
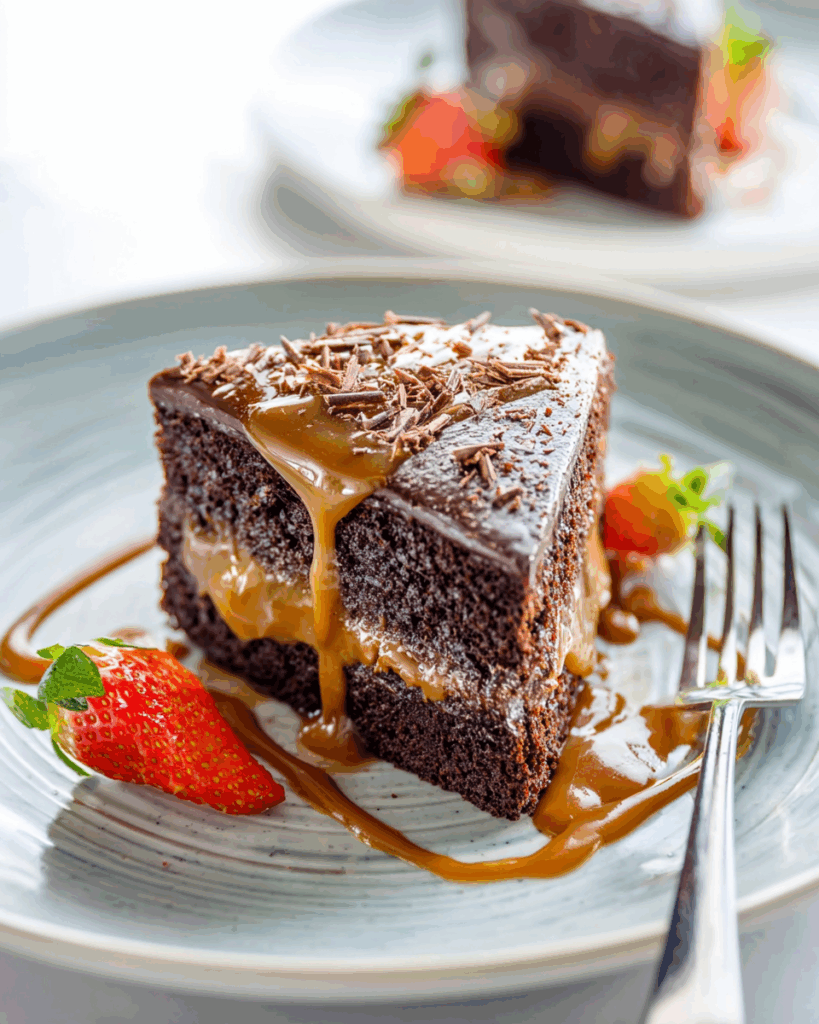
Salted caramel chocolate cake has always been more than just a dessert for us it’s a love letter to rich, gooey indulgence. At CookTune, our obsession with flavor led us on a mission to create the ultimate chocolate and caramel experience in one unforgettable slice. Our journey started in a cozy home kitchen where our founder, a lifelong dessert lover, mixed her first batch of salted caramel by accident while testing a dark chocolate frosting recipe. That “mistake” became the spark that turned into CookTune’s signature cake formula a soft, deeply chocolate base layered with thick ribbons of homemade salted caramel and wrapped in a buttery chocolate frosting that melts at first bite.
Disclosure: This post contains affiliate links.If you click and make a purchase, I may earn a small commission at no extra cost to you.


The idea behind CookTune’s “About” story is pretty simple: bake memories, not just food. We believed that a truly crave-worthy chocolate cake needed a bold edge—salted caramel gave us just that. From late-night cravings to celebration centerpieces, our salted caramel chocolate cake has stolen hearts and tastebuds across every season. This article walks you through everything from ingredients and techniques to presentation and storage tips so that you can create the perfect show-stopper cake in your own kitchen. Trust us—your guests won’t just ask for seconds. They’ll ask for the recipe too.
Don’t miss our Sokolatina Chocolate Custard Cake recipe for another decadent dessert idea that never fails to impress.
Table of Contents
Table of Contents
Salted Caramel Chocolate Cake: A Story of Sweet Beginnings
The origin of our love for this iconic cake
Before we get into bowls and mixers, let’s talk history. The salted caramel trend first took hold in the 1990s in France when pastry chefs began adding sea salt to their classic caramels. It was a game changer—suddenly, caramel wasn’t just sweet; it was complex. Then came the chocolate pairing. Deep, dark cocoa and rich buttery caramel made the perfect couple. The bitterness of chocolate elevated the sweetness of caramel, while a pinch of sea salt added balance and sophistication.
For home bakers and dessert lovers, this blend became a go-to combination. And nothing captures it better than a well-made salted caramel chocolate cake. It’s bold, beautiful, and impossible to resist.
How CookTune started and our caramel obsession
At CookTune, we live and breathe desserts. Our founder began sharing recipes online, posting small-batch sweets that leaned into bold flavor combos. When our salted caramel chocolate cake went viral on social media, it became clear this wasn’t just a one-time hit. It was a fan favorite. Over the years, we’ve refined the recipe dozens of times—each version softer, richer, and gooier than the last.
What sets our version apart is the use of both brown and white sugars in the batter, sour cream for moisture, and full-fat cocoa for deep chocolate flavor. Our caramel is buttery and sticky but never too sweet. A sprinkle of flaky sea salt finishes every layer, giving it that irresistible edge you’ll never forget.
So now that you know the backstory, let’s jump into what makes this cake so outrageously delicious, and how you can bake it perfectly every time.
Why This Salted Caramel Chocolate Cake Is Truly Special
The balance of flavors: bittersweet, salty, and sweet
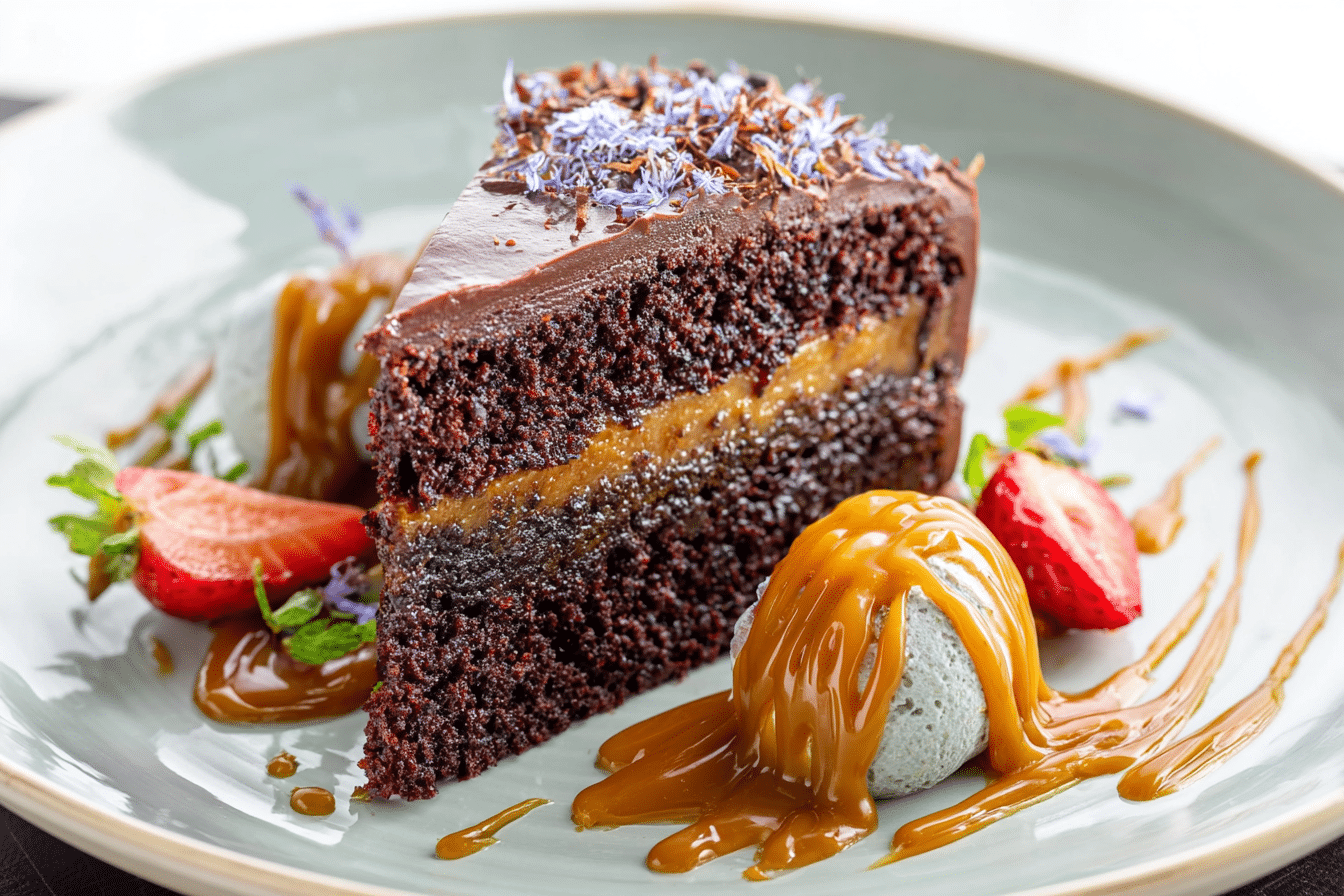
What sets a salted caramel chocolate cake apart from every other dessert is its ability to bring together flavor contrasts in a way that just makes sense. Imagine a bite that begins with deep, rich chocolate, immediately followed by a burst of silky caramel, then a subtle surprise of flaky sea salt that lingers on your tastebuds. That’s what makes this cake more than just a treat—it’s an experience.
Chocolate on its own can be intense and even bitter. Caramel can become overpoweringly sweet. But when you layer them—literally and flavorfully—and finish them with a pinch of high-quality sea salt, magic happens. Salt doesn’t just balance the sugar; it enhances it. It brings out the chocolate’s complexity and gives the caramel a luxurious depth.
In every slice of our salted caramel chocolate cake, you’ll find layers of contrast working in harmony. Each bite is rich, creamy, soft, and ever-so-slightly salty—just enough to make you reach for another forkful. That’s why this dessert doesn’t just satisfy your sweet tooth—it keeps you coming back for more.
Discover great ideas like our Salt River Bars that also play on salty-sweet flavor dynamics.
Moist texture and gooey caramel layers explained
Aside from its flavor, what makes this salted caramel chocolate cake so unforgettable is its texture. We’re talking ultra-moist cake layers that practically melt on the tongue, paired with a gooey caramel filling that slowly drips over the sides just enough to make it irresistibly messy—in the best possible way.
So how do we achieve that signature softness?
The secret’s in the ingredients. Sour cream and egg yolks make the chocolate base dense but tender. A generous amount of vegetable oil ensures that the cake stays moist for days. The cocoa blooms when hot water is added to the batter, intensifying the chocolate flavor and producing a smooth finish. This cake could stand alone—and still win awards in contrast to many dry cakes that need frosting just to be edible.
We utilize a rich, slow-cooked salted caramel sauce consisting of cream, sugar, butter, and a generous amount of sea salt for the caramel. It’s swirled between the layers, added to the frosting, and drizzled on top—so each element of the cake ties back to that rich, signature flavor.
If you’ve ever cut into a chocolate cake only to find it dry and crumbly, this is the cure. Our cake holds together perfectly while staying moist and rich from edge to edge. Add the soft chocolate frosting and layers of sticky caramel, and you’ve got a slice that’s pure indulgence from top to bottom.
Print
Salted Caramel Chocolate Cake – The Ultimate Rich and Gooey Dessert
- Prep Time: 35 minutes
- Cook Time: 35 minutes
- Total Time: 1 hour 10 minutes (plus cooling)
- Yield: 12 slices 1x
- Category: Dessert
- Method: Baking
- Cuisine: American
- Diet: Vegetarian
Description
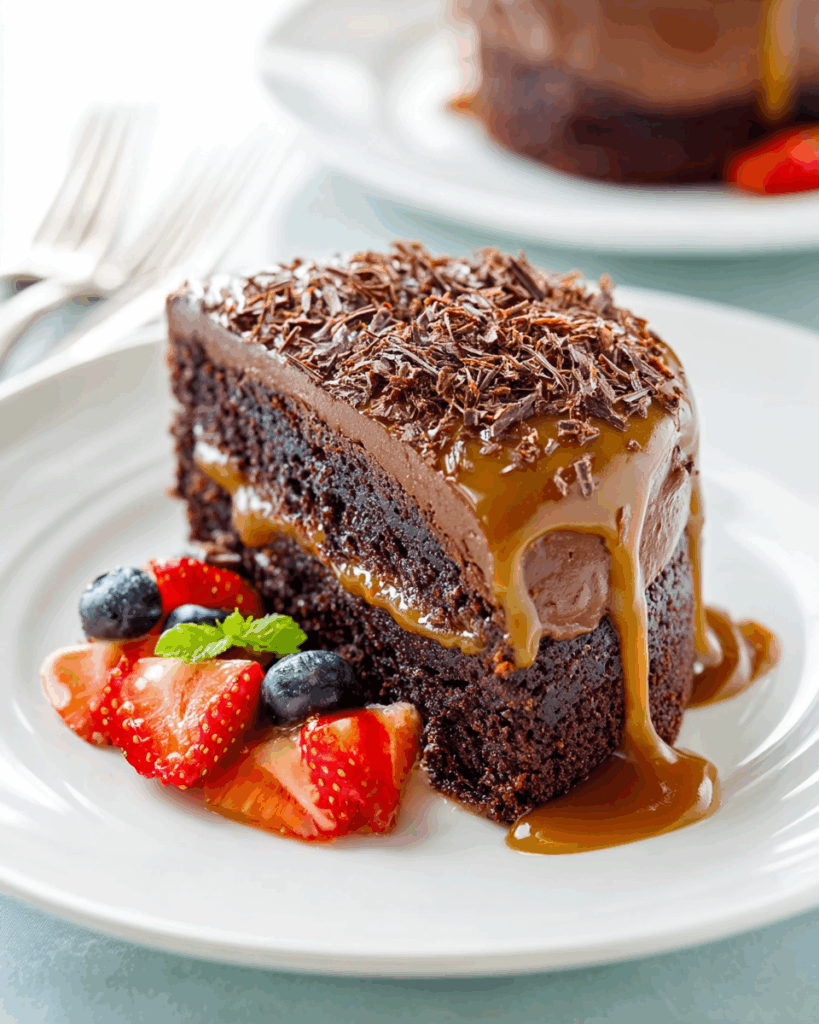
Salted Caramel Chocolate Cake is a decadent, multi-layered dessert featuring moist chocolate cake, luscious salted caramel sauce, and rich chocolate frosting. The perfect balance of sweet and salty, it’s ideal for celebrations or whenever you’re craving something unforgettable.
Ingredients
- For the Cake:
- 1 3/4 cups all-purpose flour
- 3/4 cup unsweetened cocoa powder
- 2 cups granulated sugar
- 1 1/2 teaspoons baking powder
- 1 1/2 teaspoons baking soda
- 1 teaspoon salt
- 2 large eggs
- 1 cup buttermilk
- 1/2 cup vegetable oil
- 2 teaspoons vanilla extract
- 1 cup hot water or hot coffee
- For the Salted Caramel:
- 1 cup granulated sugar
- 6 tablespoons unsalted butter, cut into cubes
- 1/2 cup heavy cream
- 1 teaspoon sea salt
- For the Frosting:
- 1 cup unsalted butter, softened
- 3 1/2 cups powdered sugar
- 3/4 cup unsweetened cocoa powder
- 1/4 cup milk
- 1 teaspoon vanilla extract
- Pinch of salt
Instructions
- Preheat oven to 350°F (175°C). Grease and flour three 8-inch round cake pans and line with parchment paper.
- In a large bowl, whisk together flour, cocoa powder, sugar, baking powder, baking soda, and salt.
- Add eggs, buttermilk, oil, and vanilla. Mix until smooth. Stir in hot water or coffee until well combined. Batter will be thin.
- Divide batter evenly between prepared pans. Bake for 30–35 minutes or until a toothpick inserted in the center comes out clean. Let cool completely.
- To make caramel: In a heavy-bottomed saucepan, heat sugar over medium heat, stirring constantly until it melts and turns amber. Add butter and stir until melted. Slowly add cream and stir until smooth. Remove from heat and stir in sea salt. Let cool completely.
- To make frosting: Beat butter until creamy. Sift in powdered sugar and cocoa powder. Add milk, vanilla, and a pinch of salt. Beat until fluffy and spreadable.
- Level cake layers if needed. Spread chocolate frosting and drizzle cooled salted caramel between each layer. Frost the outside and top with more caramel drizzle and a sprinkle of flaky sea salt.
- Chill for 20 minutes before slicing. Serve at room temperature for best flavor.
Notes
- Use room temperature ingredients for better mixing and texture.
- Caramel can be made ahead and stored in the fridge for up to a week.
- Add a layer of crushed pretzels or toffee bits for extra crunch.
Nutrition
- Serving Size: 1 slice
- Calories: 620
- Sugar: 55g
- Sodium: 320mg
- Fat: 32g
- Saturated Fat: 19g
- Unsaturated Fat: 10g
- Trans Fat: 0g
- Carbohydrates: 80g
- Fiber: 4g
- Protein: 6g
- Cholesterol: 90mg
Must-Have Ingredients for Salted Caramel Chocolate Cake
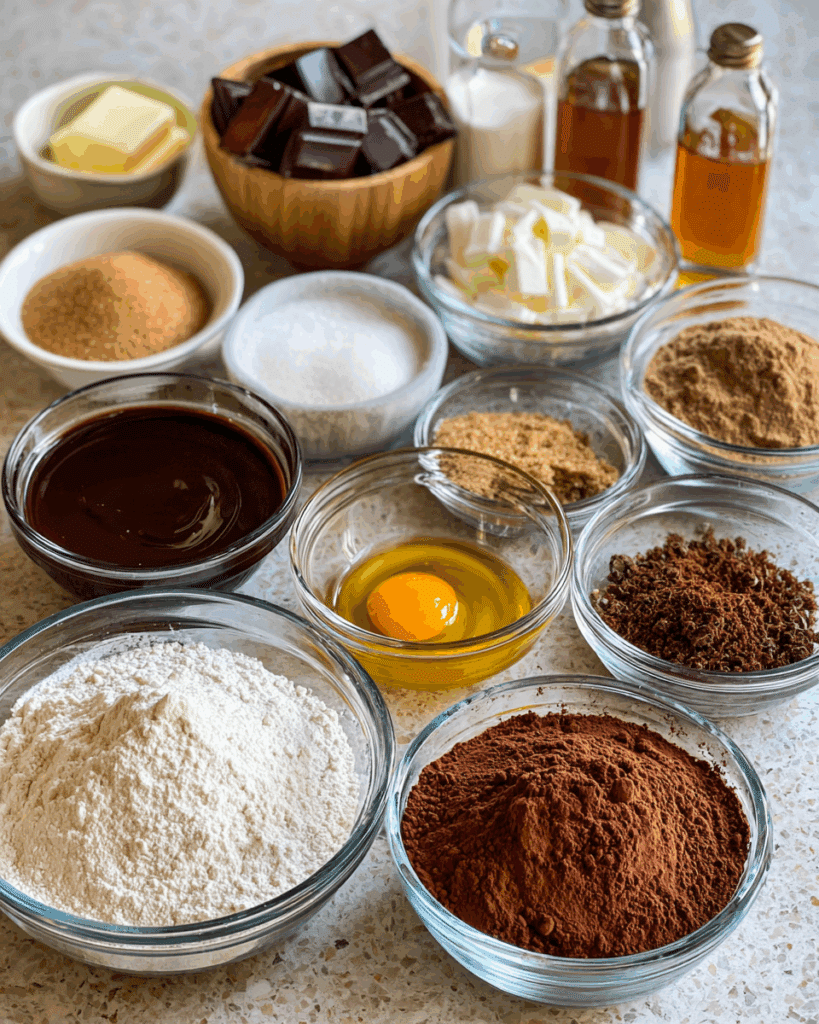
Rich chocolate cake base: Ingredients breakdown
Crafting the perfect salted caramel chocolate cake starts with choosing the right ingredients. This isn’t your average chocolate cake—this one packs in bold, indulgent flavors and a moist texture that can only come from the best baking staples.
Let’s break down what goes into the chocolate cake layers that form the backbone of this dessert:
| Ingredient | Purpose |
|---|---|
| Granulated sugar & light brown sugar | Adds sweetness and moisture. The brown sugar enhances depth and softness. |
| All-purpose flour | Provides structure to the cake. Make sure it’s not packed when measured. |
| Unsweetened cocoa powder (sifted) | The star of the show. It brings intense, bold chocolate flavor. |
| Baking soda & baking powder | Essential for rise and fluffiness. They create a light but stable crumb. |
| Salt | Enhances every flavor in the cake. |
| Eggs + egg yolks (room temp) | Provide structure and richness. Yolks especially add creaminess. |
| Full-fat sour cream | Adds incredible moisture and tang that balances the sweetness. |
| Whole milk | Keeps the batter smooth and soft. |
| Vegetable oil or melted coconut oil | Creates a tender crumb and ensures moistness for days. |
| Vanilla extract | Brings out both the chocolate and caramel flavors. |
| Hot water | Helps the cocoa “bloom,” intensifying its richness. Makes the batter thin—don’t worry, that’s the secret to softness! |
These ingredients work in perfect harmony to produce a chocolate cake base that’s soft, flavorful, and firm enough to hold up layers of caramel and frosting without falling apart.
Check out this Coconut Rum Coquito Tiramisu if you’re into rich desserts with layers and strong flavor contrasts like our salted caramel chocolate cake.
Salted caramel frosting: Essential ingredients
Now, let’s move to the crown jewel of this dessert—the salted caramel chocolate frosting. It’s smooth, glossy, just sweet enough, and infused with real caramel to tie it all together. It’s also what turns this from a standard chocolate cake into a salted caramel chocolate cake masterpiece.
Here’s what you need:
| Frosting Ingredient | Why It Matters |
|---|---|
| Unsalted butter (very soft) | Provides the rich, creamy base. Soft butter whips better and holds air. |
| Confectioners’ sugar (sifted) | Sweetens and thickens the frosting. Sifting prevents clumps. |
| Unsweetened cocoa powder (sifted) | Adds chocolatey richness to the buttercream. |
| Heavy cream | Smooths the texture. Also helps with spreading consistency. |
| Salted caramel sauce | The signature flavor. Use thick, buttery caramel—homemade if possible. |
| Vanilla extract | Rounds out the sweetness and chocolate flavor. |
| Pinch of salt | Reinforces the salted caramel theme and enhances the chocolate. |
Tip: The key to achieving that luscious, spreadable consistency is to whip the butter until pale and fluffy before adding any dry ingredients. This step sets the stage for a frosting that’s both rich and airy. Then, once the caramel is folded in, you get that signature salty-sweet twist.
This frosting is a triple threat: it’s used to fill the cake, coat the outside, and blend seamlessly with the caramel drizzle topping. No dry bites. No flavorless frosting. Just pure salted caramel chocolate bliss.
Step-by-Step Instructions to Make the Cake Perfectly
Creating the perfect salted caramel chocolate cake isn’t hard when you break it down into steps. Each part of the process, from prepping your pans to baking with confidence, helps ensure your cake comes out moist, rich, and bakery-worthy. Follow these steps exactly, and you’ll be amazed at what you can pull out of your own oven.
Preparing your cake pans the right way
This step might sound basic, but it’s essential. One of the biggest reasons cakes stick, tear, or crack is improper pan prep.
Here’s how to do it right:
- Preheat your oven to 350°F (177°C). Don’t skip this—your batter needs even heat from the start.
- Cut parchment paper into circles that match the bottom of your three 9-inch round cake pans.
- Spray your pans generously with nonstick baking spray—cover the sides and the bottom.
- Place the parchment circle inside each pan and spray again over the paper.
- Set aside on a cool counter while you prep the batter.
Why double spray? It forms a protective barrier that ensures every inch of your cake releases cleanly after baking. Trust us, a well-released cake is a stress-free cake.
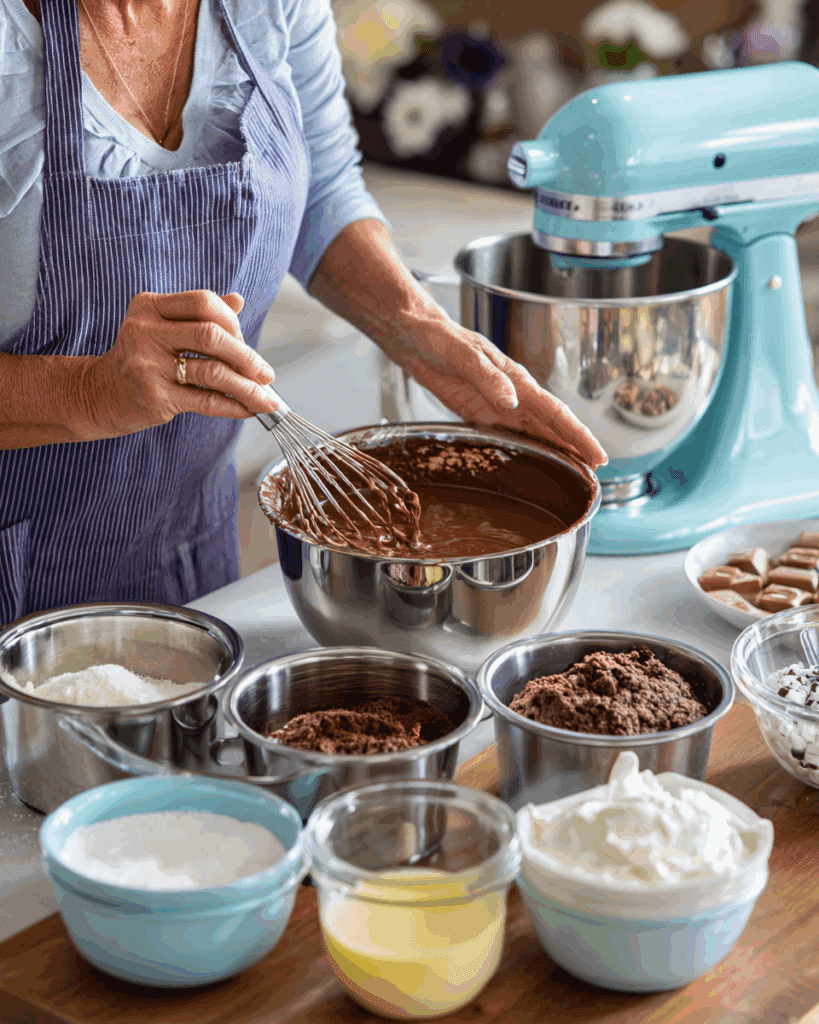
Mixing, baking, and cooling tips for success
This is where the real magic happens. Don’t be intimidated by the number of ingredients—once they’re prepped, everything comes together quickly.
Mix the dry ingredients:
In your stand mixer bowl or a large mixing bowl, combine:
- 2 cups granulated sugar
- 1 cup packed light brown sugar
- 2¾ cups all-purpose flour
- 1½ cups unsweetened cocoa powder (sifted)
- 3 tsp baking soda
- 1½ tsp baking powder
- 1¼ tsp salt
Use low speed and mix until the dry blend is even. If needed, break up clumps with your hands.
Mix the wet ingredients:
In a separate bowl, whisk together:
- 3 large eggs + 2 yolks
- 1½ cups full-fat sour cream
- ⅓ cup whole milk
- ¾ cup vegetable oil (or melted coconut oil)
- 2 tbsp vanilla extract
Whisk until completely smooth.
Combine everything:
- Pour the wet mix into the dry mix bowl.
- Beat on low until the batter comes together—don’t overmix.
- Slowly add 1½ cups hot water, continuing to mix on low until the batter thins out. This part is important: the batter will seem very runny. That’s exactly what you want.
Divide and bake:
- Pour the batter evenly into your three prepared cake pans.
- Bake for 30 minutes or until a toothpick inserted in the center comes out clean or with just a few moist crumbs.
- Let the cakes cool in their pans for 10 minutes, then gently turn them out onto wire racks to cool completely before frosting.
Pro Tip: Don’t try to frost a warm cake. Even slightly warm layers can cause the frosting to slide, melt, or become grainy.
Don’t miss our Cold Chocolate Fudge Cake recipe if you’re craving another smooth, chocolate-forward bake with a silky finish.
How to Whip Up the Salted Caramel Chocolate Frosting
A salted caramel chocolate cake’s frosting is more than just the last touch; it’s the binding agent that combines taste, texture, and beauty into a single, mouthwatering mouthful. This isn’t your standard chocolate buttercream. It’s deeper, creamier, silkier, and infused with rich salted caramel sauce that takes it to an entirely new level.
If you want a cake that looks bakery-worthy and tastes even better, your frosting needs to be flawless. Here’s how to whip up the dreamiest salted caramel chocolate frosting you’ll ever spread.
Beating butter to silky perfection
The foundation of every great frosting starts with butter—lots of it. And not just any butter: unsalted, high-fat butter at room temperature is essential. Why unsalted? Because we control the salt later when we add the caramel.
Here’s what you’ll need to start:
- 2 cups (4 sticks) unsalted butter, softened
- 4½ cups confectioners’ sugar, sifted
- ¾ cup unsweetened cocoa powder, sifted
Step-by-step:
- In the bowl of a stand mixer fitted with a paddle, beat the butter on medium speed for 3 minutes. It should look pale and fluffy.
- Turn the mixer off and sift in the powdered sugar and cocoa powder.
- Start the mixer again on low (to avoid a sugar cloud) and mix for 2 minutes until fully absorbed.
At this point, your base will be thick and slightly grainy—but don’t worry, that’s about to change.
When and how to add caramel for best flavor
Now comes the flavor upgrade that sets this apart from every other frosting: the salted caramel. You’re going to be folding this rich sauce directly into the whipped buttercream, creating a fusion that’s smooth, sweet, salty, and slightly sticky—in the best way.
Here’s what you’ll add next:
- 1 tsp vanilla extract
- ½ tsp salt
- 3 tbsp heavy cream (add more if needed)
- 2 tbsp thick salted caramel sauce
Blend it right:
- Add all four ingredients to your frosting base.
- Mix on medium-high speed for 3 minutes until the texture becomes velvety and spreadable.
Don’t rush this part—the longer you whip, the more volume and silkiness you’ll achieve.
If the frosting feels too thick, add one more tablespoon of heavy cream at a time until it reaches a fluffy consistency. If it’s too soft, sift in a bit more confectioners’ sugar. The result should hold peaks on a spatula but spread like a dream.
This salted caramel chocolate frosting isn’t just a topping—it’s a flavor-packed statement. It’s the rich, chocolatey ribbon that holds together every layer of this show-stopping cake.
Best of all? It doesn’t just taste good it pipes beautifully, spreads evenly, and can be refrigerated for up to a week.
Assembling the Salted Caramel Chocolate Cake Like a Pro
Now that you’ve baked the layers and whipped up the luscious frosting, it’s time to bring your masterpiece together. This part is where your salted caramel chocolate cake transforms from a set of ingredients into a jaw-dropping, slice-worthy centerpiece.
Let’s walk through the process of assembling your cake step-by-step, ensuring every layer is even, every bite is balanced, and your final creation looks like it came straight from a bakery window.
Leveling layers and creating the gooey center
If your cakes have domed during baking, don’t panic—it’s normal. To create a flat, stable cake, you’ll want to trim the tops with a serrated knife. This step is crucial. Uneven layers can cause the cake to shift, crack, or lean, especially once the heavy caramel and frosting come into play.
Here’s how to get started:
- Place your first cooled cake layer on a large serving plate or cake stand.
- Use a serrated knife to carefully level the top. Go slowly—this isn’t a race.
- Once even, spread a thin layer of salted caramel chocolate frosting across the surface.
- Add ½ cup of thick salted caramel sauce directly over the frosting and gently swirl it with a spatula to create a ripple effect.
Repeat the process with your second layer:
- Level, frost, drizzle caramel, and swirl again.
This center layer is where the magic happens. The frosting keeps it rich, the caramel adds that gooey surprise, and the salt enhances every flavor.
When you place the third cake layer on top, press gently to seal it in place but don’t squish—let the layers settle naturally.
Chilling, stacking, and final garnishing secrets
Before you jump into frosting the whole cake, here’s a professional secret: chill it.
Pop the assembled cake (without outside frosting) into the fridge for 1 hour. Why? Because a chilled cake is easier to frost cleanly. It firms up the layers and prevents caramel from oozing out the sides.
Once chilled, begin frosting the top and sides with your remaining salted caramel chocolate frosting. Use an offset spatula to create swoops and swirls—don’t worry about perfection. This cake is meant to look rustic and rich.
Now it’s time to garnish your salted caramel chocolate cake with confidence:
- Drizzle the remaining salted caramel sauce over the top, letting it drip slightly down the sides.
- Sprinkle a generous pinch of flaky sea salt over the caramel to give it that signature sparkle.
- Optional: Top with chocolate shavings or chunks for texture and drama.
This moment when your cake is fully dressed in ribbons of chocolate and caramel—is when the beauty of a salted caramel chocolate cake really shines. It’s rich, bold, and practically demands a fork.
For the most mouthwatering experience, serve it at room temperature. Your guests won’t stop at one slice—and neither will you.
Storing, Freezing & Reheating the Perfect Way
You’ve baked it, frosted it, layered it with gooey salted caramel, and served it with pride. Now let’s talk about how to store your salted caramel chocolate cake properly—because if you’ve gone through all that effort, the last thing you want is for it to dry out, melt, or lose that rich, indulgent flavor.
Whether you’re keeping it for the next day or freezing it for a future celebration, the good news is that salted caramel chocolate cake is incredibly freezer-friendly and stores beautifully—if done right.
Refrigeration and freshness tips
Your freshly made salted caramel chocolate cake can be stored in the refrigerator for up to 5 days without losing its moisture or flavor. In fact, some people say the flavors get even better the next day as the caramel seeps deeper into the cake layers.
To refrigerate your cake like a pro:
- Chill uncovered for 20–30 minutes: This allows the frosting and caramel to firm up so they don’t smear.
- Wrap it well: Once slightly set, wrap the entire cake in plastic wrap or place it inside a cake carrier.
- Keep away from strong odors: Like any butter-based dessert, your salted caramel chocolate cake can absorb odors from garlic, onions, or leftovers in your fridge. Store it on the top shelf and away from open containers.
If you’ve sliced the cake, press parchment paper against the exposed edges before wrapping. This keeps the inside layers just as moist as the first day you cut it.
Pro Tip: Bring your salted caramel chocolate cake back to room temperature before serving. Cold cake will dull the flavor and firm up the frosting too much. Let it sit out for at least 30 minutes to regain its luscious, creamy texture.
How to freeze without ruining texture
Need to prep ahead for a holiday or birthday bash? Good news—salted caramel chocolate cake freezes like a dream. You can freeze the whole cake or individual slices without compromising its moisture or flavor.
Here’s how to do both:
To freeze the whole cake:
- Chill the fully frosted cake in the fridge for 1 hour to let it set.
- Wrap it tightly in two layers of plastic wrap and one layer of aluminum foil.
- Freeze for up to 2 months.
To freeze individual slices:
- Place slices on a parchment-lined baking sheet and freeze until firm (about 30 minutes).
- Wrap each slice in plastic wrap and foil or place in airtight freezer bags.
This method makes it easy to defrost one serving at a time—perfect for midnight cake cravings.
How to thaw:
- Move the salted caramel chocolate cake from the freezer to the refrigerator 24 hours before serving.
- Let it come to room temp on the counter for 30–45 minutes before slicing.
When properly frozen and thawed, your salted caramel chocolate cake will taste just as decadent as the day you made it. The caramel stays gooey, the frosting remains smooth, and the chocolate layers are just as rich.
Conclusion: The Only Cake That Wins Every Time
Let’s face it—salted caramel chocolate cake isn’t just another dessert. It’s the dessert. It’s the kind of cake you make for birthdays, anniversaries, potlucks, and rainy days when you need something comforting and over-the-top delicious. From its moist, chocolatey crumb to its silky salted caramel swirls and bold frosting, this cake checks every box for flavor, texture, and visual appeal.
What makes the salted caramel chocolate cake truly unforgettable is how it transforms simple pantry staples into a masterpiece. It’s the result of careful layering, smart flavor balancing, and a little culinary magic. Whether you’re serving it chilled with coffee or plated elegantly at a holiday dinner, every bite delivers richness, depth, and a lingering salty-sweet finish that keeps you coming back.
Even better? It stores well, freezes beautifully, and gets even more flavorful the next day. That’s rare—even among premium desserts.
So now, you’ve got everything: the recipe, the method, the garnishing tips, storage secrets, and even what not to do. All that’s left is to turn your kitchen into a cake-lover’s paradise.
And if you’re in the mood to explore more sweet and decadent layers, don’t miss How to make easy Salted Caramel Sauce?
Frequently Asked Questions About Salted Caramel Chocolate Cake
What makes salted caramel chocolate cake unique?
The salted caramel chocolate cake stands out because of its flawless flavor balance. It brings together the richness of dark chocolate with the sweet, buttery essence of caramel—and then elevates both with a subtle kiss of sea salt. This isn’t just any chocolate cake. A real salted caramel chocolate cake hits every note: bittersweet, savory, creamy, and gooey all at once. It’s the kind of dessert that doesn’t just satisfy you remember it. That rich frosting, the moist crumb, the golden caramel swirl… no wonder it’s become a modern baking classic.
Can I make this cake ahead of time?
Absolutely. In fact, salted caramel chocolate cake often tastes even better the next day. Making it ahead allows the flavors to deepen and the caramel to sink into the layers. You can bake the cake layers a day in advance, wrap them tightly in plastic wrap, and store them at room temperature or in the fridge. You can also make the frosting ahead of time and refrigerate it in an airtight container. Just give it a quick whip before assembling. Once frosted and assembled, your salted caramel chocolate cake will stay fresh in the fridge for up to 5 days.
What kind of salt should I use for salted caramel?
Not all salt is created equal especially in a salted caramel chocolate cake. You’ll want to use a high-quality flaky sea salt like Maldon or Fleur de Sel. This type of salt enhances the caramel without overpowering it, offering little pops of saltiness that melt delicately on the tongue. Avoid iodized table salt, which can taste harsh and doesn’t provide the same texture or finesse. Flaky salt not only elevates flavor but also adds a beautiful visual contrast when sprinkled on top of your salted caramel chocolate cake.
Is there a way to make this cake less sweet?
Yes! While salted caramel chocolate cake is inherently rich, you can tweak it to reduce sweetness. Here’s how:
Use dark cocoa powder for a more bitter edge.
Reduce the sugar slightly in the cake batter—by ¼ cup at most.
Use bittersweet or dark chocolate chunks in the frosting for depth.
Increase the amount of salt in the caramel by a pinch to balance the sugar.
These small adjustments can make a big difference without sacrificing the soul of the salted caramel chocolate cake.
Can I freeze leftover salted caramel chocolate cake?
Definitely. One of the many perks of a salted caramel chocolate cake is that it freezes beautifully. Wrap individual slices in plastic wrap and foil, or freeze the whole cake after chilling it thoroughly. When you’re ready to enjoy it again, just thaw overnight in the fridge and bring it to room temperature before serving. The texture stays soft, the caramel remains gooey, and the flavor is just as bold. You’ll be amazed how this cake holds up—slice after slice, even from the freezer.
What’s the best way to slice this rich cake?
To cut a salted caramel chocolate cake cleanly, use a sharp serrated knife dipped in hot water. Wipe the blade between each cut to avoid smearing caramel and frosting. Since this cake is super moist and layered with sticky salted caramel, a little extra care will ensure every slice looks as good as it tastes. For ultra-clean presentation, chill the cake for 30 minutes before slicing—just enough to firm it up, without muting the flavor.