
Salt River Bars itmakes people instantly obsessed. From the first buttery bite to the creamy chocolate finish with a kiss of sea salt, these bars are more than just dessert—they’re a ritual. Salt River Bars offer a rich, layered experience with textures and flavors that keep you reaching for just one more square. And here’s the thing they’re shockingly easy to make at home, no baking degree required.
Disclosure: This post contains affiliate links.If you click and make a purchase, I may earn a small commission at no extra cost to you.


Our story? It all began in a cozy kitchen in the heart of Arizona. A craving for something salty, sweet, crunchy, and chewy all at once led to endless recipe trials—until we stumbled on the golden formula now beloved by readers all over. It’s the same formula that sparked the birth of CookTune. That’s right, Salt River Bars are more than a recipe—they’re our origin story.
Looking for inspiration? Try our no bake cookie butter cheesecake for another creamy crowd-pleaser.
Table of Contents
Table of Contents
What Are Salt River Bars and Why They’re Trending
Salt River Bars: The Perfect Fusion of Sweet and Salty
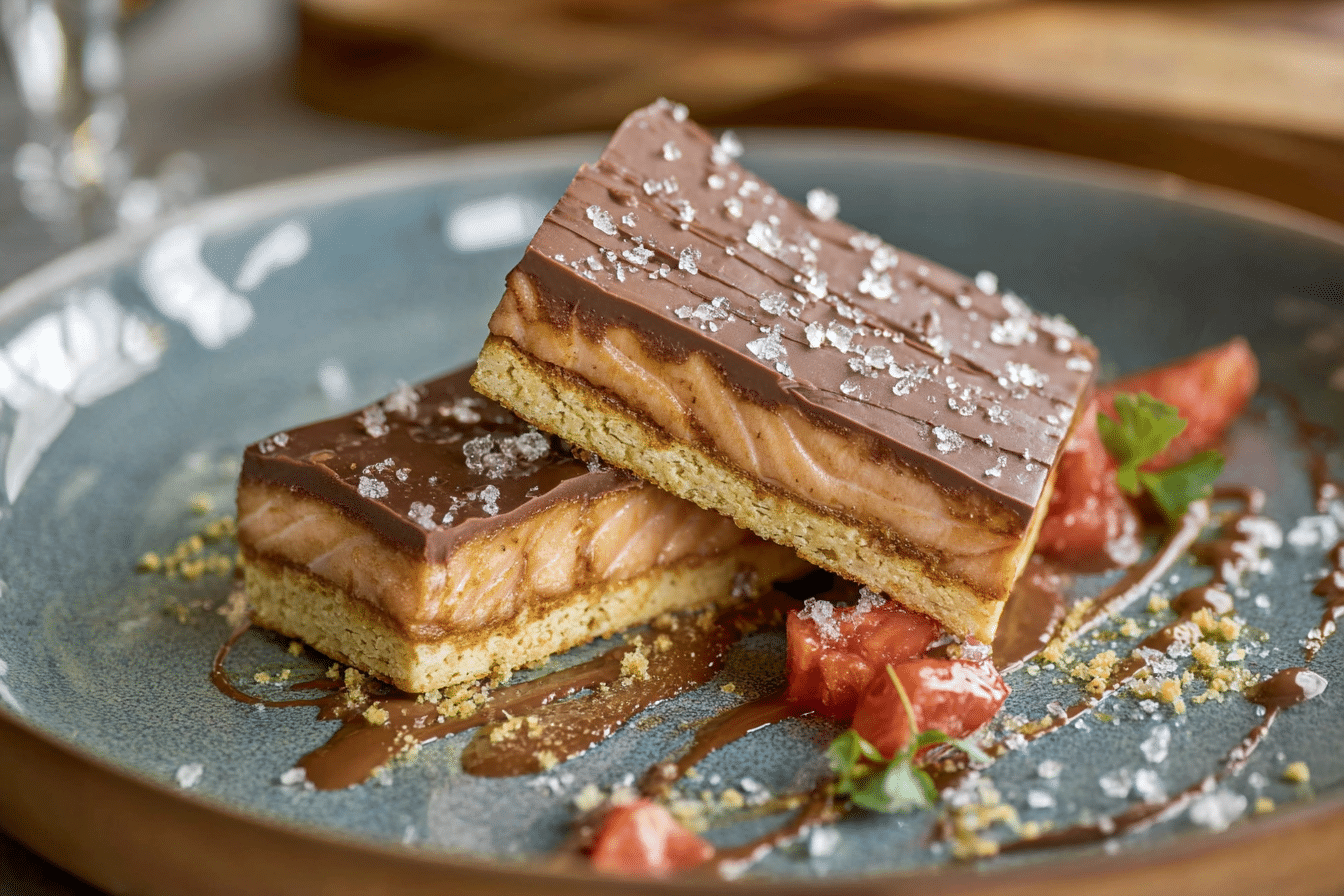
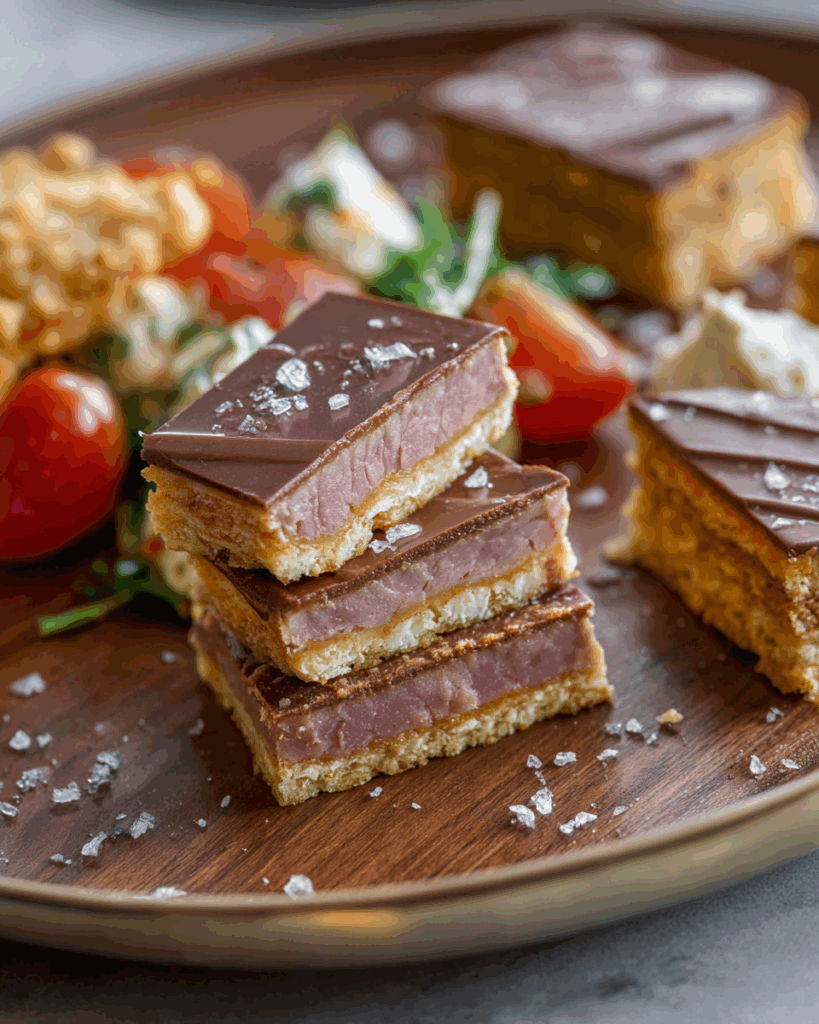
At first glance, Salt River Bars might look like your average layered dessert. But one bite reveals the genius. These bars combine crisp Club crackers with luscious layers of brown sugar caramel, a decadent chocolate-peanut butter topping, and a final touch of flaky sea salt. The magic lies in the contrast—sweet and salty, chewy and crunchy, rich and light—all at once.
This powerful fusion of textures and flavors is what’s driving their viral success. Food bloggers, dessert lovers, and Pinterest fans can’t stop posting about Salt River Bars. They’re the kind of treat you make once and find yourself whipping up again next weekend because “they disappeared too fast.”
Unlike complicated pastries or precision-based cakes, these bars are gloriously forgiving. Don’t worry if your caramel bubbles unevenly or your chocolate layer isn’t perfectly smooth—they’ll still taste like heaven.
Discover great ideas like peanut butter cracker toffee, another sweet-salty gem!
The Origin and Popularity Behind the Name
What is the origin of the name “Salt River Bars”? No, there’s no river involved—at least not one that floods your kitchen. The title is believed to have been inspired by the Salt River in Arizona, where this sensational treat first gained popularity at a small café known for experimental sweets. Much like the river itself, the bars represent a flow of flavors: calm, bold, refreshing, and deeply satisfying.
Many believe the term “Salt River” adds an air of mystery and charm to an otherwise straightforward recipe. It’s rustic. It’s regional. It makes you curious—and that curiosity turns into addiction after the first bite.
You’ll find versions of Salt River Bars in bakeries, food trucks, and even upscale dessert menus. But nothing compares to homemade. That’s where the real magic happens.
Print
Salt River Bars Simple Yet Stunning Dessert for Every Occasion
- Prep Time: 20 minutes
- Cook Time: 10 minutes
- Total Time: 30 minutes (plus chilling)
- Yield: 30 bars 1x
- Category: Dessert
- Method: No‑Bake (stovetop + assemble)
- Cuisine: American
- Diet: Vegetarian
Description
Sweet, salty, chewy, crunchy bars made with layers of Club crackers, rich caramel, and topped with a chocolate–butterscotch–peanut butter blend sprinkled with sea salt.
Ingredients
- 90 Club crackers
- 1 cup salted butter
- 2 cups light brown sugar, packed
- 1 cup graham cracker crumbs
- 3/4 cup heavy cream
- 1 1/2 cups milk chocolate chips
- 1/2 cup butterscotch chips
- 1/2 cup creamy peanut butter
- Maldon sea salt, for sprinkling
Instructions
- Line a 9×13″ pan with parchment (long edges overhanging) and spray with non-stick spray. ()
- Arrange first layer: cover bottom with 5×6 grid of Club crackers, cutting to fit if needed. ()
- In a heavy-bottomed pan over medium, melt butter, brown sugar, graham crumbs, and heavy cream together, stirring constantly. Bring to a boil and boil for 7 minutes. :contentReference[oaicite:0]{index=0}
- Pour half the caramel over the cracker layer, spreading evenly. Quickly add second layer of crackers. ()
- Pour remaining caramel over the second layer, then top with a final layer of crackers. ()
- Chill the pan to set the caramel while preparing topping. ()
- Microwave chocolate chips, butterscotch chips, and peanut butter in 30–45 s bursts, stirring until smooth. :contentReference[oaicite:1]{index=1}
- Pour topping over crackers and spread evenly. Sprinkle with Maldon sea salt. :contentReference[oaicite:2]{index=2}
- Chill 1–2 hours until firm, then lift out using parchment and cut into bars. :contentReference[oaicite:3]{index=3}
Notes
- Line pan with parchment and spray to help lift bars cleanly. :contentReference[oaicite:4]{index=4}
- Chill fully before cutting to ensure clean slices. :contentReference[oaicite:5]{index=5}
- Use Maldon or coarse sea salt for best flavor contrast. :contentReference[oaicite:6]{index=6}
- Sweet, salty, chewy, creamy, crunchy perfection—much loved by tasters. :contentReference[oaicite:7]{index=7}
Nutrition
- Serving Size: 1 bar
- Calories: 269 kcal
- Sugar: 20 g
- Sodium: 192 mg
- Fat: 16 g
- Saturated Fat: 8.3 g
- Unsaturated Fat: 6.8 g
- Trans Fat: 0.3 g
- Carbohydrates: 29 g
- Fiber: 0.8 g
- Protein: 2.7 g
- Cholesterol: 25 mg
Salt River Bars Ingredients Breakdown and Flavor Profile
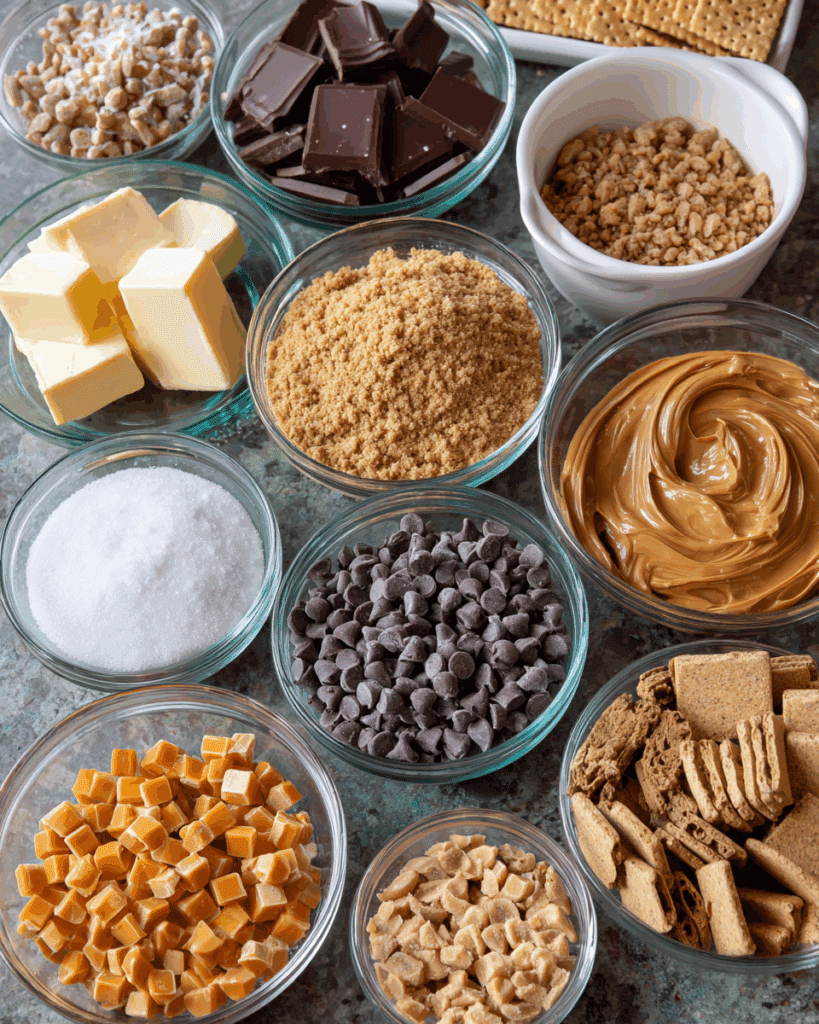
Key Ingredients You Need for the Classic Recipe
What makes Salt River Bars so outrageously good? It’s the flawless layering of ingredients that balance each other in both texture and taste. Let’s break it down:
| Ingredient | Purpose in the Recipe |
|---|---|
| Club Crackers | Adds a salty crunch and forms the structure of the bars |
| Salted Butter (1 cup) | Rich base for the caramel; enhances flavor depth |
| Light Brown Sugar (2 cups) | Gives the caramel its sweetness and deep molasses notes |
| Graham Cracker Crumbs (1 cup) | Adds body and a toasty crunch to the caramel layer |
| Heavy Cream (¾ cup) | Makes the caramel luscious and creamy |
| Milk Chocolate Chips (1½ cups) | Forms the velvety top layer for a classic dessert feel |
| Butterscotch Chips (½ cup) | Adds richness and depth to the chocolate layer |
| Creamy Peanut Butter (½ cup) | Balances the sweetness with nutty creaminess |
| Maldon Sea Salt (for topping) | Adds texture and sharpens flavor contrast |
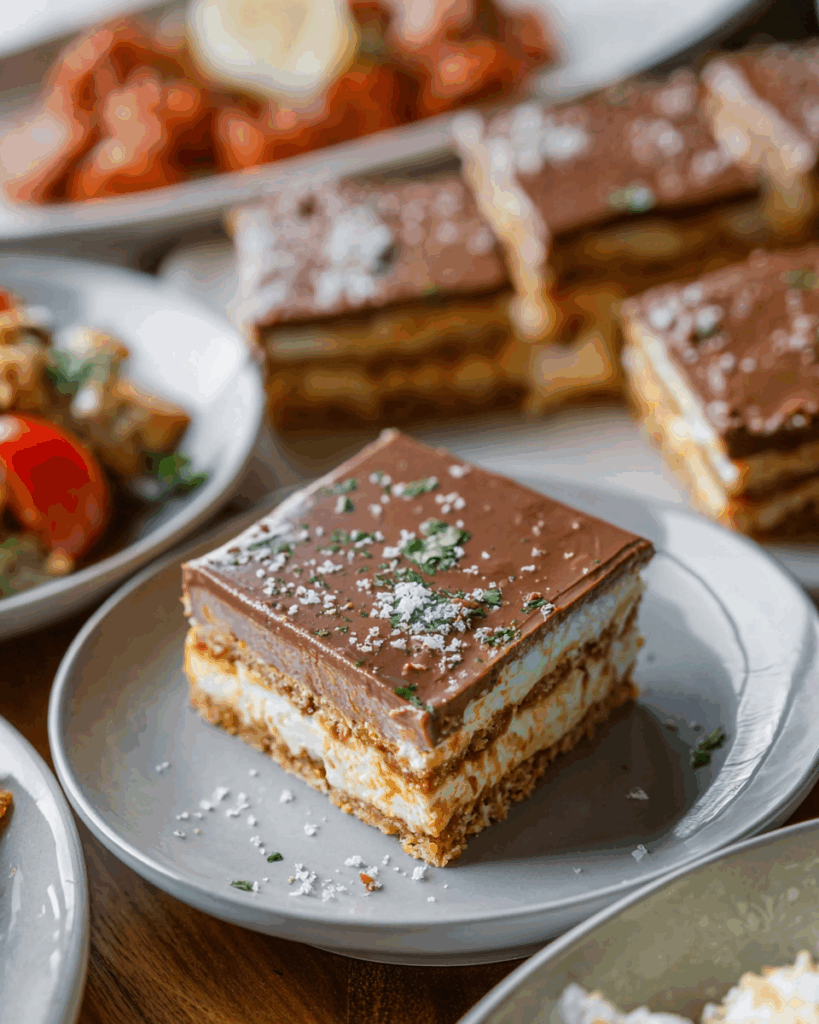
The three core layers—crackers, caramel, and chocolate-peanut butter—build a taste experience that’s complex yet approachable. No strange ingredients, no hard-to-find extras. Just pantry staples with maximum impact.
Don’t miss our rice krispy treat no bake cheesecake if you love simple ingredients that wow.
Why Each Layer Matters: Crackers, Caramel, Chocolate & Salt
Every layer in Salt River Bars plays a role, and skipping or rushing any step is like removing a guitar string from a perfect tune—it just won’t hit right.
- Crackers form the backbone. They’re neutral, flaky, and provide the structure that holds the soft caramel in place. Plus, their saltiness creates the perfect contrast.
- Caramel layer is the heart. Made from butter, sugar, graham crumbs, and cream, it’s thick, chewy, and beautifully rich. You boil it for 7 minutes—no more, no less—to hit the perfect stage.
- Chocolate & butterscotch-peanut butter topping is where the magic meets comfort. Melted and poured on top, it finishes the bars with a silky texture and deep flavor.
- Sea salt sprinkle sharpens everything. It pulls out notes you didn’t know were there and adds that final satisfying crunch.
Want to swap ingredients? Go for it. Try almond butter instead of peanut, or switch in dark chocolate chips for a more grown-up bite. But don’t remove the salt—it’s what separates these bars from any other dessert square.
Step-by-Step Guide to Making Salt River Bars
Preparing Your Pan and Layering Like a Pro
Before you melt a single chip, prep is everything. Salt River Bars rely on clean layers and solid chilling. Here’s how to set yourself up for delicious success:
- Grab a 9×13-inch pan. If you’ve got one with straight sides, even better. Straight sides help the layers stack evenly.
- Line it with parchment paper. Leave extra hanging off the long sides to create handles. This makes lifting and slicing the bars later so much easier.
- Spray everything. Lightly mist both the parchment and the exposed sides of the pan with non-stick spray to avoid any sticky mishaps.
- Layer #1: Crackers. Arrange 5 rows of 6 Club crackers (or as many as it takes to snugly fill your pan). Trim the ends to fit if needed.
Pro Tip: For best results, use fresh crackers. Slightly stale ones won’t hold their crunch once the caramel hits.
Now that your base is locked and loaded, you’re ready for the caramel…
Cooking the Caramel and Crafting the Chocolate Topping
Here’s where the signature Salt River Bars flavor really comes alive. The caramel is bold, buttery, and totally addicting. Follow these steps exactly for that gooey perfection:
1. Make the Caramel Layer
In a heavy-bottomed pan over medium heat, combine:
- 1 cup salted butter
- 2 cups light brown sugar (packed)
- 1 cup graham cracker crumbs
- ¾ cup heavy cream
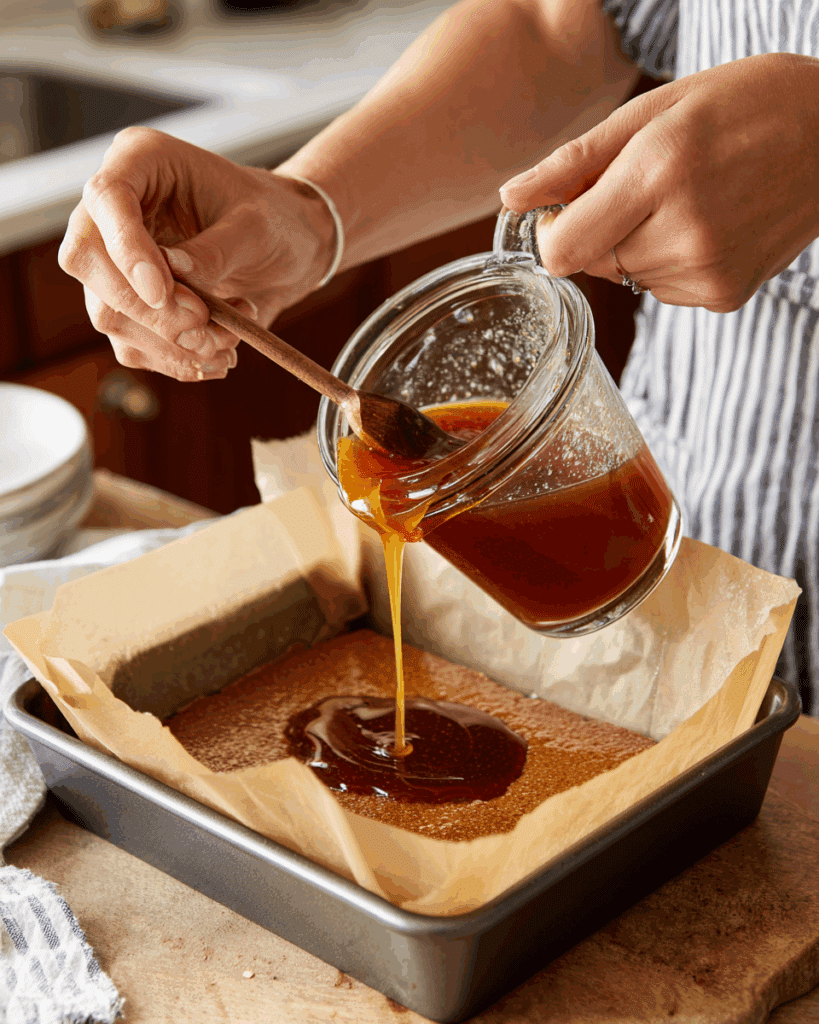
Stir constantly until it melts down into a golden, bubbling mix. Once boiling, keep it going for 7 full minutes—no shortcuts. Stir the entire time to avoid burning and ensure that luscious smooth finish.
Assembly Steps:
- Pour half the caramel over your cracker base. Smooth it to the edges with an offset spatula.
- Quickly add a second cracker layer over the hot caramel.
- Pour the rest of the caramel on top, spread again, and follow with a third and final cracker layer.
Let the pan cool in the fridge while you prepare the topping.
2. Create the Chocolate-Peanut Butter Topping
In a microwave-safe bowl, combine:
- 1½ cups milk chocolate chips
- ½ cup butterscotch chips
- ½ cup creamy peanut butter
Microwave in 15-second bursts, stirring between each round until smooth and pourable.
Pour the topping evenly over the final cracker layer, smoothing to every edge. Sprinkle a generous pinch (about 1 tsp) of Maldon sea salt over the surface. It’s not just for looks—it’s flavor magic.
Refrigerate the whole pan for 1–2 hours before slicing into beautiful, crave-worthy squares.
Expert Tips for Perfecting Your Salt River Bars
Common Mistakes to Avoid During Assembly
Even though Salt River Bars are relatively simple to make, a few missteps can turn your dream dessert into a sticky, uneven mess. Here are the top mistakes people make—and how to avoid them.
1. Skipping the Parchment Paper
We’ve all been there—too eager to start and thinking a greased pan is “good enough.” It’s not. Without parchment, your beautiful bars may fuse to the pan like concrete. Always line and spray your pan.
2. Not Boiling the Caramel Long Enough
Timing is everything. Seven minutes at a steady boil gives the caramel the body it needs. Under-boil it, and it’ll be runny. Overdo it, and you’ll end up with something closer to hard toffee.
3. Rushing the Layers
Salt River Bars aren’t just a flavor experience—they’re visual. Stack your crackers carefully, smooth your caramel evenly, and take your time. It pays off when you slice into those perfectly defined layers.
4. Skipping the Chill Time
No matter how tempting it is to dive in early, chill time isn’t optional. If you don’t refrigerate for at least 1–2 hours, your bars will fall apart when cut. Worse, the chocolate topping won’t set.
5. Using Thin Chocolate or Peanut Butter Substitutes
Cheap chocolate chips or natural peanut butter with too much oil can cause your top layer to stay runny or separate. Stick with quality ingredients for best results.
Cooling, Cutting & Presentation Hacks
Let’s talk finishing moves—because Salt River Bars are as much about presentation as they are about taste.
The Cool-Down Strategy
After assembling all the layers, pop your tray in the fridge, not the freezer. Why? Freezers set the topping too fast and can crack the chocolate when you slice it. A steady, chilled environment lets every layer firm up evenly.
Slicing Without the Mess
Use the parchment handles to lift the bars out of the pan and place on a cutting board. Then:
- Run a long, sharp knife under hot water, dry it, and slice.
- Clean the knife between each cut for those flawless edges.
Pro Tip: For party platters, slice into bite-sized 1×1-inch squares—they’re easier to grab and look super polished.
Serve It Right
Salt River Bars are best served slightly chilled or at cool room temp. They hold shape beautifully and don’t need any plating fuss—just layer them on a white tray or rustic wooden board for a visually irresistible setup.
Creative Variations of Salt River Bars You’ll Love
Peanut Butter Crunch, Nut-Free & Gluten-Free Options
Once you’ve mastered the original Salt River Bars, it’s hard not to start experimenting. Whether you’ve got dietary needs or just want to surprise your taste buds, there are endless ways to remix the classic.
Peanut Butter Crunch Explosion
If you’re a die-hard peanut butter lover, level up your top layer:
- Replace milk chocolate chips with peanut butter chips
- Add a crushed peanut brittle layer between the caramel and chocolate
- Sprinkle with roasted, salted peanuts before chilling
The result? A crunchy, salty, peanut-forward version that hits every craving at once.
Nut-Free Swap
Allergy-sensitive households can still enjoy Salt River Bars with a few simple swaps:
- Use SunButter or Wowbutter in place of peanut butter
- Stick to semi-sweet or dark chocolate chips to cut down sugar and bring out more cocoa flavor
- Skip nut toppings and consider a light dusting of crushed pretzels for texture
You’ll still get that layered richness—minus the allergens.
Gluten-Free Version
Yes, you can go gluten-free without losing the signature Salt River experience:
- Replace Club crackers with gluten-free table crackers or crisp rice crackers
- Make sure graham cracker crumbs are certified gluten-free
- Double-check that your chocolate chips and butterscotch chips are gluten-free brands (most are, but always verify)
These gluten-free bars tend to be even crunchier—great for folks who love texture in every bite.
Seasonal Twists: Peppermint, Pumpkin Spice & More
Salt River Bars aren’t just a treat—they’re a canvas. With a little creativity, you can make versions that fit any season or occasion. Here are a few festive remixes to try:
Holiday Peppermint Bark Bars
Perfect for December cookie swaps or winter gifts.
- Use white chocolate chips and dark chocolate in the topping
- Mix in a few drops of peppermint extract
- Top with crushed candy canes instead of sea salt
Pumpkin Caramel Bars
A fall twist that adds a warm spiced touch.
- Add 1 tsp pumpkin pie spice to the caramel layer
- Mix in ½ cup canned pumpkin into the caramel just before boiling
- Top with white chocolate and cinnamon chips
S’mores Inspired
Who says you need a campfire?
- Swap the Club crackers for graham crackers
- Layer mini marshmallows between the caramel and chocolate
- Use semi-sweet chocolate chips for a deeper cocoa hit
Storing, Freezing, and Serving Salt River Bars
Best Storage Methods for Freshness
One of the best things about Salt River Bars—aside from their craveable flavor—is how beautifully they hold up over time. If you store them right, you can enjoy that same rich, salty-sweet crunch days after making them.
Here’s how to keep them at their best:
Short-Term Storage
- Once the bars are fully chilled and cut, transfer them into an airtight container.
- Layer parchment paper between rows to prevent sticking, especially if your chocolate top is soft.
- Store in the refrigerator for up to 1 week.
Pro Tip: For maximum freshness, keep the lid sealed tight. Exposure to air will dull the chocolate topping and soften the cracker base.
Room Temp Rules
While Salt River Bars are safe to eat at room temperature for a few hours—like during a party—they’re best served cool. Why? Because the caramel layer can start to soften or melt, especially in warm climates.
If you’re making these for a gathering, place them on the dessert table last, and keep extras chilled until refills are needed.
How to Freeze and Thaw Without Losing Texture
Want to make a big batch and enjoy Salt River Bars weeks later? Good news—they freeze like a dream. Here’s how to do it without sacrificing quality.
To Freeze:
- Cut bars into squares after full refrigeration.
- Wrap each bar individually in parchment or wax paper.
- Stack in a freezer-safe container or zip-top bag.
- Label and freeze for up to 2 months.
To Thaw:
- Transfer to the refrigerator the night before you want to eat them.
- Let them chill overnight, then serve cold or let them come to room temp for 10–15 minutes.
Avoid microwaving! It’ll melt the chocolate topping and ruin the layering.
Don’t miss our chocolate chip oatmeal coconut cookies —they’re just as freezer-friendly and taste like a bakery treat.
Serving Tips That Elevate Your Bars
Whether you’re serving them at brunch, wrapping them as edible gifts, or packing them in lunchboxes, Salt River Bars always deliver. But a little presentation effort makes a big impact.
For Parties:
- Cut bars into bite-sized cubes and display on a chilled marble or ceramic platter.
- Garnish with a tiny pinch of flaky salt or gold dust for a luxe finish.
For Gifts:
- Use string and a handwritten tag to secure each bar in a clear cellophane bag.
- Include a cute label: “Homemade Salt River Bars – Refrigerate for Best Flavor!”
For Snacking:
- For road trip snacks or lunchboxes, place one in a tiny zip bag.
- For a decadent boost, pair with cold brew or iced coffee.
Why Salt River Bars Are Ideal for Any Occasion
Holiday Treats, Bake Sales, and Potluck Favorites
If there’s one thing that makes Salt River Bars a modern dessert essential, it’s their incredible versatility. Whether you’re showing up to a holiday dinner, packing treats for a school bake sale, or hosting a casual BBQ, these bars deliver every time. Why? Because they:
- Travel well: They hold their shape even when stacked or wrapped
- Look beautiful: The layered effect and glossy chocolate topping make them look gourmet
- Satisfy all palates: Even picky eaters fall in love with that salty-sweet crunch
- Require no utensils: They’re grab-and-go treats, no forks or plates needed
For Bake Sales
Cut the bars into generous squares, wrap individually in clear wrap, and stick on cute labels. They’re easy to price, don’t require refrigeration at the table, and always sell out.
For Holiday Parties
You can customize Salt River Bars to match the season. Add crushed peppermint for Christmas, orange zest for fall, or heart sprinkles for Valentine’s Day. Serve them on a rustic wooden tray or tiered stand for maximum wow.
For Office Potlucks
Want to impress your coworkers without spending all night baking? Salt River Bars are your secret weapon. Make them the night before, store them in the fridge, and bring them out right before lunch. You’ll earn dessert legend status in no time.
Making Edible Gifts with Salt River Bars
Forget the cookie tins this year. If you’re looking for a standout edible gift, Salt River Bars are it. They’re different, unexpected, and completely addictive.
Gift Ideas:
- Bar Stacks: Stack three square bars, wrap in wax paper and tie with a ribbon
- Dessert Jars: Layer mini Salt River Bars in a mason jar and top with a bow and handwritten tag
- DIY Kits: Include a printed recipe card and all the dry ingredients (wrapped in clear pouches) so friends can make their own
Include a fun note like: “Warning: Highly addictive. Refrigerate before cutting. Share at your own risk.”
Conclusion: Salt River Bars—The Sweet-Salty Treat You Didn’t Know You Needed
Salt River Bars aren’t just another dessert—they’re an experience. Layer by layer, they deliver everything you didn’t know you craved: a buttery crunch from the crackers, a deep, chewy caramel core, and a smooth chocolate-peanut butter finish kissed with sea salt.
They’re the kind of treat that leaves people asking, “Wait, what is this? And where can I get more?”
From busy moms baking ahead for the week to professional pastry chefs who can’t resist the simplicity, Salt River Bars have become a sleeper-hit dessert that fits every occasion. They’re freezer-friendly, giftable, portable, and completely addictive.
And if you’re like us, you won’t stop at one batch. You’ll make them again. You’ll try a twist. You’ll bring them to every event—and maybe, like us, you’ll start a tradition (or even a blog) around them.
Because the truth is, these bars are more than dessert. They’re moments made sweeter, one salty-smooth square at a time.
Looking for your next obsession? Try Iced Lemon Oatmeal Cookies.
FAQs About Salt River Bars
What are Salt River Bars made of?
Salt River Bars are made from layers of Club crackers, a homemade caramel sauce (with butter, brown sugar, graham cracker crumbs, and heavy cream), and a chocolate-peanut butter topping that includes milk chocolate chips, butterscotch chips, and creamy peanut butter. A sprinkle of flaky sea salt finishes the top for that iconic sweet-meets-salty contrast.
Why are Salt River Bars called that?
The name is believed to have originated in Arizona, inspired by the Salt River, where the recipe gained traction at a local café. The name evokes a rustic, regional charm and captures the layered flow of textures and flavors in the bars—just like a river’s current.
Are Salt River Bars easy to make?
Absolutely! While they look impressive, Salt River Bars are beginner-friendly. No baking is required, just some stovetop caramel boiling and layering. The hardest part? Waiting for them to chill before slicing into them!
Can Salt River Bars be made ahead of time?
Yes, and they’re actually better when made ahead. Chilling helps all the layers firm up and makes slicing cleaner. You can prepare them up to 3 days in advance and store them in the fridge.
How do you store Salt River Bars?
For best results, store Salt River Bars in an airtight container in the refrigerator for up to one week. If stacking, place parchment between layers. For longer storage, freeze individually wrapped pieces for up to two months.
Can I customize Salt River Bars with other toppings?
Once you’ve made Salt River Bars, other desserts just don’t compare. They’re unapologetically rich, perfectly balanced between sweet and salty, and layered with textures that satisfy every kind of craving. They’re simple enough for a Tuesday night and elegant enough for a holiday platter.
But more than that—they’re memorable. Whether you’re biting into one fresh out of the fridge, gifting a dozen wrapped in twine, or sharing them at your kid’s birthday, these bars create moments.