
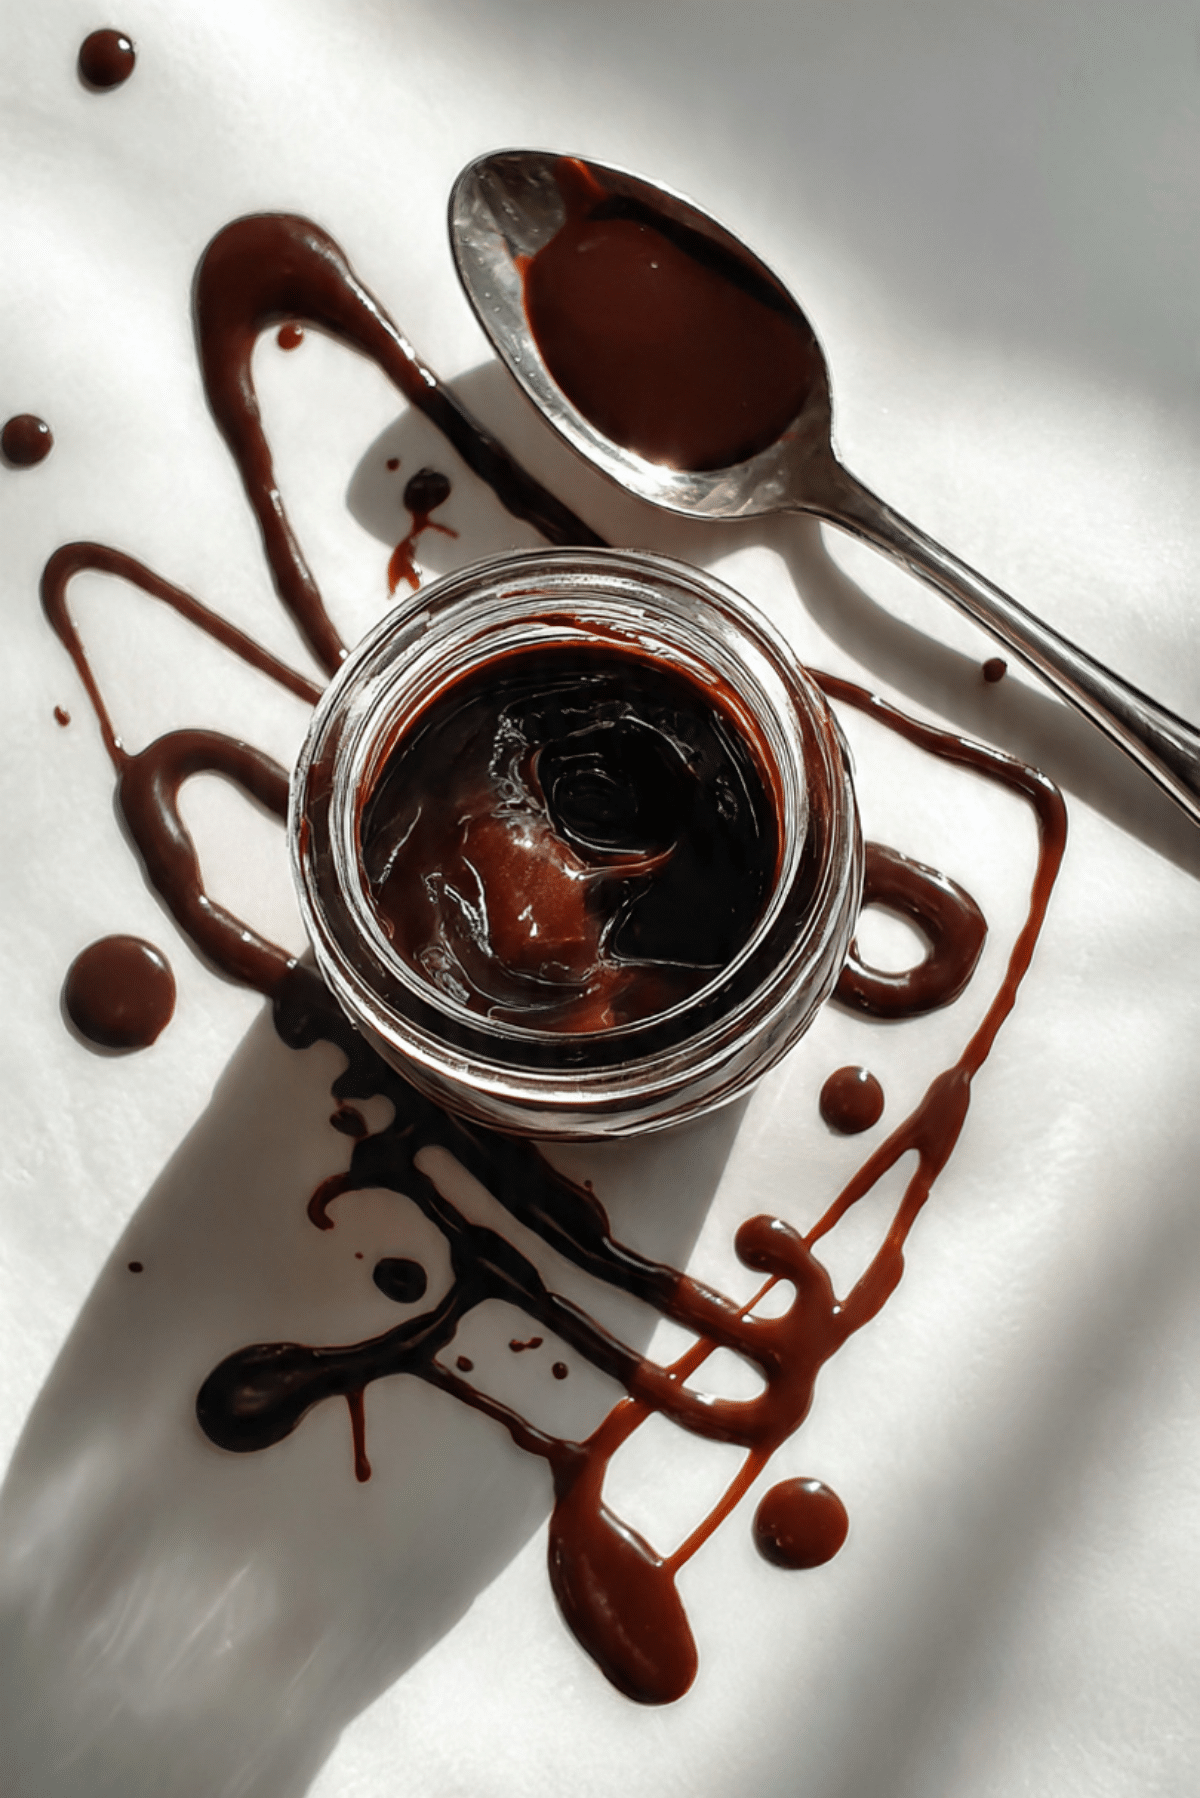
This homemade magic shell recipe is pure nostalgia in a jar. With only two ingredients—dark chocolate and coconut oil—you can create that delightful chocolate shell that hardens instantly when poured over ice cream. It’s glossy, rich, and absolutely magical. Once you make it yourself, you’ll never go back to store-bought again.
Disclosure: This post contains affiliate links.If you click and make a purchase, I may earn a small commission at no extra cost to you.


Behind the Recipe
I remember being amazed the first time I poured that store-bought chocolate sauce over ice cream and watched it turn into a crisp shell. Recreating that magic at home felt like a challenge until I discovered how simple it really is. The secret lies in coconut oil, which firms up when chilled, transforming melted chocolate into that iconic crackly coating.
Recipe Origin or Trivia
Magic shell became popular in the 1980s as a fun dessert topping for kids and adults alike. The science behind it is simple but clever: coconut oil solidifies quickly when exposed to cold, creating a satisfying snap. This homemade version not only skips preservatives but also tastes richer thanks to quality dark chocolate.
Why You’ll Love Homemade Magic Shell Recipe
This is the easiest dessert topping you’ll ever make, and it transforms even plain vanilla ice cream into something special.
Versatile: Works on ice cream, fruit, frozen bananas, or even pretzels.
Budget-Friendly: Two simple ingredients that go a long way.
Quick and Easy: Ready in under five minutes.
Customizable: Adjust the chocolate type or flavor add-ins.
Crowd-Pleasing: Everyone loves the satisfying “crack” sound.
Make-Ahead Friendly: Stores beautifully for weeks.
Great for Leftovers: Simply reheat and reuse—no waste here.
Chef’s Pro Tips for Perfect Results
Keep these simple tricks in mind to make your magic shell flawless every time:
- Use good-quality chocolate: It makes all the difference in taste.
- Melt gently: Overheating can cause chocolate to seize.
- Adjust ratio if needed: More coconut oil makes it thinner and snappier.
- Cool slightly before pouring: Prevents melting your ice cream instantly.
- Store properly: Keep at room temperature in a sealed jar for smooth reuse.
Kitchen Tools You’ll Need
You only need a few basics for this recipe.
Microwave-Safe Bowl or Double Boiler: To melt the chocolate and coconut oil.
Spoon or Spatula: For stirring until smooth.
Glass Jar or Bottle: For easy storage and pouring.
Measuring Spoon: To measure the coconut oil accurately.
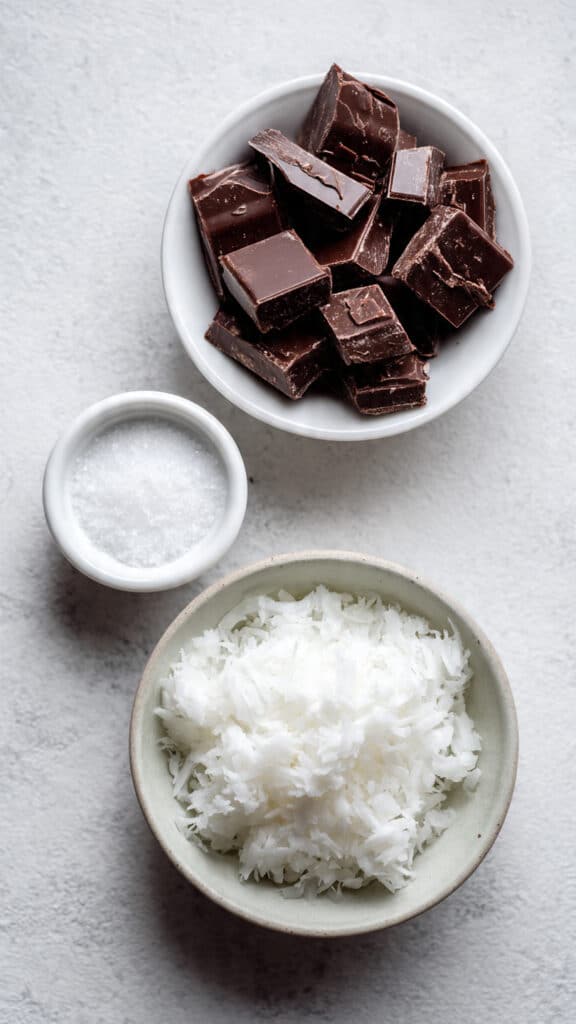
Ingredients in Homemade Magic Shell Recipe
It doesn’t get simpler than this. Here’s what you’ll need:
- Dark Chocolate (60% Cacao): 5 oz. Provides rich, bittersweet flavor and smooth texture.
- Coconut Oil: 3 tbsp. Gives the shell its signature hard crack when chilled and adds a subtle tropical note.
Ingredient Substitutions
Customize your magic shell to suit your taste or what you have on hand:
Dark Chocolate: Use milk chocolate, white chocolate, or semisweet chips.
Coconut Oil: Substitute refined coconut oil for less coconut flavor, or use vegetable shortening in a pinch.
Ingredient Spotlight
Coconut Oil: The key ingredient that gives magic shell its instant hardening ability. Its natural fat composition allows it to solidify quickly when it touches something cold, creating that satisfying crisp coating.
Instructions for Making Homemade Magic Shell Recipe
Here’s how to whip up this two-ingredient wonder.
1. Preheat Your Equipment:
Prepare a microwave-safe bowl or set up a double boiler on the stove.
2. Combine Ingredients:
Add the dark chocolate and coconut oil to the bowl.
3. Prepare Your Cooking Vessel:
If using a microwave, heat in 20–30 second intervals, stirring between each until smooth. If using a double boiler, melt gently over low heat.
4. Assemble the Dish:
Once melted, stir until glossy and fully combined. Cool slightly for a minute or two.
5. Cook to Perfection:
No actual cooking required—just ensure everything is fully melted and smooth.
6. Finishing Touches:
Pour the magic shell into a clean glass jar or bottle for easy storage.
7. Serve and Enjoy:
Drizzle over cold ice cream, wait a few seconds, and watch it harden into a crunchy chocolate shell.
Texture & Flavor Secrets
The beauty of this recipe lies in its balance of texture and taste. The dark chocolate brings deep, slightly bitter notes that contrast beautifully with sweet ice cream, while the coconut oil provides that delicate crispness you can hear and feel with every bite.
Cooking Tips & Tricks
These little tips can take your magic shell from good to great:
- Add a pinch of sea salt for a gourmet twist.
- Mix in vanilla or peppermint extract for flavor variation.
- For a thicker shell, reduce coconut oil slightly.
- To make it kid-friendly, use milk chocolate for a sweeter taste.
What to Avoid
It’s easy to make, but a few small mistakes can affect the texture.
- Overheating the chocolate: Causes clumping or burning.
- Storing in the fridge: It’ll solidify too much and become hard to use.
- Pouring too hot: Can melt your ice cream instantly instead of forming a shell.
- Using water-based ingredients: Water can cause chocolate to seize.
Nutrition Facts
Servings: 8
Calories per serving: 180
Note: These are approximate values.
Preparation Time
Prep Time: 5 minutes
Cook Time: 2 minutes
Total Time: 7 minutes
Make-Ahead and Storage Tips
Store your homemade magic shell in a clean, airtight jar at room temperature for up to a month. If it solidifies, simply microwave it for 10–15 seconds and stir before using. It stays glossy and delicious every time.
How to Serve Homemade Magic Shell Recipe
Pour over scoops of vanilla or chocolate ice cream for that classic effect. It’s also fantastic drizzled over frozen yogurt, dipped on popsicles, or spooned onto frozen fruit like strawberries or bananas.
Creative Leftover Transformations
- Chocolate-Covered Fruit: Dip cold fruit pieces for a crunchy coating.
- Dessert Garnish: Drizzle over cakes or brownies for a glossy finish.
- Hot Cocoa Drizzle: Add a spoonful to hot milk for instant cocoa.
Additional Tips
- Use high-quality chocolate for the best flavor.
- Keep a jar on hand for quick dessert upgrades.
- Adjust sweetness by mixing different types of chocolate.
Make It a Showstopper
Serve your magic shell in a small glass jar with a spoon beside it and a drizzle of hardened chocolate on the rim. Add a sprinkle of flaky salt or crushed nuts over the ice cream for a professional finish.
Variations to Try
- White Chocolate Magic Shell: Use white chocolate chips instead of dark.
- Nutty Version: Add a tablespoon of peanut butter or hazelnut spread.
- Mint Chocolate Shell: Stir in a few drops of peppermint extract.
- Salted Caramel Twist: Mix with caramel chips and sea salt.
- Espresso Infusion: Add a teaspoon of instant espresso powder for mocha flavor.
FAQ’s
Q1: Can I use any type of chocolate?
Yes, just adjust the coconut oil ratio for the desired thickness.
Q2: Does it taste like coconut?
If you use unrefined coconut oil, slightly. Refined coconut oil has almost no flavor.
Q3: How long does it take to harden?
Usually within 30 seconds of hitting cold ice cream.
Q4: Can I use butter instead of coconut oil?
Butter won’t harden the same way, so it’s not recommended.
Q5: How do I fix a thickened mixture?
Microwave for 10 seconds and stir until smooth again.
Q6: Is this vegan-friendly?
Yes, as long as you use dairy-free dark chocolate.
Q7: Can I make a sugar-free version?
Use sugar-free dark chocolate or stevia-sweetened chips.
Q8: Can I double the recipe?
Absolutely, just keep the same chocolate-to-oil ratio.
Q9: Can I store it in the fridge?
It’ll harden too much—keep it at room temperature instead.
Q10: Does it work on frozen fruit?
Yes, it hardens beautifully on any cold surface.
Conclusion
Homemade magic shell is a little bit of kitchen magic you can whip up anytime. With its shiny finish, satisfying crack, and deep chocolate flavor, it brings back childhood joy in the simplest, most delicious way. Trust me, once you make this, your ice cream nights will never be the same.
Print
Homemade Magic Shell Recipe
- Prep Time: 5 minutes
- Cook Time: 2 minutes
- Total Time: 7 minutes
- Yield: 8 servings 1x
- Category: Dessert
- Method: Melted
- Cuisine: American
- Diet: Vegan
Description
This homemade magic shell is a quick, two-ingredient recipe that creates a glossy chocolate shell that hardens instantly on ice cream. Made with dark chocolate and coconut oil, it’s smooth, rich, and irresistibly satisfying.
Ingredients
- 5 oz dark chocolate (60% cacao), bittersweet chocolate or dark chocolate chips
- 3 tbsp coconut oil
Instructions
- Place dark chocolate and coconut oil in a microwave-safe bowl.
- Heat in 20–30 second intervals, stirring after each, until fully melted and smooth. Alternatively, melt over low heat using a double boiler.
- Stir well to combine until glossy.
- Cool slightly before pouring into a clean jar or bottle.
- Drizzle over cold ice cream and watch it harden into a chocolate shell within seconds.
Notes
- Use high-quality chocolate for the best flavor.
- Do not refrigerate; store at room temperature.
- If it solidifies, microwave for 10–15 seconds to soften.
- Add extracts like peppermint or vanilla for fun flavor variations.
Nutrition
- Serving Size: 2 tablespoons
- Calories: 180
- Sugar: 8g
- Sodium: 5mg
- Fat: 15g
- Saturated Fat: 10g
- Unsaturated Fat: 5g
- Trans Fat: 0g
- Carbohydrates: 10g
- Fiber: 2g
- Protein: 2g
- Cholesterol: 0mg
Yo BigBunny, you know what? Found some real gems on this site. The games are slick and payouts are faster than a bunny hop. Check it out! bigbunny