
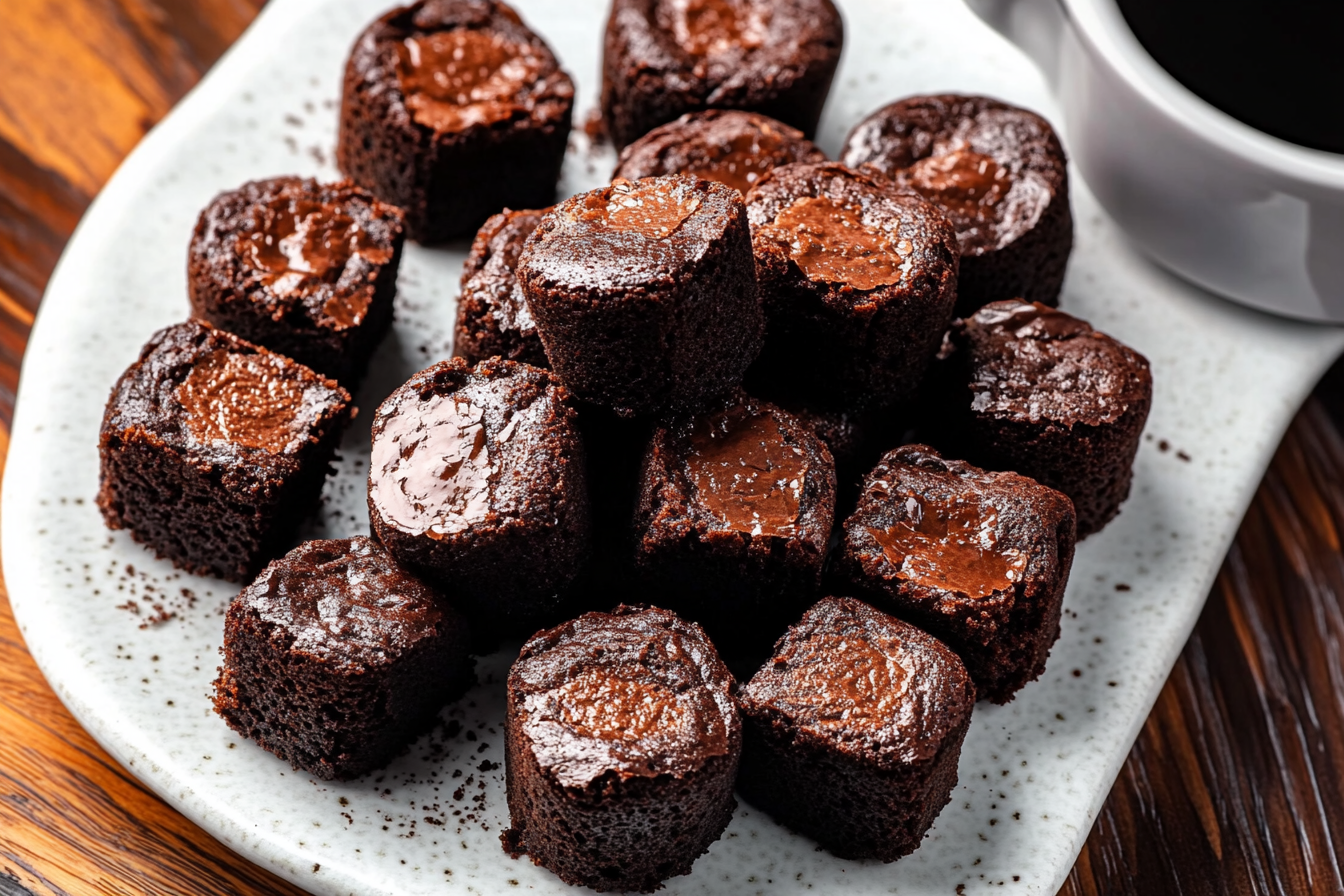
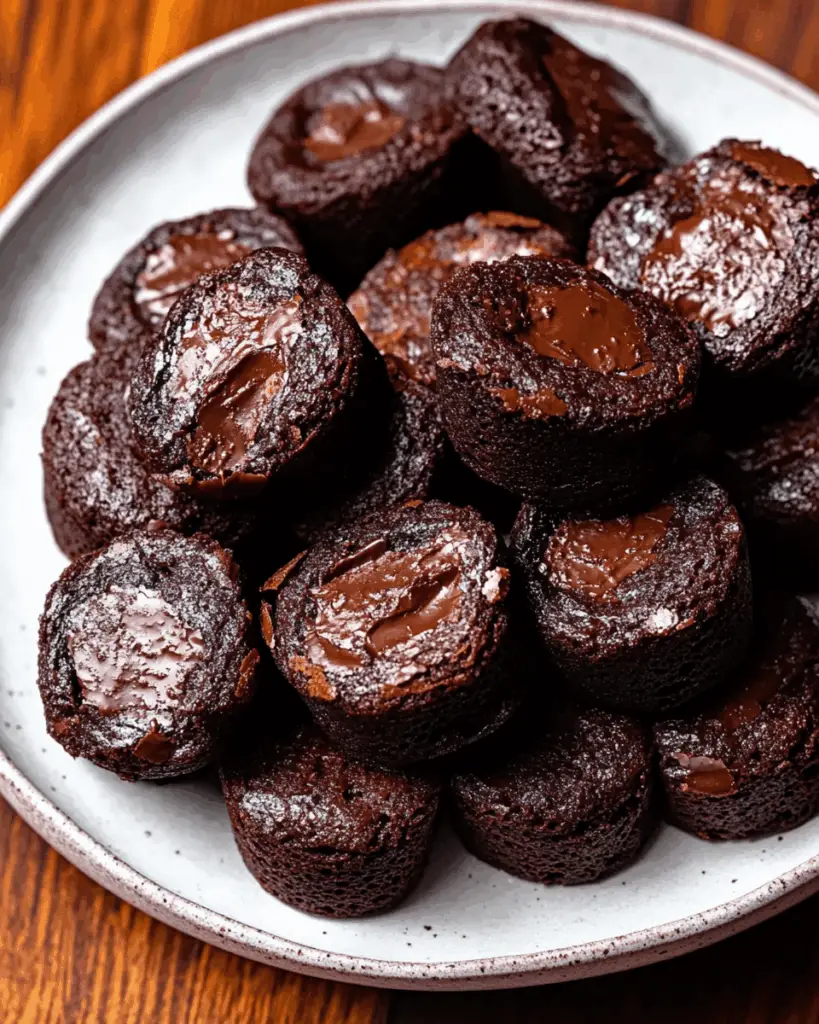
If brownies and coffee had a baby, this would be it—and oh, what a beautiful baby it would be. These Fudgy Espresso Brownie Bites are rich, chocolatey, and deeply satisfying with just the right kick of espresso to make each bite feel like a tiny celebration. They’re the kind of treat that makes you close your eyes for a second, just to savor the moment. Think: chewy edges, gooey centers, and a bold espresso twist that makes everything feel a bit more grown-up (in the best way).
Disclosure: This post contains affiliate links.If you click and make a purchase, I may earn a small commission at no extra cost to you.


Whether you’re baking for a girls’ night, a sweet little gift, or just to treat yourself after a long day—trust me, you’re going to love these. They come together with minimal fuss but deliver major flavor. And let’s be honest… the batter alone is worth making.
Why You’ll Love Fudgy Espresso Brownie Bites
Versatile:
These brownie bites are perfect whether you’re whipping up a batch for a laid-back movie night or need something crowd-pleasing for a potluck. They look adorable on a dessert tray and taste even better warm from the oven with a scoop of ice cream.
Budget-Friendly:
No fancy ingredients here—just pantry staples that transform into something magical. Cocoa powder, espresso, sugar, butter… all the good stuff that’s probably already sitting in your kitchen waiting to shine.
Quick and Easy:
This recipe is beginner-friendly and super straightforward. No need for mixers or complicated techniques—just melt, stir, scoop, and bake. That’s it!
Customizable:
Want to make them extra decadent? Add in chocolate chunks or swirl in some peanut butter. Need a gluten-free version? A simple flour swap will do the trick. You can totally make these your own.
Crowd-Pleasing:
Chocolate lovers, coffee lovers, dessert lovers—everyone wins here. These brownie bites strike the perfect balance between fudgy and cakey, with a flavor that appeals to kids and grown-ups alike.
Ingredients in Fudgy Espresso Brownie Bites
(Note: the full ingredients list, including measurements, is provided in the recipe card directly below.)
Butter: Adds rich flavor and helps create that irresistibly fudgy texture. Melted butter also gives the brownies a shiny, crackly top.
Sugar: Granulated sugar sweetens the brownies and helps form that perfect chewy crust.
Brown Sugar: Adds a touch of molasses depth and makes the bites even more moist and rich.
Espresso Powder: The real star here. It intensifies the chocolate flavor and gives the brownies a subtle, sophisticated coffee kick.
Cocoa Powder: Unsweetened cocoa delivers deep chocolate flavor without making the bites too sweet.
Eggs: They bind everything together and help create that dreamy, dense interior.
Vanilla Extract: Just a splash enhances the overall flavor and brings out the richness of the chocolate.
All-Purpose Flour: The structural backbone of the bites—just enough to hold things together without compromising fudginess.
Salt: Balances the sweetness and makes all the flavors pop.
Chocolate Chips or Chunks (optional): Fold them in for extra pools of melted chocolate in every bite.
Instructions
Let’s dive into the steps to create this flavorful masterpiece:
Preheat Your Equipment:
Start by preheating your oven to 350°F. If you’re using a mini muffin tin, this ensures the bites bake evenly and get those beautifully crackled tops.
Combine Ingredients:
In a large bowl, whisk together the melted butter, sugar, and brown sugar until glossy and smooth. Then stir in the espresso powder, cocoa powder, eggs, and vanilla extract. Mix until everything is beautifully blended.
Prepare Your Cooking Vessel:
Lightly grease a mini muffin pan or line it with paper liners. This makes for easy cleanup and helps the brownie bites pop out effortlessly after baking.
Assemble the Dish:
Scoop the brownie batter into each well of your prepared pan, filling each about ¾ full. If you’re using chocolate chips or chunks, now’s the time to gently fold them into the batter or sprinkle them on top.
Cook to Perfection:
Bake for 12–15 minutes, or until the tops are shiny and just set. Don’t overbake—these are meant to be fudgy! A toothpick inserted in the center should come out with a few moist crumbs.
Finishing Touches:
Remove from the oven and let the brownie bites cool in the pan for about 5 minutes, then transfer them to a wire rack to cool completely.
Serve and Enjoy:
Serve warm or at room temperature, with a cold glass of milk or a piping hot espresso. Either way, they’re pure bliss.
Nutrition Facts
Servings: About 24 mini bites
Calories per serving: [Calorie count per serving]
Preparation Time
Prep Time: 10 minutes
Cook Time: 15 minutes
Total Time: 25 minutes
How to Serve Fudgy Espresso Brownie Bites
Coffee Pairing: These bites practically beg to be enjoyed with a fresh cup of coffee or espresso. Try them with a latte for a full-on café experience at home.
Ice Cream Sidekick: Warm a couple brownie bites and serve them alongside vanilla or salted caramel ice cream. It’s like a brownie sundae, only better.
Party Platter: Arrange them on a pretty plate, dusted with powdered sugar or cocoa powder. Add berries or chocolate drizzle for extra flair.
On the Go: Pop them into a container for a sweet lunchbox treat or a midday pick-me-up at work.
As a Gift: Wrap a few in a little parchment and twine. Instant homemade gift that feels heartfelt and cozy.
Additional Tips
Prep Ahead:
Make the batter ahead and store it in the fridge overnight. Just scoop and bake when you’re ready.
Spice It Up:
Add a dash of cinnamon or a pinch of cayenne for a fun flavor twist.
Dietary Adjustments:
Swap flour for a 1:1 gluten-free baking blend, and use dairy-free butter if needed.
Storage Tips:
Keep brownie bites in an airtight container at room temperature for up to 4 days. They also freeze beautifully—just thaw and enjoy.
Double the Batch:
Trust me, they’ll go fast. Double the recipe and freeze half for future chocolate emergencies.
FAQ Section
Q1: Can I use instant coffee instead of espresso powder?
A1: Yes, though espresso powder has a stronger flavor. Use about double the amount of instant coffee to get a similar effect.
Q2: Can I make these without the espresso?
A2: Definitely! Just skip the espresso powder. You’ll have classic fudgy brownie bites instead.
Q3: How do I store leftovers?
A3: Store in an airtight container at room temp for up to 4 days or freeze for up to 2 months.
Q4: Can I freeze these?
A4: Absolutely. Freeze in a single layer on a baking sheet, then transfer to a freezer bag. Reheat in the microwave or let thaw at room temp.
Q5: What’s the best way to reheat them?
A5: A quick 10–15 seconds in the microwave brings back that just-baked fudginess.
Q6: Can I use dark chocolate instead of cocoa powder?
A6: Yes! Melted dark chocolate will make the bites richer and slightly denser—so delicious.
Q7: Can I bake this in a regular pan instead of mini muffins?
A7: Sure! Use an 8×8 pan and adjust the baking time to 20–25 minutes.
Q8: Can I make these vegan?
A8: With a few swaps—like flax eggs and plant-based butter—you can definitely make a vegan version.
Q9: How strong is the coffee flavor?
A9: It’s subtle—enough to deepen the chocolate without overpowering. Even non-coffee drinkers love it!
Q10: Can I add nuts or other mix-ins?
A10: Totally! Chopped walnuts, pecans, or even toffee bits would be amazing.
Conclusion
These Fudgy Espresso Brownie Bites are tiny treasures packed with flavor, personality, and that magical touch only homemade treats can offer. They’re everything you want in a bite-sized dessert: rich, indulgent, and oh-so-satisfying. Whether you’re a chocolate fanatic, a coffee lover, or just in need of something sweet and comforting, this recipe is going to be your new go-to.
Print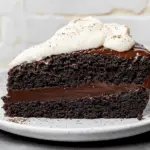
Fudgy Espresso Brownie Bites
- Prep Time: 20 minutes
- Cook Time: 35 minutes
- Total Time: 55 minutes
- Yield: 8-10 servings
- Category: Dessert
- Method: Baking
- Cuisine: Irish
- Diet: Vegetarian
Description
Chocolate Guinness Cake is a rich, decadent dessert featuring the deep, malty flavor of Guinness stout paired with a moist, tender chocolate cake. Topped with a creamy whipped cream cheese frosting, this cake is the perfect indulgence for any occasion.
Ingredients
- For the cake:
- Two 11.2oz bottles Guinness, reduced down to 227g (1 cup)
- 105 g (1 1/4 cups) dutch process cocoa powder
- 210 g (1 3/4 cups) all-purpose flour
- 400 g (2 cups) granulated sugar
- 1 1/4 teaspoon baking powder
- 1 1/2 teaspoon baking soda
- 1/2 teaspoon salt
- 170 g (3/4 cup) whole milk plain Greek yogurt
- 124 g (1/2 cup + 2 tbsp) neutral oil
- 2 eggs
- 2 teaspoons vanilla extract
- For the whipped cream cheese frosting:
- 227 g (1 block) cream cheese, cold
- 200 g (1 cup) granulated sugar
- 227 g (1 cup) heavy cream, cold
Instructions
- Preheat the oven to 350ºF. Grease and line an 8-inch round cake pan with parchment paper.
- In a saucepan over medium heat, reduce the Guinness beer to 227g (1 cup) and let it cool.
- In a large bowl, whisk together cocoa powder, flour, sugar, baking powder, baking soda, and salt.
- In a separate bowl, whisk together yogurt, oil, eggs, vanilla extract, and the reduced Guinness.
- Gradually add the wet ingredients to the dry ingredients, stirring until well combined.
- Pour the batter into the prepared cake pan and bake for 30–35 minutes, or until a toothpick inserted into the center comes out clean.
- Allow the cake to cool completely in the pan, then transfer to a wire rack.
- For the frosting: In a large bowl, beat the cream cheese and sugar together until smooth and creamy.
- Slowly add the heavy cream and beat until the frosting is thick and fluffy.
- Spread the whipped cream cheese frosting over the cooled cake. Slice and enjoy!
Notes
- Make sure the cream cheese and heavy cream are cold to help the frosting whip up properly.
- If you don’t have an 8-inch pan, you can use a 9-inch pan, but the cake may bake faster, so check it earlier.
- This cake can be made ahead of time and stored in the fridge for up to 3 days.
Nutrition
- Serving Size: 1 slice
- Calories: 380
- Sugar: 28g
- Sodium: 230mg
- Fat: 22g
- Saturated Fat: 9g
- Unsaturated Fat: 12g
- Trans Fat: 0g
- Carbohydrates: 42g
- Fiber: 3g
- Protein: 4g
- Cholesterol: 60mg