
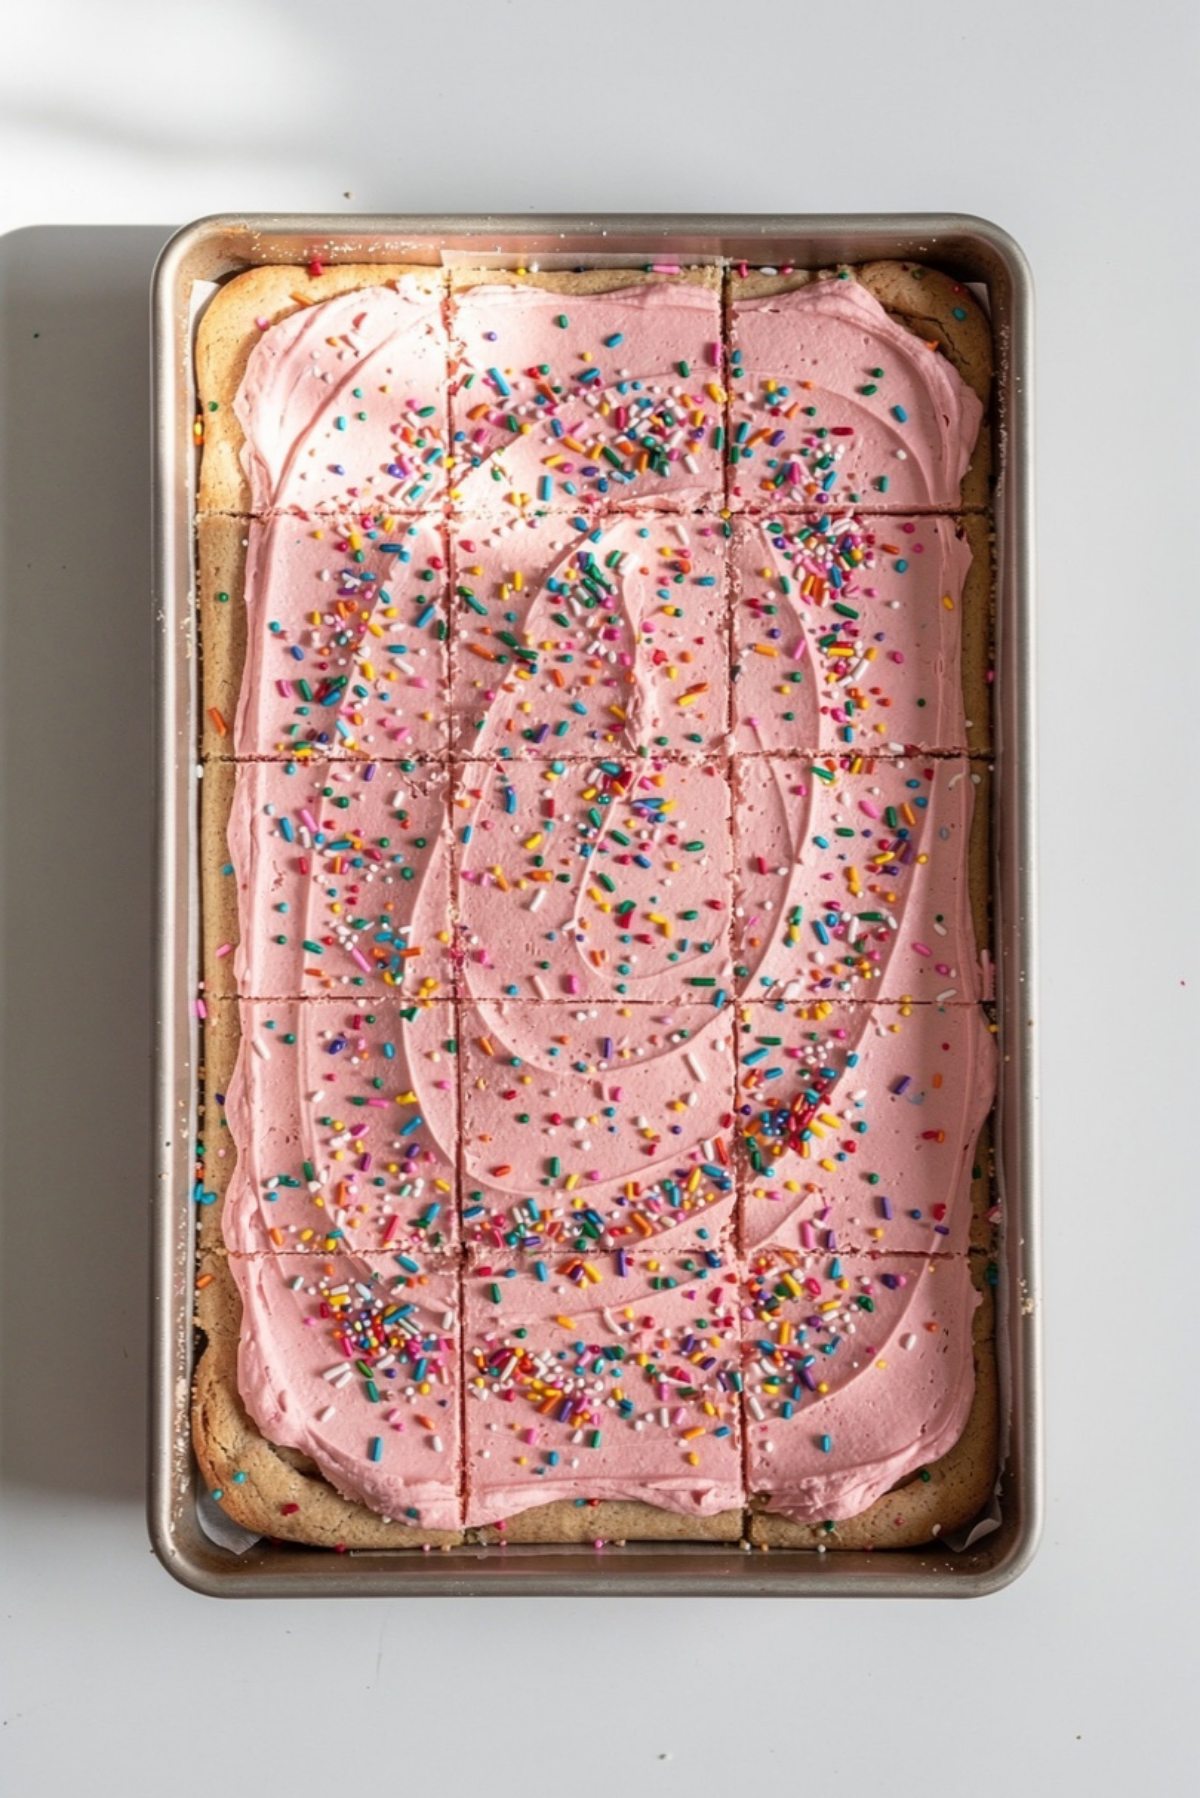
There is something about a thick, soft sugar cookie base topped with a cloud of creamy pink frosting that just feels like pure celebration. These Frosted Sugar Cookie Bars are the kind of treat that instantly takes you back to birthday parties, school bake sales, and those bakery cases you used to press your nose against as a kid. The buttery aroma while they bake fills the kitchen in the best way, and trust me, you’re going to love this. One bite and you get that tender cookie crumb paired with silky frosting and a little crunch from the sprinkles. Let me tell you, it’s worth every bite.
Disclosure: This post contains affiliate links.If you click and make a purchase, I may earn a small commission at no extra cost to you.


Why Everyone Falls in Love With These Bars
Some desserts are good, and then there are the ones people talk about long after the last square disappears. These bars belong in that second category. They are soft, sweet, colorful, and just indulgent enough to feel special without being complicated.
They strike that perfect balance between nostalgic comfort and party ready charm. This one’s a total game-changer when you need something easy but impressive.
A Little Sweet Backstory
Sugar cookies have been around for centuries, with roots tracing back to early European baking traditions. Over time, the classic rolled sugar cookie evolved into easier versions, including sheet pan styles like this one.
Turning them into bars was a practical twist. Instead of rolling and cutting individual cookies, bakers began pressing the dough into a pan, baking it all at once, and frosting it generously. The result was quicker, softer, and honestly even more satisfying. It is the kind of dessert that shows how home baking keeps adapting while holding onto tradition.
Why This Recipe Always Works
There is a reason this treat is a staple in so many kitchens. Let’s break down exactly why it never disappoints.
Versatile: You can switch up the frosting color and sprinkles for birthdays, holidays, or just because. It fits any occasion effortlessly.
Budget-Friendly: The ingredients are pantry basics like flour, sugar, butter, and eggs, which keeps things affordable and simple.
Quick and Easy: No rolling pins, no cookie cutters, no chilling required. Press, bake, frost, done.
Customizable: Add almond extract, swap sprinkle colors, or even layer different frosting shades for a fun twist.
Crowd-Pleasing: Soft cookie base plus creamy frosting equals instant approval from kids and adults alike.
Make-Ahead Friendly: You can bake the base a day ahead and frost before serving, which makes party prep so much easier.
Great for Leftovers: They stay soft for days when stored properly, so you can enjoy them all week.
Pro Tips From My Kitchen
Before we dive into baking, here are a few insider tips that make a noticeable difference.
- Use room temperature butter for both the cookie base and frosting so everything blends smoothly.
- Do not overmix the batter once you add the flour, this keeps the bars soft and tender.
- Line your baking pan with parchment paper for easy removal and clean slices.
- Let the bars cool completely before frosting, otherwise the frosting will melt and lose that fluffy texture.
Essential Tools You Will Need
Having the right tools makes the process feel smooth and relaxed.
Mixing Bowls: You will need one large bowl for the cookie dough and another for the frosting.
Electric Mixer: Helps cream the butter and sugar until light and fluffy, which creates that soft texture.
9×13 Inch Baking Pan: This size gives you thick, bakery style bars.
Spatula: Perfect for spreading the dough evenly and smoothing the frosting on top.
Parchment Paper: Makes lifting the bars out of the pan effortless.
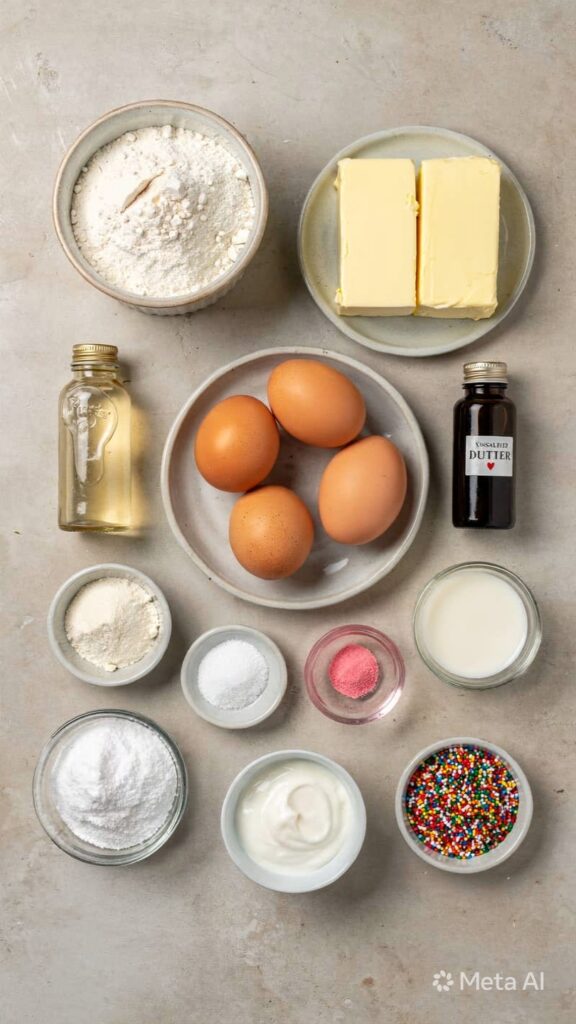
Ingredients You Will Need For Frosted Sugar Cookie Bars
The beauty of this dessert lies in its simple ingredients working together in perfect harmony.
- All Purpose Flour: 2 1/2 cups, provides structure and keeps the bars sturdy yet soft.
- Baking Powder: 1 teaspoon, gives a gentle lift for a tender texture.
- Salt: 1/2 teaspoon, balances the sweetness.
- Unsalted Butter: 1 cup, softened, creates richness and that melt in your mouth crumb.
- Granulated Sugar: 1 1/2 cups, sweetens and helps achieve a light texture.
- Large Eggs: 2, bind everything together and add moisture.
- Vanilla Extract: 2 teaspoons, enhances the classic sugar cookie flavor.
- Powdered Sugar: 3 cups, forms the base of the creamy frosting.
- Heavy Cream: 3 tablespoons, adds smoothness to the frosting.
- Pink Food Coloring: A few drops, for that signature bakery look.
- Rainbow Sprinkles: 1/4 cup, for a cheerful crunch on top.
Easy Ingredient Swaps
If you need to adjust, here are a few flexible substitutions.
All Purpose Flour: Use a gluten free flour blend for a gluten free version.
Heavy Cream: Substitute with whole milk if needed.
Pink Food Coloring: Any color works depending on your theme.
Vanilla Extract: Almond extract for a slightly nutty twist.
Spotlight On Key Ingredients
Some ingredients truly make these bars shine.
Unsalted Butter: This is the backbone of flavor. Creaming it properly creates that soft, airy crumb that makes these irresistible.
Powdered Sugar: It gives the frosting that smooth, fluffy texture that spreads like a dream and sets beautifully.
Let’s Bake These Together
Now comes the fun part. Let’s bring everything together step by step.
- Preheat Your Equipment: Preheat your oven to 350°F and line a 9×13 inch baking pan with parchment paper.
- Combine Ingredients: In a bowl, whisk together flour, baking powder, and salt. In another bowl, beat butter and sugar until light and fluffy. Add eggs and vanilla, then gradually mix in the dry ingredients until just combined.
- Prepare Your Cooking Vessel: Press the dough evenly into the prepared pan, smoothing the top with a spatula.
- Assemble the Dish: Make sure the dough is evenly distributed so it bakes uniformly.
- Cook to Perfection: Bake for 18 to 22 minutes, until the edges are lightly golden and the center is set. Do not overbake.
- Finishing Touches: Let cool completely. Beat powdered sugar, butter, heavy cream, and food coloring until smooth and fluffy. Spread evenly over cooled bars and add sprinkles.
- Serve and Enjoy: Slice into squares and serve. Watch them disappear quickly.
Texture and Flavor Magic
The base is soft and slightly chewy, with buttery sweetness that feels comforting and rich. The frosting is creamy and smooth, melting gently on your tongue. Then you get that tiny crunch from the sprinkles, which adds contrast and a bit of fun. The balance between tender crumb and fluffy topping is what makes these bars so addictive.
Helpful Tips for Perfect Results
A few small details can elevate your results.
- Chill the frosted bars for 20 minutes before slicing for cleaner edges.
- Use gel food coloring for a more vibrant shade.
- Measure flour correctly by spooning it into the cup and leveling it off.
What to Avoid for Best Results
Even simple desserts have a few pitfalls.
- Overbaking, which leads to dry bars. Keep an eye on the edges.
- Frosting warm bars, which causes melting and sliding.
- Overmixing after adding flour, which can make them dense.
Nutrition Facts
Servings: 24
Calories per serving: 280
Note: These are approximate values.
Preparation Time
Prep Time: 15 minutes
Cook Time: 20 minutes
Total Time: 35 minutes
Make-Ahead and Storage Tips
These bars are fantastic for planning ahead. You can bake the base a day in advance and store it covered at room temperature. Frost the next day for the freshest look.
Store leftovers in an airtight container at room temperature for up to 3 days or refrigerate for up to 5 days. They can also be frozen without frosting for up to 2 months. Thaw at room temperature and frost before serving.
How to Serve
Serve them chilled for clean slices or slightly at room temperature for the softest bite. Pair with a cold glass of milk, hot coffee, or even vanilla ice cream for a fun dessert plate.
Creative Leftover Transformations
If you somehow have extras, here are a few ideas.
Cut them into cubes and layer with whipped cream for a quick trifle.
Crumble over vanilla yogurt for a sweet breakfast treat.
Sandwich two thin slices with extra frosting in between.
Additional Tips
Use high quality vanilla for deeper flavor.
Let the frosting whip for a few extra minutes for extra fluffiness.
Keep sprinkles light and even for the prettiest finish.
Make It a Showstopper
For special occasions, pipe the frosting instead of spreading it. Add themed sprinkles or even edible glitter for a festive touch. Clean, sharp slices always elevate presentation, so wipe your knife between cuts.
Variations to Try
Add lemon zest to the dough for a fresh citrus note.
Swirl two frosting colors together for a marble effect.
Top with crushed freeze dried strawberries for natural color and flavor.
Add a thin layer of jam under the frosting for a sweet surprise.
FAQ’s
1. Can I make these ahead of time?
Yes, bake the base a day ahead and frost before serving.
2. Can I freeze them?
Yes, freeze unfrosted bars for best texture.
3. How do I keep them soft?
Store in an airtight container and avoid overbaking.
4. Can I use salted butter?
Yes, just reduce the added salt slightly.
5. Do I need to chill the dough?
No, this dough goes straight into the pan.
6. Can I double the recipe?
Yes, use two 9×13 pans for even baking.
7. What if I do not have heavy cream?
Whole milk works fine for the frosting.
8. How do I get clean slices?
Chill briefly and wipe the knife between cuts.
9. Can I change the frosting flavor?
Absolutely, try almond or lemon extract.
10. Are they overly sweet?
They are sweet but balanced with a soft buttery base.
Conclusion
These Frosted Sugar Cookie Bars are simple, nostalgic, and completely irresistible. They bring color, comfort, and just the right amount of sweetness to any table. Whether you are baking for a party or just because you need a little joy in your kitchen, this is one treat that never lets you down. Trust me, once you make them, they will become a regular favorite.
Print
Frosted Sugar Cookie Bars
Description
Soft and buttery sugar cookie bars topped with fluffy pink buttercream frosting and colorful sprinkles. These thick, tender bars are easy to make, perfect for parties, and deliver classic bakery flavor in every bite.
Ingredients
- 2 1/2 cups all purpose flour
- 1 teaspoon baking powder
- 1/2 teaspoon salt
- 1 cup unsalted butter, softened
- 1 1/2 cups granulated sugar
- 2 large eggs
- 2 teaspoons vanilla extract
- 3 cups powdered sugar
- 3 tablespoons heavy cream
- A few drops pink food coloring
- 1/4 cup rainbow sprinkles
Instructions
- Preheat oven to 350°F and line a 9×13 inch baking pan with parchment paper.
- In a bowl, whisk together flour, baking powder, and salt.
- In a separate large bowl, beat softened butter and granulated sugar until light and fluffy.
- Add eggs and vanilla extract, mixing until fully combined.
- Gradually mix the dry ingredients into the wet ingredients until just combined. Do not overmix.
- Press the dough evenly into the prepared baking pan and smooth the top.
- Bake for 18 to 22 minutes, until the edges are lightly golden and the center is set. Do not overbake.
- Allow the bars to cool completely in the pan.
- In a clean bowl, beat powdered sugar, heavy cream, and additional softened butter if needed for smooth texture, along with pink food coloring, until creamy and fluffy.
- Spread the frosting evenly over the cooled bars and top with rainbow sprinkles.
- Slice into 24 squares and serve.
Notes
- Make sure the bars are completely cooled before frosting to prevent melting.
- Chill the frosted bars for 20 minutes before slicing for cleaner edges.
- Store in an airtight container at room temperature for up to 3 days or refrigerate for up to 5 days.