

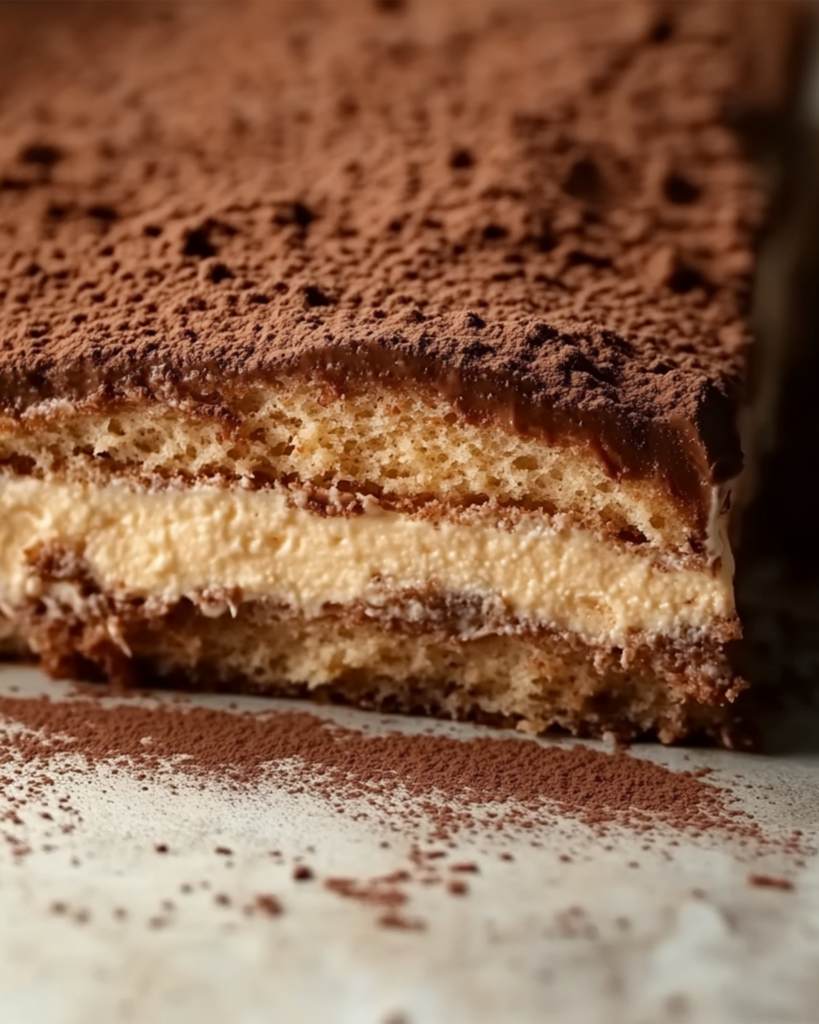
There’s something undeniably magical about Classic Italian Tiramisu—delicate layers of espresso-soaked ladyfingers, rich mascarpone cream, and a dusting of cocoa that melts in your mouth. This elegant yet simple dessert is the perfect way to end any meal, whether you’re hosting a dinner party or just treating yourself. And trust me, once you make it from scratch, you’ll never go back to store-bought!
Disclosure: This post contains affiliate links.If you click and make a purchase, I may earn a small commission at no extra cost to you.


Why You’ll Love Classic Italian Tiramisu
- Authentic Italian Flavor – Made with real mascarpone, espresso, and a touch of cocoa.
- No Baking Required – The perfect fuss-free dessert for any occasion.
- Make-Ahead Friendly – Actually tastes better when prepared in advance!
- Rich & Creamy – Silky mascarpone filling paired with bold espresso-soaked ladyfingers.
- Crowd-Pleasing Favorite – A dessert that always impresses!
Ingredients
Here’s everything you need to make this dreamy tiramisu:
- Ladyfingers – Light and airy sponge cookies that soak up the espresso beautifully.
- Espresso – Freshly brewed, strong espresso for deep coffee flavor.
- Mascarpone Cheese – The creamy, rich base that gives tiramisu its signature texture.
- Egg Yolks – Create a luxurious, silky custard.
- Granulated Sugar – Adds just the right amount of sweetness.
- Heavy Cream – Whipped to perfection for an extra light and creamy texture.
- Vanilla Extract – Enhances the flavors with a warm, sweet note.
- Cocoa Powder – A light dusting on top adds a touch of chocolate bitterness.
- Dark Rum (Optional) – A classic Italian twist for a subtle boozy kick.
(Note: The full ingredients list, including measurements, is provided in the recipe card directly below.)
Instructions
Let’s layer up this Italian masterpiece:
- Prepare the Espresso – Brew fresh espresso and let it cool. If using, stir in dark rum for extra depth of flavor.
- Whip the Heavy Cream – Beat heavy cream until soft peaks form, then set aside.
- Make the Mascarpone Mixture – In a bowl, whisk egg yolks and sugar until pale and fluffy. Gently fold in mascarpone cheese and vanilla extract until smooth.
- Fold in the Whipped Cream – Carefully mix in the whipped cream, keeping it light and airy.
- Dip the Ladyfingers – Quickly dip each ladyfinger into the cooled espresso, ensuring they are soaked but not soggy.
- Assemble the Layers – Arrange a layer of espresso-soaked ladyfingers in a dish, then spread half of the mascarpone mixture on top. Repeat with another layer of soaked ladyfingers and the remaining mascarpone mixture.
- Chill to Set – Refrigerate for at least 4 hours, preferably overnight, to allow the flavors to meld.
- Dust with Cocoa & Serve – Before serving, dust generously with cocoa powder and enjoy!
How to Serve Classic Italian Tiramisu
- With Fresh Berries – A handful of raspberries or strawberries adds a fresh contrast.
- Drizzled with Chocolate – A light drizzle of melted dark chocolate makes it even more indulgent.
- Alongside Espresso – A small cup of espresso or cappuccino is the perfect pairing.
- In Individual Cups – Serve in glass cups for an elegant, single-portion presentation.
Additional Tips
- Use High-Quality Espresso – The coffee flavor is key, so use the best you can find.
- Don’t Over-Soak the Ladyfingers – A quick dip is all you need to prevent a mushy texture.
- Let It Chill Overnight – This enhances the flavors and makes slicing easier.
- Use Pasteurized Eggs – If you’re concerned about raw egg yolks, opt for pasteurized eggs or use a cooked custard method.
- Skip the Alcohol for a Family-Friendly Version – Simply leave out the rum for a non-alcoholic tiramisu.
FAQ Section
Q1: Can I use instant coffee instead of espresso?
A1: Yes, but for the best flavor, use a strong brew. Dissolve instant coffee in hot water at a high concentration.
Q2: How long does tiramisu last in the fridge?
A2: It stays fresh for up to 3 days when covered and refrigerated.
Q3: Can I freeze tiramisu?
A3: Yes! Wrap it tightly and freeze for up to 2 months. Thaw in the fridge before serving.
Q4: What can I use instead of mascarpone?
A4: A mix of cream cheese and heavy cream can work, but mascarpone gives the best texture and flavor.
Q5: Can I make tiramisu without eggs?
A5: Yes! Skip the egg yolks and use a combination of mascarpone and whipped cream for a no-egg version.
Q6: Can I make tiramisu in advance?
A6: Absolutely! It tastes even better the next day as the flavors develop.
Q7: What size dish should I use?
A7: A 9×9-inch dish works well, but you can adjust based on portion needs.
Q8: What’s the best way to get clean slices?
A8: Use a sharp knife and wipe it clean between cuts for neat portions.
Q9: Can I make this in a trifle bowl?
A9: Yes! It makes for a beautiful presentation when layered in a trifle dish.
Q10: Can I use store-bought whipped topping instead of whipping cream?
A10: Yes, but freshly whipped cream gives a better texture and taste.
Conclusion
If you love creamy, coffee-infused desserts, Classic Italian Tiramisu is a must-try! With its luscious layers and rich flavors, it’s an irresistible treat that’s sure to impress. Whether you’re making it for a special occasion or just because, this timeless dessert will always be a hit. So grab your ingredients and whip up a little slice of Italy today!
Print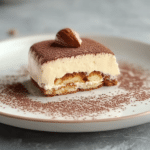
Classic Italian Tiramisu
- Prep Time: 15 minutes
- Cook Time: 57 minutes
- Total Time: 1 hour 12 minutes
- Yield: 10 servings
- Category: Dessert
- Method: Baking
- Cuisine: American
Description
This Banana Coffee Cake is rich in coffee flavor, incredibly moist, and topped with a luscious coffee glaze. The combination of ripe bananas, crunchy walnuts, and a tender crumb makes this the ultimate brunch or dessert treat. If you love coffee cake, this homemade version takes it to the next level!
Ingredients
For the Cake
- 2 cups all-purpose flour (fluffed and spooned)
- 2 large eggs
- 1 large banana (if small, use 2) peeled and mashed
- 3/4 cup granulated sugar
- 1/2 cup neutral oil (vegetable or canola)
- 1/2 cup chopped walnuts
- 3 tbsp sour cream (or substitute Greek yogurt or buttermilk)
- 2 tsp instant coffee
- 2 tbsp hot water
- 1 tsp baking soda
- 1 tsp vanilla extract
- 1/2 tsp salt
For the Coffee Glaze
- 1 cup powdered sugar
- 1 tsp instant coffee
- 3 tbsp hot water
Instructions
Step 1: Preheat and Prepare the Pan
- Preheat oven to 350°F (175°C).
- Line a standard loaf pan with parchment paper and grease the sides.
Step 2: Mix the Wet Ingredients
- In a bowl, whisk together sugar and eggs for 30 seconds until fluffy.
- Add oil, sour cream, vanilla extract, and hot coffee. Whisk to combine.
- Stir in the mashed banana.
Step 3: Mix the Dry Ingredients
- In a separate bowl, whisk together flour, baking soda, and salt.
- Fold in the chopped walnuts.
Step 4: Combine and Bake
- Gradually mix the dry ingredients into the wet ingredients until fully combined.
- Pour the batter into the prepared loaf pan.
- Bake for 57-60 minutes, or until a toothpick inserted in the center comes out clean.
Step 5: Make the Coffee Glaze
- While the loaf bakes, whisk together hot water, instant coffee, and powdered sugar.
- Once the cake is done, place it on a cooling rack with parchment paper underneath.
- Drizzle the glaze over the warm loaf and let it cool completely before slicing.
Notes
- Flour Measurement Tip: To avoid a dry cake, fluff the flour with a fork, spoon it into the measuring cup, and level it off. Do not scoop directly into the flour bag.
- Glaze Thickness: If too thin, add more powdered sugar. For a thinner glaze, add a splash of hot water or coffee.
- Substitutions: Greek yogurt, buttermilk, or crème fraîche can replace sour cream.
- Chocolate Chip Variation: Swap half of the walnuts with chocolate chips for a sweeter twist.
Nutrition
- Serving Size: 1 slice
- Calories: 166
- Sugar: 18g
- Sodium: 120mg
- Fat: 8g
- Saturated Fat: 1g
- Unsaturated Fat: 7g
- Trans Fat: 0g
- Carbohydrates: 23g
- Fiber: 1g
- Protein: 3g
- Cholesterol: 30mg