
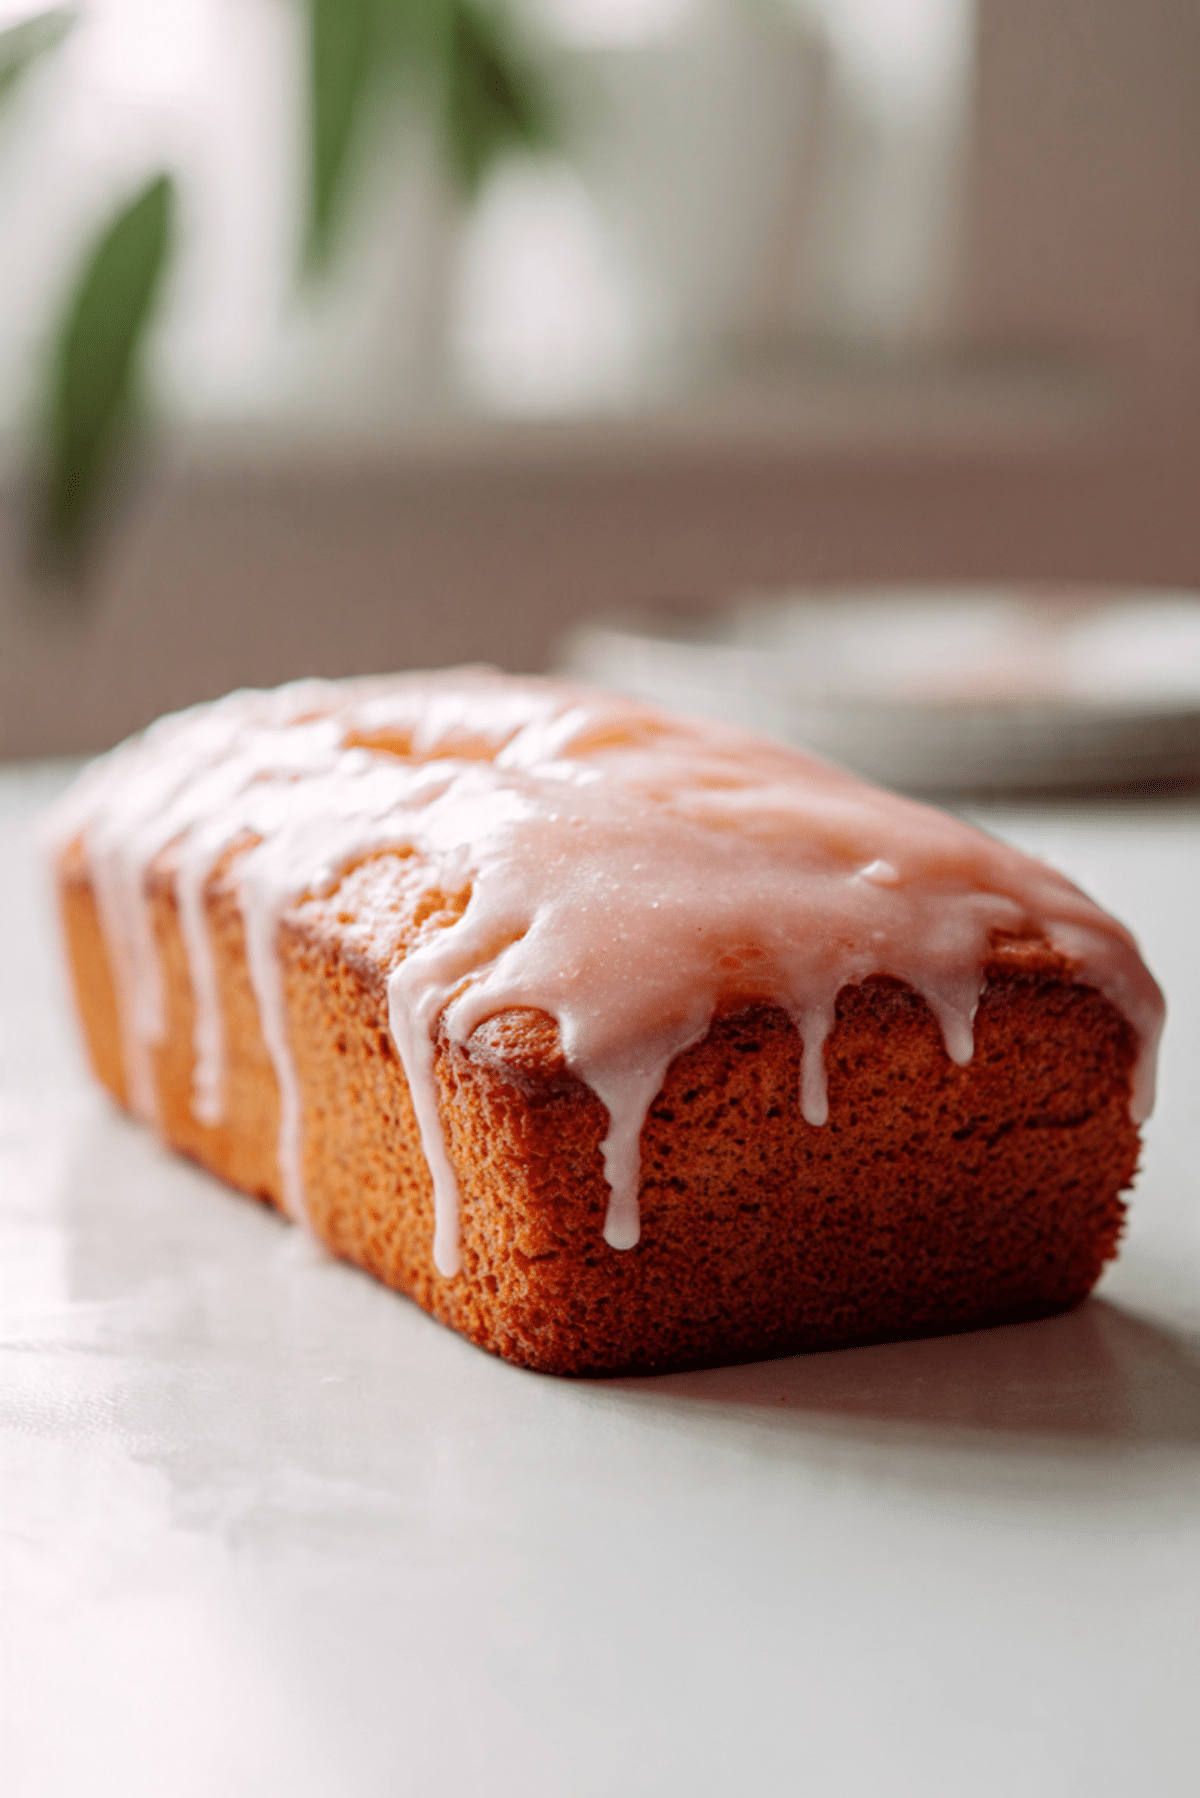
There is something about the smell of warm strawberries and vanilla drifting through the kitchen that just makes everything feel softer and sweeter. The first time I pulled this Strawberry Honeybun Cake out of the oven, I remember standing there for a second, just letting that buttery, fruity aroma wrap around me. The glaze was still slightly glossy, the swirls peeking through the top like little pink ribbons. Trust me, you’re going to love this. It is tender, rich, and layered with flavor in the best possible way.
Disclosure: This post contains affiliate links.If you click and make a purchase, I may earn a small commission at no extra cost to you.


Why This Cake Feels Like a Little Celebration in Every Bite
Some desserts are simple, and some feel like a moment. This one definitely feels like a moment. It is the kind of cake you bring to brunch and suddenly everyone wants the recipe. The soft crumb, the strawberry swirl, and that sweet glaze soaking gently into the top make every bite balanced and satisfying.
It is sweet but not overwhelming. Fruity but still buttery. Cozy yet bright. This one’s a total game-changer when you want something familiar with a fun twist.
A Sweet Twist on a Classic Favorite
Honeybun cakes have been around for years, inspired by the cinnamon swirled pastries many of us grew up loving. Traditionally, they feature warm spices and a vanilla glaze poured over a tender cake base.
This strawberry version takes that nostalgic idea and gives it a fresh, fruity spin. Instead of cinnamon, we swirl in strawberry jam, which melts slightly into the batter as it bakes. The result is a beautiful marbled interior and a flavor that feels perfect for spring gatherings, birthdays, or honestly just a random Tuesday when you need something sweet.
What Makes This Strawberry Honeybun Cake So Reliable
Before we dive into the details, let me tell you why this cake earns a permanent spot in your recipe box.
Versatile: It works for brunch, dessert, potlucks, or even as a sweet afternoon snack with coffee.
Budget-Friendly: The ingredients are pantry staples with just a jar of strawberry jam bringing the magic.
Quick and Easy: No complicated techniques here, just simple mixing and layering.
Customizable: You can adjust the swirl intensity or even play with different jam flavors.
Crowd-Pleasing: Soft, sweet, fruity, and glazed, it checks every box.
Make-Ahead Friendly: It tastes even better once the glaze settles in.
Great for Leftovers: The texture stays moist for days when stored properly.
A Few Chef Secrets Before You Start
Now let me share a few little insider tips that make all the difference.
- Use room temperature eggs and sour cream so the batter blends smoothly.
- Do not overmix the flour once it is added, this keeps the crumb tender.
- Swirl gently with a knife, do not overdo it or you will lose that pretty marbled look.
- Pour the glaze while the cake is still slightly warm so it seeps in just enough.
Small details, big results.
The Kitchen Tools That Make It Easy
Before we start mixing, gather a few essentials.
Mixing Bowls: One large for the batter and a smaller one for the glaze.
Hand Mixer or Stand Mixer: Helps create a smooth, fluffy base.
9×13 Inch Baking Pan: Gives the perfect thickness for even baking.
Rubber Spatula: For scraping every bit of batter into the pan.
Butter Knife: Perfect for swirling the jam into the batter.
Ingredients That Bring This Cake to Life
There is something beautiful about how simple ingredients come together to create something this special. Each one plays a role in building flavor and texture.
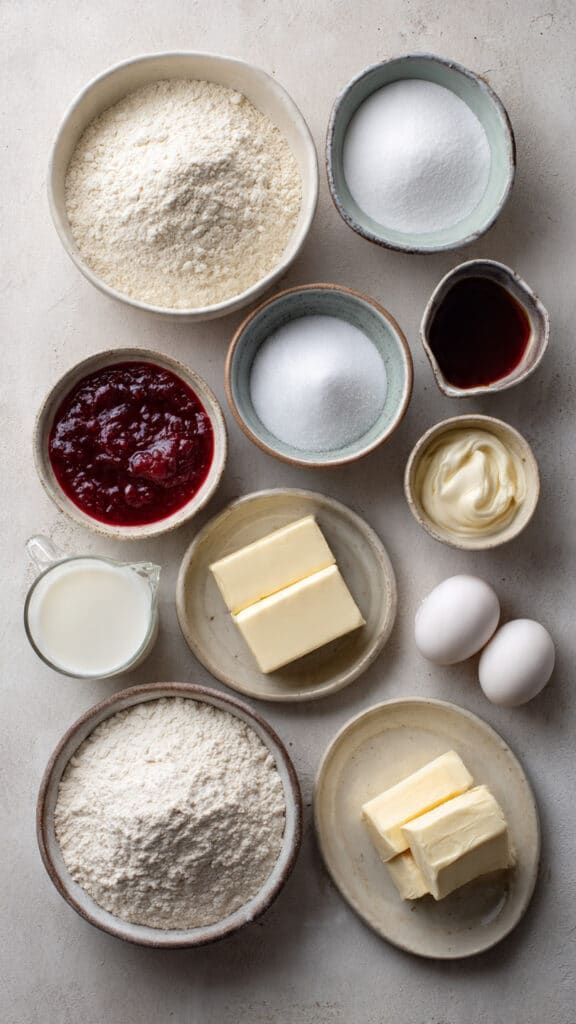
- All Purpose Flour: 2 ½ cups, gives the cake structure and softness.
- Granulated Sugar: 1 cup, adds sweetness and helps create a tender crumb.
- Brown Sugar: ½ cup, adds moisture and a subtle caramel note.
- Baking Powder: 2 teaspoons, helps the cake rise evenly.
- Salt: ½ teaspoon, balances the sweetness.
- Eggs: 3 large, provide richness and structure.
- Sour Cream: 1 cup, makes the cake incredibly moist.
- Unsalted Butter: 1 cup melted, adds richness and flavor.
- Vanilla Extract: 1 tablespoon, enhances the overall sweetness.
- Strawberry Jam: 1 cup, creates the signature swirl and fruity flavor.
- Powdered Sugar: 2 cups, forms the base of the glaze.
- Milk: 3 tablespoons, thins the glaze to the perfect pourable consistency.
Easy Ingredient Swaps If You Need Them
Sometimes you work with what you have, and that is perfectly fine.
Sour Cream: Plain Greek yogurt works beautifully.
Unsalted Butter: Use salted butter and reduce the added salt slightly.
Strawberry Jam: Raspberry or mixed berry jam for a different twist.
Milk: Heavy cream for a richer glaze.
Spotlight on the Stars of the Show
Let’s talk about the two ingredients that truly define this cake.
Strawberry Jam: This is where the magic happens. It melts slightly into the batter and creates pockets of fruity sweetness throughout.
Sour Cream: This keeps the crumb soft and tender, giving you that melt in your mouth texture.
Let’s Bake This Beauty Together
Alright, and now let’s dive into the heart of it, the baking process. Take a deep breath, preheat that oven, and let’s get started.
- Preheat Your Equipment: Preheat your oven to 350°F and lightly grease a 9×13 inch baking pan.
- Combine Ingredients: In a large bowl, mix melted butter, granulated sugar, and brown sugar until smooth. Add eggs one at a time, then stir in sour cream and vanilla extract. In a separate bowl, whisk flour, baking powder, and salt, then gradually mix into the wet ingredients until just combined.
- Prepare Your Cooking Vessel: Pour half of the batter evenly into the greased baking pan.
- Assemble the Dish: Spoon strawberry jam over the batter in small dollops. Add the remaining batter on top and gently swirl with a knife to create a marbled effect.
- Cook to Perfection: Bake for 35 to 40 minutes, or until a toothpick inserted in the center comes out clean.
- Finishing Touches: In a small bowl, whisk powdered sugar and milk until smooth. Pour over the slightly warm cake.
- Serve and Enjoy: Let the glaze set before slicing into generous squares and serving.
The Texture and Flavor Story
When you cut into it, you will notice that soft, fluffy crumb with beautiful pink swirls running through it. The glaze adds a light sweetness that seeps slightly into the top layer. You get buttery richness first, then that bright strawberry note, followed by the gentle sweetness of the glaze. Let me tell you, it’s worth every bite.
Helpful Baking Tips for the Best Results
A few extra reminders to keep everything perfect.
- Measure your flour correctly by spooning it into the cup and leveling it.
- Do not overbake, the cake should be just set in the center.
- Let the glaze sit for at least 15 minutes before slicing.
Mistakes to Avoid for a Perfect Cake
Even simple cakes can go wrong, so here is what to watch for.
- Overmixing the batter which can make the cake dense.
- Swirling too aggressively and losing the defined jam ribbons.
- Pouring glaze on a completely cooled cake which prevents absorption.
Nutrition Snapshot
Servings: 12
Calories per serving: 420
Note: These values are approximate and can vary based on ingredient brands.
Time Breakdown for Planning
Prep Time: 15 minutes
Cook Time: 40 minutes
Total Time: 55 minutes
Make It Ahead and Store It Like a Pro
This cake stores beautifully. You can bake it a day in advance and keep it covered at room temperature. For longer storage, refrigerate it in an airtight container for up to 4 days. It also freezes well. Wrap slices tightly and freeze for up to 2 months. To reheat, let it thaw at room temperature and warm slightly if desired.
Serving Ideas That Make It Shine
Serve it slightly warm with fresh strawberries on the side. A scoop of vanilla ice cream turns it into a full dessert experience. It also pairs wonderfully with coffee or a light tea for brunch.
Creative Ways to Use Leftovers
If you somehow have leftovers, here are a few fun ideas.
Cube it and layer with whipped cream for a quick trifle.
Toast a slice lightly and serve with extra jam.
Turn it into a sweet breakfast treat with a dollop of yogurt.
Extra Tips for Even More Flavor
Add a tiny splash of almond extract for a subtle depth.
Sprinkle a bit of powdered sugar on top before serving for a bakery look.
Use high quality jam for the best strawberry flavor.
Make It Look Bakery Worthy
For a showstopping finish, let the glaze drip naturally over the edges. Slice clean squares using a sharp knife wiped between cuts. A simple white plate makes the pink swirls pop beautifully.
Fun Variations to Try
Add white chocolate chips to the batter for extra sweetness.
Use lemon zest in the glaze for a bright contrast.
Swirl cream cheese with the jam for a richer filling.
Top with fresh sliced strawberries before serving.
FAQ’s
Q1: Can I use frozen strawberries instead of jam?
Fresh or frozen strawberries release too much moisture. Jam gives better texture and flavor consistency.
Q2: Can I make this in a different pan?
Yes, but baking time will vary. Watch closely for doneness.
Q3: How do I know it is fully baked?
Insert a toothpick into the center. If it comes out clean or with a few crumbs, it is ready.
Q4: Can I reduce the sugar?
You can slightly reduce it, but it may affect texture.
Q5: Does it need to be refrigerated?
It can stay at room temperature for up to 2 days, then refrigerate.
Q6: Can I double the recipe?
Yes, use two pans for even baking.
Q7: Can I make it gluten free?
Use a 1 to 1 gluten free flour blend.
Q8: Why is my cake dense?
Most likely overmixing or too much flour.
Q9: Can I skip the glaze?
You can, but the glaze adds moisture and sweetness.
Q10: What is the best way to cut clean slices?
Use a sharp knife and wipe it clean between cuts.
Conclusion
Strawberry Honeybun Cake is the kind of dessert that feels nostalgic and fresh all at once. It is soft, fruity, sweet, and comforting in every bite. Whether you are baking it for a gathering or just because you deserve something delicious, this cake delivers. Go ahead and give it a try, your kitchen is about to smell amazing.
Print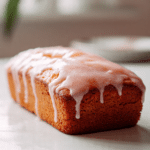
Strawberry Honeybun Cake
- Prep Time: 15 minutes
- Cook Time: 40 minutes
- Total Time: 55 minutes
- Yield: 12 servings 1x
- Category: Dessert
- Method: Baking
- Cuisine: American
- Diet: Vegetarian
Description
A soft and moist strawberry swirled cake layered with sweet strawberry jam and topped with a smooth vanilla glaze that gently soaks into every bite. Perfect for brunch, dessert, or anytime you want a fruity twist on a classic comfort cake.
Ingredients
- 2 1/2 cups all purpose flour
- 1 cup granulated sugar
- 1/2 cup brown sugar
- 2 teaspoons baking powder
- 1/2 teaspoon salt
- 3 large eggs
- 1 cup sour cream
- 1 cup unsalted butter, melted
- 1 tablespoon vanilla extract
- 1 cup strawberry jam
- 2 cups powdered sugar
- 3 tablespoons milk
Instructions
- Preheat oven to 350°F and lightly grease a 9×13 inch baking pan.
- In a large bowl, mix melted butter, granulated sugar, and brown sugar until smooth.
- Add eggs one at a time, mixing well after each addition. Stir in sour cream and vanilla extract.
- In a separate bowl, whisk together flour, baking powder, and salt. Gradually add the dry ingredients into the wet mixture and mix until just combined.
- Pour half of the batter evenly into the prepared baking pan.
- Spoon strawberry jam over the batter in small dollops.
- Add the remaining batter on top and gently swirl with a knife to create a marbled effect.
- Bake for 35 to 40 minutes, or until a toothpick inserted into the center comes out clean.
- In a small bowl, whisk powdered sugar and milk until smooth to form the glaze.
- Pour the glaze over the slightly warm cake and allow it to set before slicing and serving.
Notes
- Use room temperature eggs and sour cream for a smoother batter.
- Do not overmix the flour to keep the cake tender.
- Let the glaze sit for at least 15 minutes before slicing for clean cuts.
- Store covered at room temperature for up to 2 days or refrigerate for up to 4 days.
Nutrition
- Serving Size: 1 slice
- Calories: 420
- Sugar: 38g
- Sodium: 210mg
- Fat: 20g
- Saturated Fat: 12g
- Unsaturated Fat: 6g
- Trans Fat: 0g
- Carbohydrates: 55g
- Fiber: 1g
- Protein: 5g
- Cholesterol: 85mg


