
There is something especially comforting about pulling a homemade loaf from the oven, especially when it is tender enough for sandwiches, toast, and those thick slices that disappear with a swipe of butter before they even cool. This soft sourdough sandwich bread brings together that gentle tang people love from natural fermentation with a fluffy, sliceable crumb that feels right at home in everyday baking. Trust me, you’re going to love this, because it has that bakery-style look with a cozy homemade heart.
Disclosure: This post contains affiliate links.If you click and make a purchase, I may earn a small commission at no extra cost to you.


Why This Loaf Deserves a Spot in Your Kitchen
Some breads are made for special occasions, but this one slips right into daily life so easily that it starts to feel essential. The crust bakes up light and golden, the inside stays soft and pillowy, and every slice feels sturdy enough for lunch yet tender enough for morning toast. Let me tell you, it’s worth every bite.
The Story Behind This Comforting Loaf
Sourdough has been part of home baking for generations, long before commercial yeast became the norm in many kitchens. Traditional sourdough breads were often rustic, chewy, and deeply flavored, but over time home bakers began adapting natural fermentation into softer enriched loaves that worked beautifully for family meals. That is where sandwich-style sourdough really shines, because it blends old-world technique with the soft texture many people grew up loving.
And now that we have a feel for where this kind of bread comes from, it makes even more sense why so many bakers return to it again and again.
Reasons Bakers Keep Coming Back to This Recipe
This loaf has a lot going for it, and once you bake it, you will see exactly why it earns a regular place in the kitchen.
Versatile: It works beautifully for toast, grilled sandwiches, French toast, and even a simple buttered slice with jam. One loaf can carry you through breakfast, lunch, and snack time without missing a beat.
Budget-Friendly: The ingredient list is made from pantry basics like flour, water, starter, salt, milk, butter, and a little honey. It gives you a homemade loaf with bakery character without the bakery price tag.
Quick and Easy: For a sourdough loaf, this one feels very approachable. The process is straightforward, and the dough is pleasant to handle once it comes together.
Customizable: You can brush the top with butter for extra softness, swap honey for sugar, or use bread flour for a slightly chewier bite. Small changes still give you a beautiful result.
Crowd-Pleasing: This one’s a total game-changer for households that want the flavor of sourdough without a crust that feels too tough. Kids and adults both tend to love its soft texture.
Make-Ahead Friendly: You can build the dough around your schedule by letting it rise more slowly in a cooler room or overnight in the refrigerator. That flexibility makes baking feel a lot less stressful.
Great for Leftovers: A day-old loaf turns into excellent toast, croutons, bread pudding, or golden grilled cheese. Nothing goes to waste when the bread is this good.
A Few Baker’s Secrets for the Best Texture
Before we get into the ingredients, here are a few small details that make a big difference in the final loaf.
- Use an active, bubbly starter that has recently peaked, because it gives the dough better lift and a lighter crumb.
- Warm the milk slightly before mixing so the dough feels supple and cozy, not stiff and sluggish.
- Knead until the dough looks smooth and elastic, because that strength helps create neat slices later.
- Do not rush the final proof, since under-proofed dough can bake up dense while over-proofed dough may collapse.
- Brush the top with melted butter after baking for an extra soft crust and a beautiful finish.
Kitchen Tools That Make the Process Easier
Bread baking feels much more relaxed when a few dependable tools are nearby.
Large mixing bowl: Gives you plenty of room to combine and knead the dough comfortably.
Kitchen scale or measuring cups and spoons: Accurate measuring helps keep the dough balanced and consistent.
Loaf pan, 9 x 5 inch: Shapes the dough into that classic sandwich loaf form with even slices.
Dough scraper: Handy for handling soft dough and keeping the work surface tidy.
Clean kitchen towel or plastic wrap: Protects the dough while it rises so it does not dry out.
Pastry brush: Useful for brushing the loaf with butter before or after baking.
Wire rack: Helps the bread cool properly so the crumb sets without becoming gummy.
What You Will Need to Bring This Loaf to Life
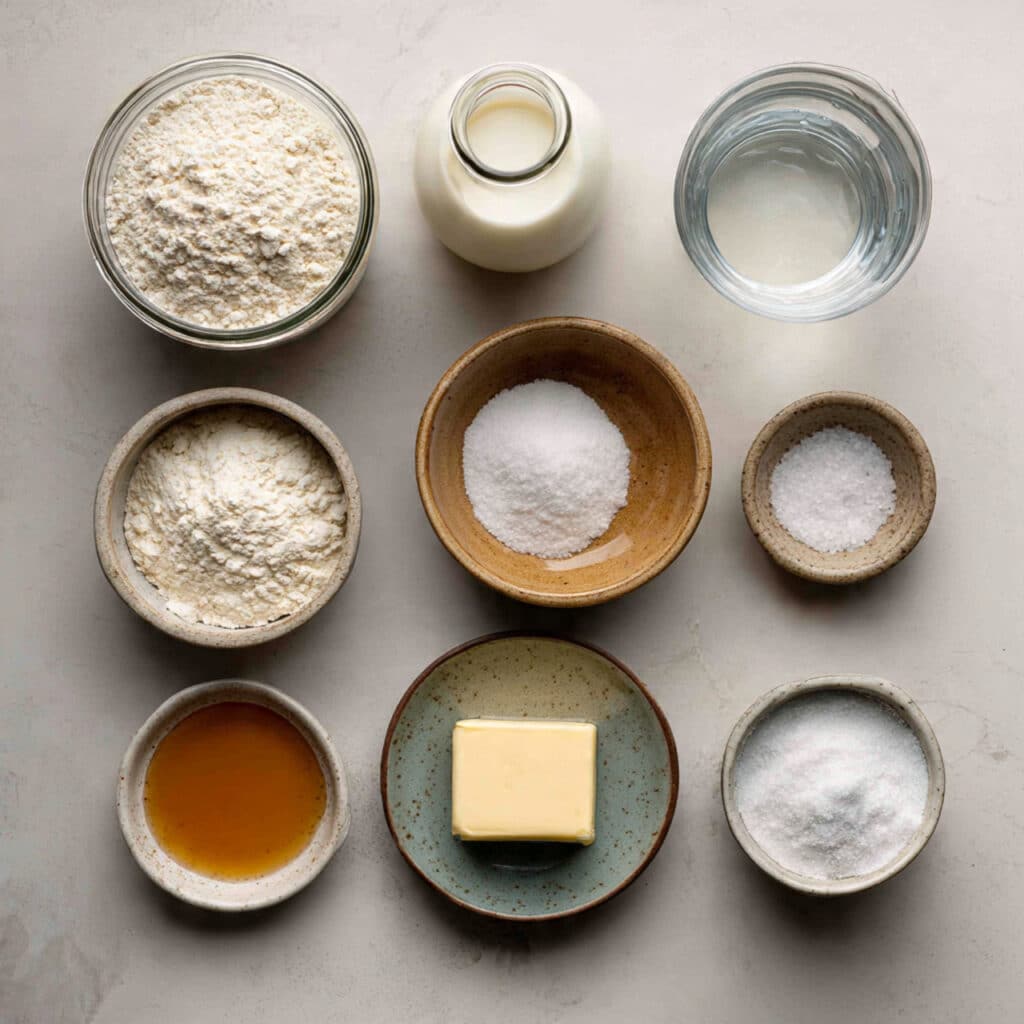
Now let’s dive into the ingredients, because this is where the magic really starts. Each one has a job to do, and together they create a loaf that is soft, flavorful, and beautifully balanced.
- Active sourdough starter: 120 grams, about 1/2 cup. This is the heart of the loaf, bringing rise, flavor, and that signature mild tang.
- Warm whole milk: 240 grams, 1 cup. Milk softens the crumb and gives the bread a richer, more tender texture.
- Warm water: 60 grams, 1/4 cup. This helps hydrate the dough and keeps it soft without making it too heavy.
- Honey: 21 grams, 1 tablespoon. A little honey adds subtle sweetness and encourages lovely browning.
- Unsalted butter, softened: 28 grams, 2 tablespoons. Butter brings softness, flavor, and that delicate sandwich-bread feel.
- Bread flour: 500 grams, about 4 cups. Bread flour gives the loaf structure while still allowing for a tender interior.
- Fine sea salt: 10 grams, 1 3/4 teaspoons. Salt sharpens flavor and strengthens the dough so the loaf bakes up beautifully.
Easy Swaps When You Need Flexibility
Even a dependable loaf can use a little wiggle room, and these simple substitutions make it easier to work with what you have.
Whole milk: Warm 2 percent milk.
Honey: Granulated sugar or maple syrup.
Unsalted butter: Neutral oil or plant-based butter.
Bread flour: All-purpose flour, though the crumb may be slightly less chewy and structured.
The Ingredients That Truly Make the Difference
A few ingredients deserve a little spotlight, because they shape the personality of the loaf in a big way.
Active sourdough starter: This is what gives the bread its gentle tang and natural lift. A lively starter creates a loaf that feels airy, fragrant, and full of character.
Whole milk: Milk is one of the biggest reasons this loaf stays soft and sandwich-friendly. It rounds out the flavor and helps the crumb feel plush rather than rustic.
Let’s Bake This Soft and Tangy Loaf
Once the ingredients are measured and ready, the whole process begins to feel calm and rewarding. Here are the steps you’re going to follow, and each one brings the loaf a little closer to that golden, soft finish.
- Preheat Your Equipment: Grease a 9 x 5 inch loaf pan and set it aside. If your kitchen runs cool, briefly warm your oven, then turn it off so the dough has a comfortable spot to rise later.
- Combine Ingredients: In a large bowl, whisk together the active sourdough starter, warm milk, warm water, and honey until smooth. Add the softened butter, bread flour, and salt, then mix until a shaggy dough forms.
- Prepare Your Cooking Vessel: Turn the dough onto a lightly floured surface and knead for 8 to 10 minutes, until smooth and elastic. Place it back into a lightly greased bowl, cover, and let it rise until puffy and nearly doubled, about 4 to 6 hours depending on the strength of your starter and room temperature.
- Assemble the Dish: Gently deflate the dough and shape it into a tight log. Place it seam-side down in the prepared loaf pan, cover again, and let it rise until the dough crowns about 1 inch above the rim, about 2 to 4 hours.
- Cook to Perfection: Preheat the oven to 375°F, which is 190°C. Bake for 35 to 40 minutes, until the top is golden and the loaf sounds hollow when tapped. If the top browns too quickly, loosely tent it with foil during the final part of baking.
- Finishing Touches: Remove the loaf from the pan and brush the top with a little melted butter for a softer crust. Let it cool completely on a wire rack before slicing.
- Serve and Enjoy: Slice with a serrated knife and enjoy the tender crumb, delicate tang, and golden crust in whatever way makes you happiest.
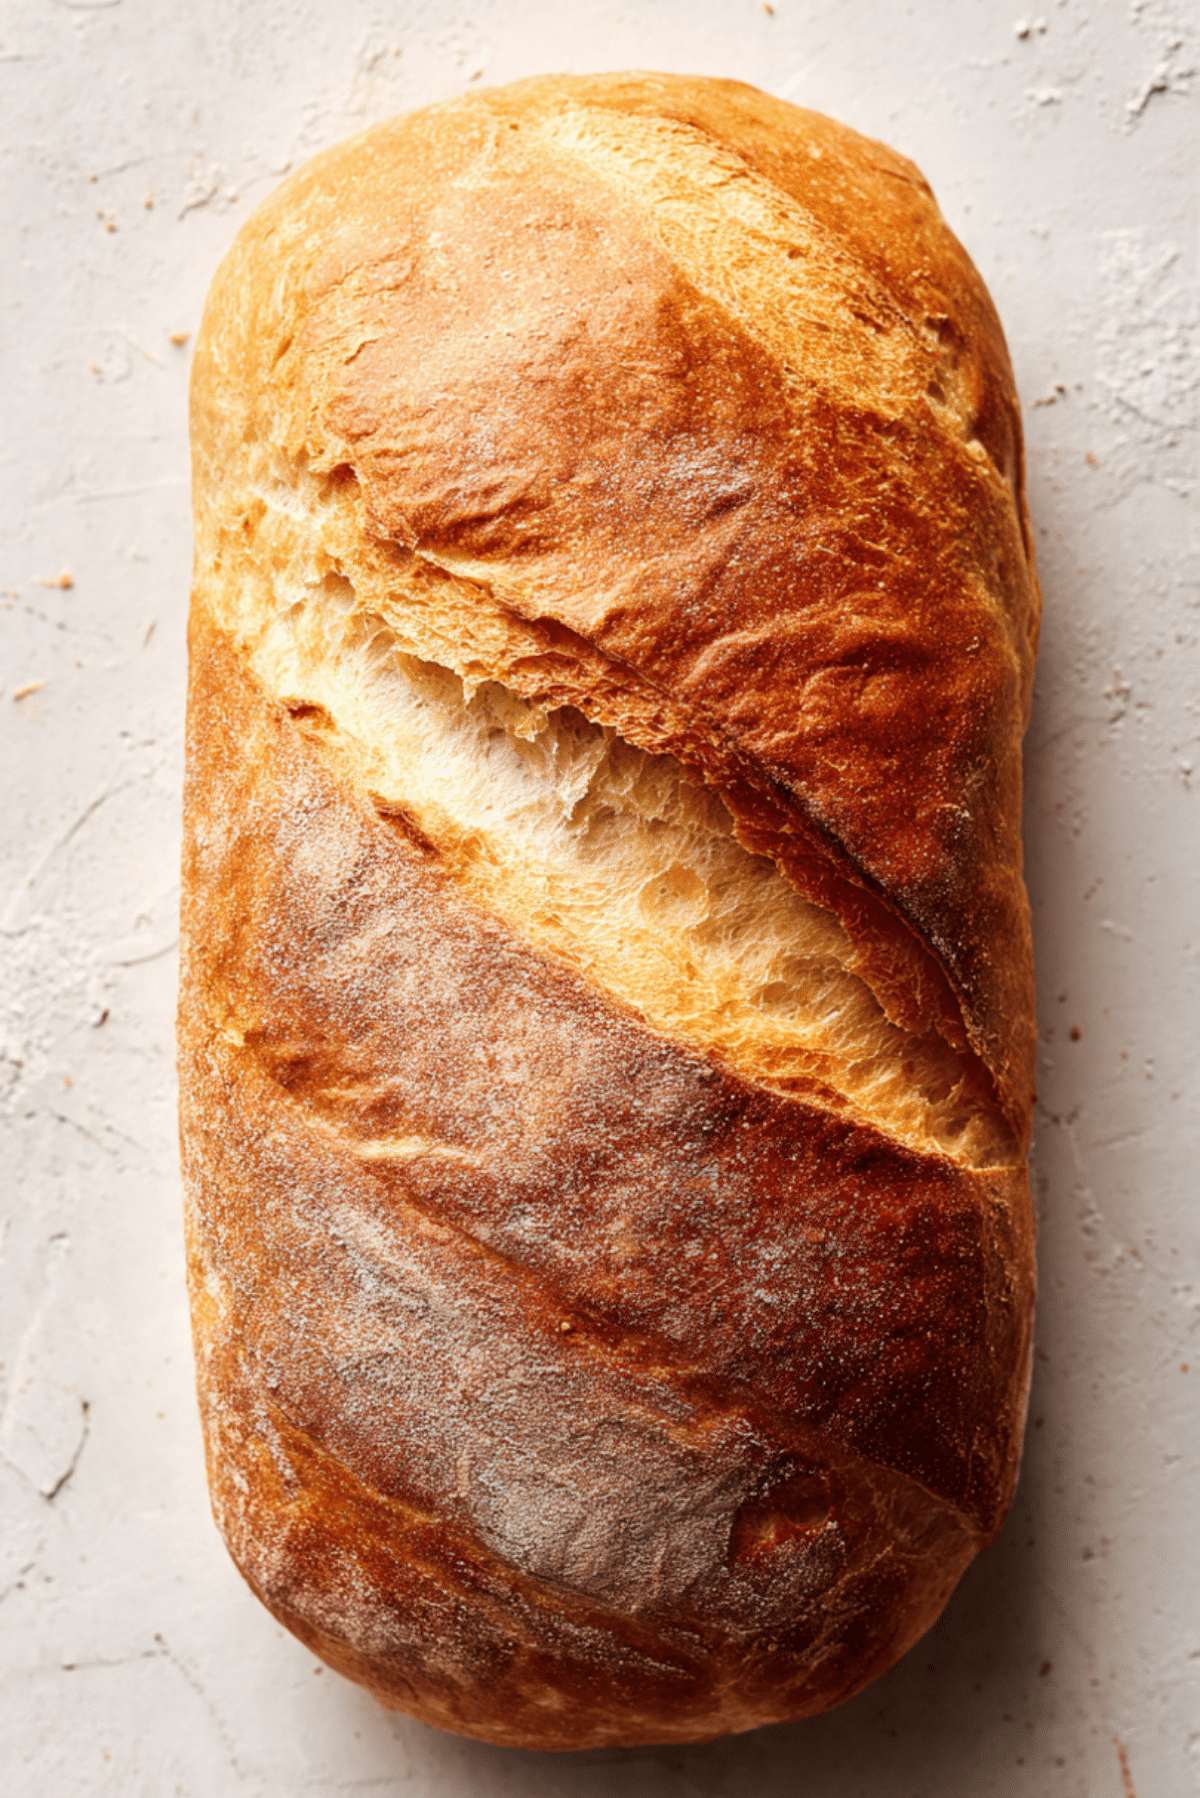
The Flavor and Texture That Make It So Special
This loaf has a beautiful balance that keeps every slice interesting. The crust is thin and lightly golden, soft enough to bite through easily, while the inside stays fluffy, moist, and tender. The flavor starts with a gentle buttery richness, then gives way to a mild sourdough tang that never feels too sharp. As it cools, the aroma becomes even more inviting, warm, slightly creamy, and just a little toasty around the edges.
Helpful Tips for a Better Bake Every Time
A few small tricks can make the whole process smoother and the final loaf even better.
- Use a mature starter: A starter that is active and bubbly will help the loaf rise more reliably and give a lighter crumb.
- Be patient with proofing: Sourdough moves at its own pace, so watch the dough more than the clock.
- Cool before slicing: This is hard, I know, but cutting too early can make the crumb seem gummy.
- Grease the pan well: A well-greased pan helps the loaf release cleanly and keeps the sides looking beautiful.
What Can Trip You Up, and How to Avoid It
Even a cozy loaf like this has a few places where things can go off track, but they are easy to manage once you know what to watch for.
- Dense loaf: This often means the starter was not active enough or the dough needed more rising time. Give fermentation a little more patience.
- Dry texture: Too much flour during mixing or kneading can make the dough stiff. Keep it soft and only lightly flour the work surface.
- Collapsed top: Over-proofing can cause the dough to rise too far before baking. Bake once the loaf is nicely domed but still holds structure.
- Gummy slices: Cutting while the bread is still warm can compress the crumb. Let it cool fully for cleaner slices.
A Quick Look at the Nutrition
Servings: 12 slices
Calories per serving: 180
Note: These are approximate values.
Timing That Helps You Plan Your Bake
Prep Time: 20 minutes
Cook Time: 40 minutes
Total Time: 6 hours 20 minutes
Make-Ahead and Storage Tips for Busy Days
One of the nicest things about this loaf is how well it fits into a real kitchen schedule. You can mix the dough earlier in the day and let it rise gradually, or refrigerate the shaped loaf overnight for a slower final proof and bake it the next morning.
Once baked and cooled, store the loaf tightly wrapped or in an airtight container at room temperature for up to 4 days. For longer storage, slice it first and freeze the slices in a sealed freezer bag for up to 2 months. Reheat slices in the toaster, or let them thaw at room temperature for a soft, fresh feel.
Best Ways to Serve This Everyday Favorite
This bread shines in simple moments and hearty meals alike. Use it for classic sandwiches with turkey or vegetables, toast it for breakfast with butter and jam, or turn it into golden grilled cheese with a crisp skillet finish. It also pairs beautifully with soup, scrambled eggs, or a generous spread of cream cheese and sliced cucumber.
Clever Ways to Use Every Last Slice
Leftovers never feel boring here, because this loaf transforms easily into something new. Thick cubes make excellent baked croutons, especially for tomato soup or creamy salads. Slightly stale slices are perfect for French toast, bread pudding, or savory breakfast strata. You can even make homemade breadcrumbs for casseroles and crispy toppings.
A Few More Tips to Keep in Your Back Pocket
This loaf is wonderfully forgiving, but a little extra care always shows in the final result. Let the dough rest for 10 minutes before kneading if it feels sticky and rough at first, because that short pause helps the flour absorb the liquid. Use a serrated knife for slicing so the crumb stays fluffy and intact. And for the softest crust of all, cover the cooled loaf loosely with a clean towel for the first few hours after baking.
How to Make It Look Extra Special
A beautiful loaf does not need much, but a few details make it feel truly bakery-worthy. Brush the top with melted butter right after baking so it gleams softly. Slice it evenly and stack the pieces slightly fanned out on a wooden board or clean plate for serving. A neat, golden top with a gentle dome gives the whole loaf that homemade but polished look people instantly love.
Easy Variations to Try Next Time
Once you bake the original loaf, it becomes very tempting to play with the formula a little.
Honey Oat Version: Sprinkle rolled oats on top after brushing with milk or butter for a cozy, wholesome finish.
Softer Dinner Roll Dough: Divide the dough into rolls instead of shaping one loaf, then bake until fluffy and golden.
Light Whole Wheat Twist: Replace 100 grams, about 3/4 cup, of the bread flour with whole wheat flour for a slightly nuttier flavor.
Cinnamon Raisin Style: Add 1 teaspoon cinnamon and 100 grams, about 2/3 cup, raisins for a breakfast-ready loaf.
Seeded Sandwich Loaf: Knead in 2 tablespoons sunflower seeds or sesame seeds for added texture and a subtle nutty bite.
FAQ’s
Q1: Can I use all-purpose flour instead of bread flour?
Yes, you can. The loaf may be slightly softer in structure and a little less chewy, but it will still bake up beautifully.
Q2: Does this bread taste very sour?
No, it usually has a mild tang rather than a strong sour flavor. The milk, butter, and honey help keep the taste balanced and gentle.
Q3: How do I know my starter is ready to use?
It should look bubbly, expanded, and airy, ideally at or near its peak after feeding. A lively starter helps the loaf rise much better.
Q4: Can I refrigerate the dough overnight?
Yes. After shaping the dough, you can refrigerate it for the final rise. Let it sit at room temperature if needed before baking, depending on how much it rose in the refrigerator.
Q5: Why is my dough sticky?
This dough is meant to feel soft. A little stickiness is normal, especially early on, and it usually becomes smoother as you knead.
Q6: Can I make this loaf without milk?
Yes, but the crumb may be slightly less soft and rich. You can use warm water instead, or a plain unsweetened dairy-free milk.
Q7: What size pan works best?
A 9 x 5 inch loaf pan is ideal for this amount of dough. It gives the loaf enough room to rise into a classic sandwich shape.
Q8: How should I slice it cleanly?
Wait until the loaf is completely cool, then use a serrated knife with gentle sawing motions. That keeps the crumb from squishing.
Q9: Can I freeze the whole loaf?
Yes, though freezing individual slices is often more convenient. Wrap them well so they stay fresh and easy to grab when needed.
Q10: What makes this bread soft compared to rustic sourdough?
The milk, butter, and honey all contribute to a more tender crumb, and baking it in a loaf pan helps create that soft sandwich-bread shape and texture.
Conclusion
This soft sourdough sandwich bread is the kind of loaf that makes everyday meals feel a little warmer and a lot more satisfying. It is tender, lightly tangy, easy to slice, and wonderfully adaptable for everything from toast to sandwiches. Trust me, you’re going to love this, because once you bake it and smell that golden loaf cooling on the counter, it is very hard to go back to store-bought.
Print
Soft Sourdough Sandwich Bread
- Prep Time: 20 minutes
- Cook Time: 40 minutes
- Total Time: 6 hours 20 minutes
- Yield: 12 slices 1x
- Category: Bread
- Method: Baking
- Cuisine: American
- Diet: Vegetarian
Description
A tender and flavorful homemade sandwich loaf made with active sourdough starter, warm milk, butter, and honey. This bread has a soft crumb, a light golden crust, and a gentle tang that makes it perfect for toast, sandwiches, and everyday baking.
Ingredients
- 120 grams active sourdough starter (about 1/2 cup)
- 240 grams warm whole milk (1 cup)
- 60 grams warm water (1/4 cup)
- 21 grams honey (1 tablespoon)
- 28 grams unsalted butter, softened (2 tablespoons)
- 500 grams bread flour (about 4 cups)
- 10 grams fine sea salt (1 3/4 teaspoons)
Instructions
- Grease a 9 x 5 inch loaf pan and set it aside.
- In a large bowl, whisk together the active sourdough starter, warm milk, warm water, and honey until smooth.
- Add the softened butter, bread flour, and salt, then mix until a shaggy dough forms.
- Turn the dough onto a lightly floured surface and knead for 8 to 10 minutes, until smooth and elastic.
- Place the dough in a lightly greased bowl, cover, and let it rise until puffy and nearly doubled, about 4 to 6 hours.
- Gently deflate the dough and shape it into a tight log.
- Place the dough seam-side down in the prepared loaf pan, cover, and let it rise until the dough crowns about 1 inch above the rim, about 2 to 4 hours.
- Preheat the oven to 375°F (190°C).
- Bake for 35 to 40 minutes, until the top is golden and the loaf sounds hollow when tapped. Tent loosely with foil if the top browns too quickly.
- Remove the loaf from the pan, brush the top with melted butter if desired, and cool completely on a wire rack before slicing.
Notes
- Use a bubbly, recently fed starter for the best rise.
- Do not slice the loaf while it is still warm, or the crumb may turn gummy.
- Store tightly wrapped at room temperature for up to 4 days.
- Freeze sliced bread in a sealed freezer bag for up to 2 months.
Nutrition
- Serving Size: 1 slice
- Calories: 180
- Sugar: 2 g
- Sodium: 210 mg
- Fat: 3 g
- Saturated Fat: 2 g
- Unsaturated Fat: 1 g
- Trans Fat: 0 g
- Carbohydrates: 32 g
- Fiber: 1 g
- Protein: 5 g
- Cholesterol: 8 mg