

There’s something magical about homemade pierogi. These little pockets of joy are packed with flavor, wrapped in a tender dough, and filled with your choice of delicious goodness. Whether you’re a fan of classic potato and cheese, savory meat fillings, or sweet fruit variations, pierogi are the ultimate comfort food. They bring warmth to any meal and make for a fun, hands-on cooking experience. Trust me, once you try making them from scratch, you’ll never go back to store-bought!
Disclosure: This post contains affiliate links.If you click and make a purchase, I may earn a small commission at no extra cost to you.


Why You’ll Love This Pierogi Recipe
This recipe isn’t just about the ingredients—it’s about creating moments. Whether you’re cooking for a casual family dinner, hosting a get-together with friends, or simply indulging in some comforting flavors for yourself, this dish is versatile enough to fit the occasion.
Versatile: Perfect for busy weeknights or as a standout dish at gatherings. Imagine rolling out the dough, filling each pierogi with love, and watching your family’s eyes light up as they take their first bite.
Budget-Friendly: Uses ingredients you likely already have in your kitchen. No fancy or expensive components—just simple, wholesome flavors that make you feel at home.
Quick and Easy: Straightforward steps that even beginners can follow. Don’t worry if you’ve never made homemade pierogi before—this recipe is here to guide you every step of the way.
Customizable: Easy to tweak with different fillings and toppings. Whether you love a creamy potato and cheese filling or prefer something heartier like ground meat, you can make this recipe your own.
Crowd-Pleasing: A guaranteed hit with both kids and adults. You can’t go wrong with a plate of warm, buttery pierogi!
Ingredients
Here’s the magic of this dish—it’s made with simple ingredients that come together to create something extraordinary.
Dough: The foundation of every great pierogi. Soft, pliable, and perfect for encasing delicious fillings.
Flour: The base ingredient that gives structure to the dough. All-purpose flour works best for that perfect consistency.
Egg: Helps bind the dough and adds a slight richness to the texture.
Sour Cream: A secret ingredient that keeps the dough soft and tender.
Butter: Adds a subtle richness and makes the dough easy to work with.
Salt: Enhances the overall flavor of the dough.
Potato and Cheese Filling: The most classic and beloved pierogi filling. Creamy mashed potatoes mixed with melted cheese—comfort food at its finest.
Potatoes: The main ingredient for a smooth, creamy filling. Russet potatoes work best for their fluffy texture.
Cheddar Cheese: Sharp, melty, and full of flavor. Feel free to use your favorite cheese for a twist.
Butter and Onion: Sautéed onions add a hint of sweetness and depth, while butter brings everything together.
Salt and Pepper: Simple seasonings that elevate the filling’s taste.
Instructions
Prepare the Dough: In a large bowl, mix flour, egg, sour cream, melted butter, and salt until a soft dough forms. Knead for a few minutes until smooth, then cover and let it rest. This step allows the gluten to relax, making it easier to roll out.
Make the Filling: While the dough rests, boil potatoes until fork-tender. Drain and mash them with cheese, sautéed onions, butter, salt, and pepper. The filling should be creamy and well-seasoned.
Roll and Cut the Dough: Roll out the dough on a floured surface until it’s about 1/8-inch thick. Use a round cutter or glass to cut circles.
Fill the Pierogi: Place a spoonful of filling in the center of each dough circle. Fold the dough over and press the edges together, sealing tightly. Use a fork to crimp the edges for an extra-secure seal.
Cook the Pierogi: Bring a pot of salted water to a gentle boil. Drop in the pierogi and cook until they float to the surface. This means they’re perfectly cooked inside. Remove with a slotted spoon.
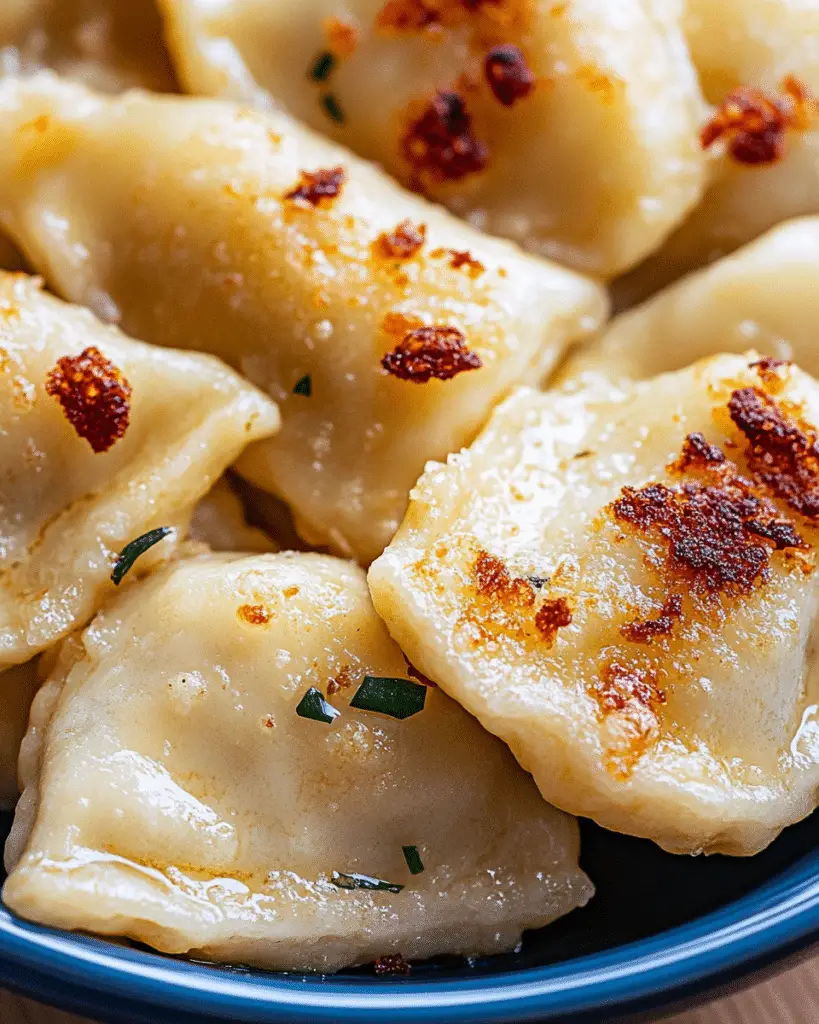
Pan-Fry for Extra Flavor (Optional): For a crispy golden exterior, sauté the boiled pierogi in a bit of butter until lightly browned. This adds an irresistible crunch to every bite.
Serve and Enjoy: Plate your warm pierogi and top with sour cream, caramelized onions, or fresh herbs. Time to dig in!
How to Serve Pierogi
Fresh Salads: A crisp green salad with a tangy vinaigrette balances the richness of the pierogi.
Crusty Bread: Serve with warm bread to soak up any buttery goodness left on the plate.
Creamy Accompaniments: A dollop of sour cream or Greek yogurt makes each bite even more indulgent.
Vegetable Sides: Roasted or steamed vegetables add a pop of color and nutrition to your meal.
As a Standalone: Sometimes, a plate of pierogi is all you need—just sprinkle with fresh herbs for the perfect finishing touch.
Additional Tips
Prep Ahead: Make the dough and filling in advance to save time. Refrigerate them separately and assemble when ready.
Spice It Up: Add a pinch of paprika, garlic powder, or cayenne to the filling for an extra kick.
Dietary Adjustments: Swap regular flour for gluten-free alternatives or use dairy-free cheese for a plant-based version.
Storage Tips: Store cooked pierogi in an airtight container in the fridge for up to 3 days. Reheat by boiling or pan-frying.
Double the Batch: These freeze beautifully! Place uncooked pierogi on a baking sheet, freeze until firm, then transfer to a freezer bag. Boil straight from frozen when ready to enjoy.
FAQ
Q1: Can I use store-bought dough?
A1: Yes! While homemade dough is best, pre-made dumpling or ravioli dough works in a pinch.
Q2: What’s the best cheese for the filling?
A2: Sharp cheddar is a classic choice, but you can use gouda, ricotta, or even cream cheese for a twist.
Q3: Can I make these ahead of time?
A3: Absolutely! Assemble the pierogi, place them on a tray, and refrigerate until ready to cook.
Q4: How do I prevent pierogi from sticking together?
A4: Toss them with a bit of butter or oil after boiling to keep them from clumping.
Q5: Can I bake pierogi instead of boiling?
A5: Boiling is traditional, but you can bake them at 375°F until golden for a different texture.
Q6: What’s the best way to reheat pierogi?
A6: Pan-frying in butter is the best way to bring them back to life! You can also microwave or steam them.
Q7: How do I make a dessert version?
A7: Swap the filling for sweetened ricotta, berries, or apples and serve with powdered sugar!
Q8: Can I freeze cooked pierogi?
A8: Yes, but uncooked pierogi freeze better and retain their texture when boiled fresh.
Q9: Can I make mini pierogi?
A9: Definitely! Just cut smaller circles and adjust the filling amount accordingly.
Q10: What can I do with leftover filling?
A10: Use it as a side dish, spread it on toast, or mix it into scrambled eggs for a tasty twist!
Final Thoughts
Making homemade pierogi is a rewarding experience that fills your kitchen with warmth and your plate with pure comfort. Whether you enjoy them boiled, pan-fried, or loaded with toppings, these little dumplings never disappoint. So roll up your sleeves, grab your rolling pin, and let’s make some magic—one delicious bite at a time!
Print
Pierogi Recipe
- Prep Time: 1 hour 30 minutes
- Cook Time: 30 minutes
- Total Time: 2 hours
- Yield: 12 servings 1x
- Category: Main Course
- Method: Boiling
- Cuisine: Eastern European
Description
These homemade pierogi are stuffed with a creamy, cheesy potato filling, then boiled and tossed with crispy bacon and melted butter for the ultimate comfort food. Serve them with sour cream for a rich, satisfying dish. Perfect for a cozy family dinner or a special occasion!
Ingredients
For the Potato Filling:
- 2 lbs Russet potatoes (about 5 medium), peeled
- 1/2 teaspoon Salt
- 2 tablespoons Unsalted butter, melted
- 2 oz Cream cheese, softened
- 3/4 cup Mozzarella cheese, shredded
For the Pierogi Dough:
- 1 cup Warm water
- 1/4 cup Whole milk
- 2 tablespoons Sour cream
- 3 tablespoons Extra light olive oil (or vegetable oil)
- 1 Large egg
- 1 1/2 teaspoons Fine sea salt (plus more for cooking)
- 4 cups All-purpose flour (measured correctly)
For the Bacon Topping (for ⅓ batch):
- 4 oz Bacon, chopped
- 2 tablespoons Unsalted butter
- Sour cream (optional, for serving)
Instructions
Make the Potato Filling:
- Place peeled potatoes in a pot and add enough water to cover them. Bring to a boil over medium-high heat and cook for 25 minutes, or until fork-tender.
- Drain the potatoes and let them cool for 5 minutes.
- Mash the potatoes until smooth, then mix in salt, melted butter, cream cheese, and shredded mozzarella. Partially cover and set aside.
Prepare the Pierogi Dough:
- In a stand mixer bowl (or large mixing bowl), whisk together warm water, milk, sour cream, egg, oil, and salt.
- Using a dough hook (or a wooden spoon if mixing by hand), add 2 cups of flour and mix until incorporated.
- Gradually add the remaining flour ½ cup at a time, mixing well after each addition. Add flour 1 tablespoon at a time until the dough no longer sticks to the sides of the bowl or hands.
- Knead the dough for 2-3 minutes until smooth and elastic. Cover with plastic wrap and let rest for 30 minutes.
Shape the Pierogi:
- Divide the dough into two pieces. Keep one piece covered while rolling out the other on a floured surface to about ⅛-inch thickness.
- Use a 3-inch round cookie cutter to cut dough circles as close together as possible.
- Place ½ tablespoon of potato filling in the center of each round.
- Fold the dough over the filling and pinch the edges tightly to seal. For extra security, crimp the edges with a pinch-and-twist motion.
- Repeat with the remaining dough and filling. Keep the shaped pierogi covered to prevent drying.
Make the Bacon Topping:
- Before cooking the pierogi, sauté the chopped bacon in a medium skillet over medium heat until crispy.
- Melt in butter and remove from heat. Set aside.
Cook the Pierogi:
- Bring a large pot of water to a rolling boil and add 1 tablespoon of salt.
- Add the fresh or frozen pierogi in batches. Cook for about 2 minutes, or until the pierogi float to the top and the water returns to a boil.
- Remove the pierogi with a slotted spoon and place them in a bowl, drizzling with buttery bacon mixture between layers to prevent sticking.
- Serve warm with sour cream on the side.
Notes
- Freezing: To freeze, arrange uncooked pierogi in a single layer on a parchment-lined baking sheet. Freeze until solid, then transfer to an airtight container. Cook from frozen, adding an extra 1-2 minutes to the boiling time.
- Make-Ahead: Dough can be made a day ahead and refrigerated. Let it come to room temperature before rolling.
- Variations: Try adding sautéed onions, cheddar cheese, or caramelized mushrooms to the potato filling for extra flavor.
Nutrition
- Serving Size: 1 serving
- Calories: 380
- Sugar: 1g
- Sodium: 500mg
- Fat: 15g
- Saturated Fat: 6g
- Unsaturated Fat: 7g
- Trans Fat: 0g
- Carbohydrates: 50g
- Fiber: 3g
- Protein: 10g
- Cholesterol: 35mg