
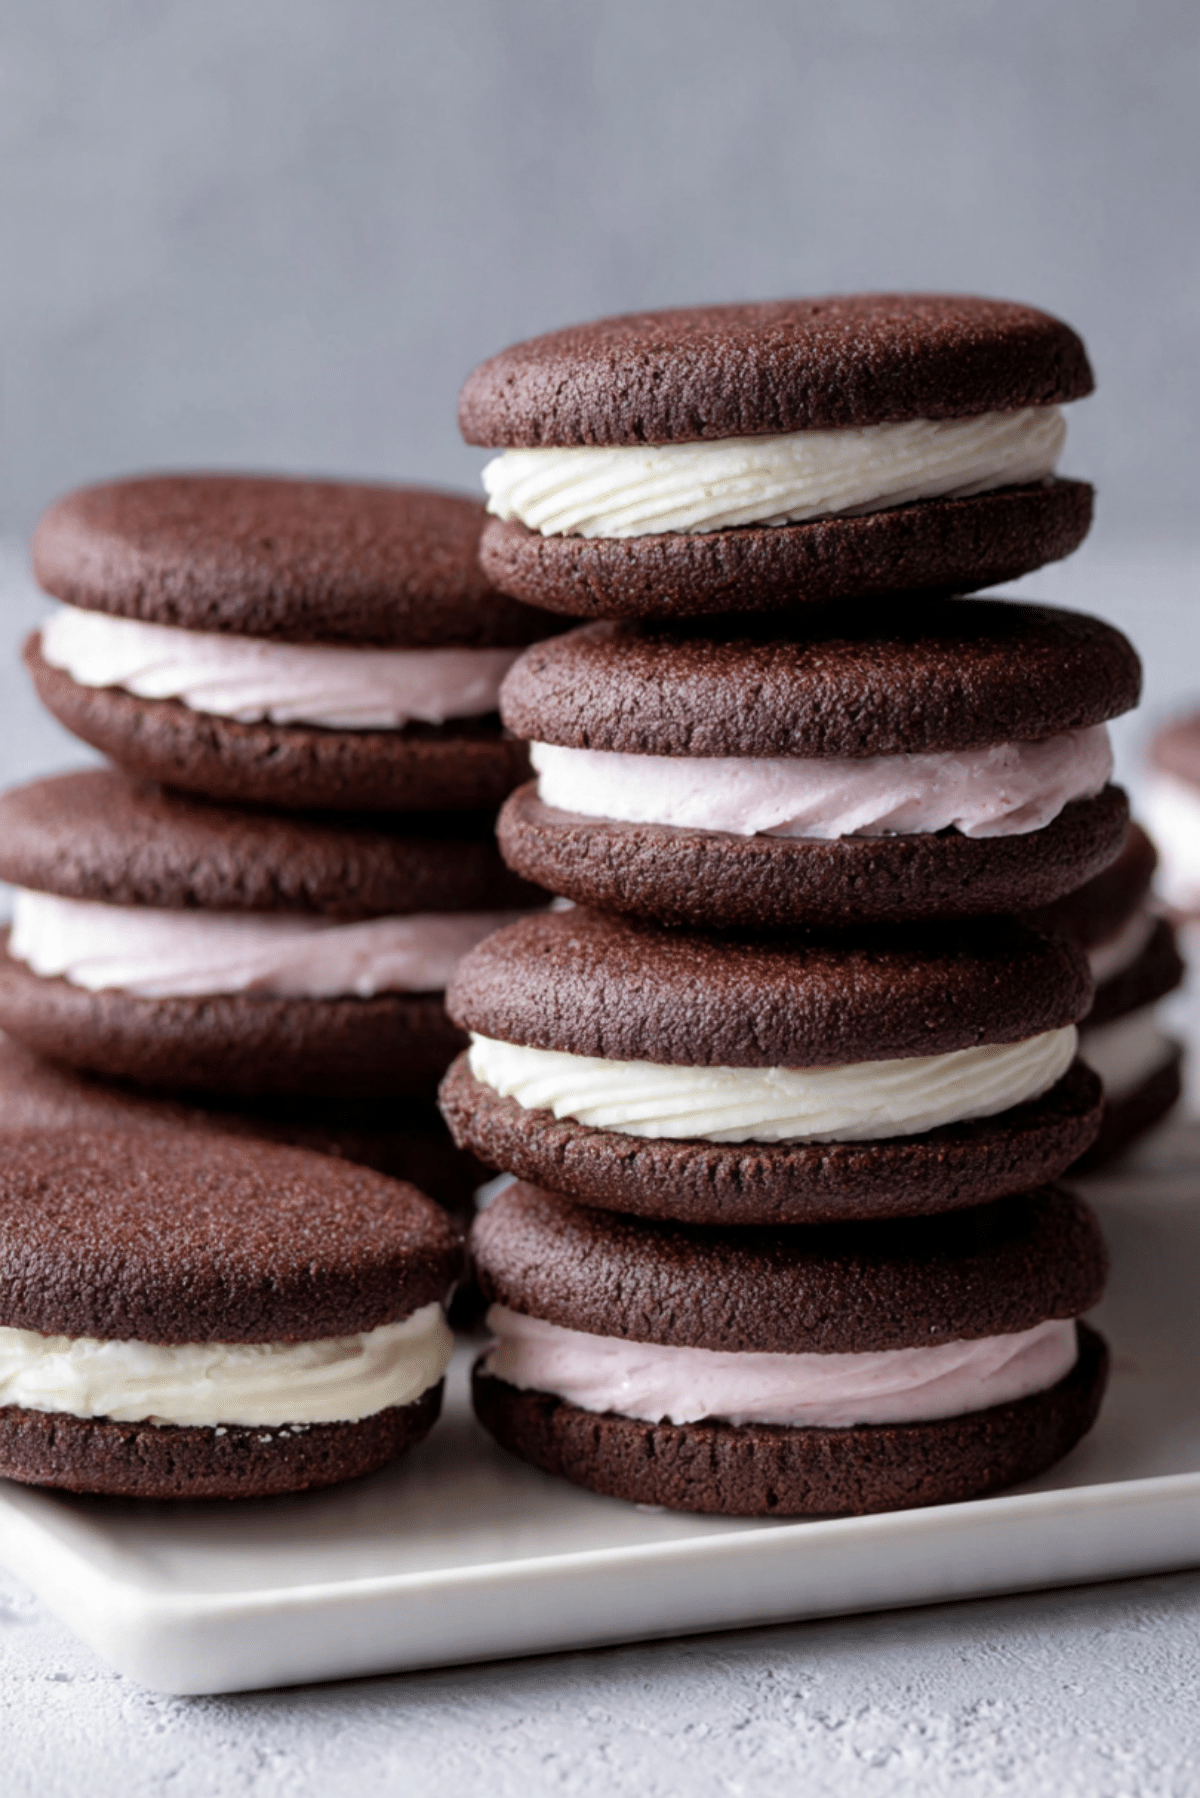
There is something almost magical about twisting apart a chocolate sandwich cookie and seeing that creamy center peeking through. Oreo-Inspired Cocoa Sandwich Cookies bring that same joy straight into your kitchen, but with an even richer cocoa flavor and a soft, melt in your mouth filling. The deep dark cookie layers have that classic snap, while the sweet cream in the middle ties everything together. Trust me, you’re going to love this. One bite and you will get that nostalgic crunch followed by silky sweetness that lingers just long enough to make you reach for another.
Disclosure: This post contains affiliate links.If you click and make a purchase, I may earn a small commission at no extra cost to you.


The Chocolate Cookie That Never Goes Out of Style
Some desserts never fade, and chocolate sandwich cookies are one of them. The contrast between crisp cocoa cookies and smooth vanilla filling creates a balance that feels timeless. These homemade versions have a slightly deeper chocolate flavor, thanks to generous cocoa powder, and the filling can be made thick and fluffy just the way you like it. This one’s a total game-changer because you control the texture, the sweetness, and even the thickness of that iconic center layer.
Inspired by a Classic Favorite
These cookies take inspiration from the well loved chocolate sandwich cookie that has been part of snack plates and lunchboxes for decades. The idea is simple, two thin cocoa cookies pressed together with a creamy filling. But when you make them at home, you can elevate the flavor with real butter, quality cocoa powder, and pure vanilla extract. The result feels familiar, yet just a little more special.
Why This Recipe Always Wins
Before we roll out the dough, let’s talk about why these cookies deserve a place in your baking routine.
Versatile: Perfect for parties, gift boxes, or a cozy night in with milk.
Budget-Friendly: Made with simple pantry staples you likely already have.
Quick and Easy: Straightforward mixing and baking, no complicated steps.
Customizable: Adjust the filling thickness or flavor to your liking.
Crowd-Pleasing: Chocolate and cream is a combination that rarely disappoints.
Make-Ahead Friendly: The cookies can be baked and filled in advance.
Great for Leftovers: They store beautifully and stay crisp when sealed properly.
Expert Tips for That Perfect Snap
Getting that classic crisp texture is easier than you think.
- Roll the dough evenly so the cookies bake uniformly.
- Do not overbake, remove them when set and let them crisp as they cool.
- Use parchment paper for even baking and easy removal.
- Let the cookies cool completely before adding the filling.
Kitchen Tools You Will Need
You only need a few essentials to make these shine.
Mixing Bowls: For separating dry and wet ingredients.
Electric Mixer: Helps cream butter and sugars smoothly.
Rolling Pin: Ensures even thickness for the cookie dough.
Round Cookie Cutter: Creates that classic sandwich shape.
Baking Sheet: Provides even heat distribution.
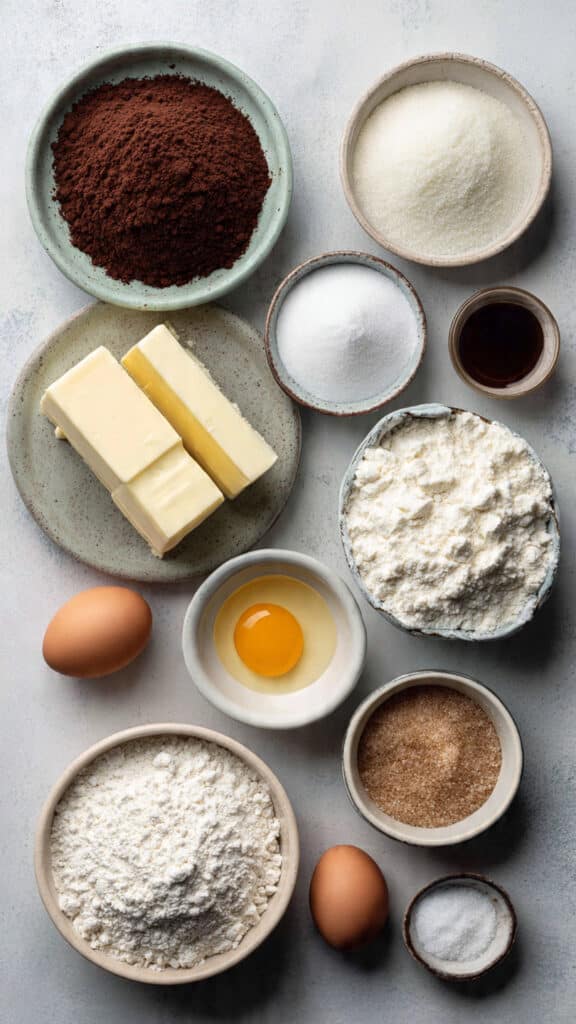
Ingredients That Build the Layers
Each ingredient plays a role in achieving that rich chocolate flavor and smooth filling.
- All Purpose Flour: 1 3/4 cups, provides structure to the cookies.
- Unsweetened Cocoa Powder: 3/4 cup, gives deep chocolate flavor and color.
- Baking Soda: 1 teaspoon, helps create slight lift.
- Salt: 1/2 teaspoon, balances sweetness and enhances cocoa.
- Unsalted Butter: 1 cup, softened, adds richness and tenderness.
- Granulated Sugar: 1 cup, sweetens and helps crisp the edges.
- Brown Sugar: 1/2 cup, packed, adds moisture and subtle depth.
- Large Eggs: 2, bind the dough together.
- Vanilla Extract: 2 teaspoons, enhances both cookie and filling flavor.
- Powdered Sugar: 2 cups, forms the base of the creamy filling.
Simple Ingredient Swaps
You can adapt this recipe with ease.
Unsweetened Cocoa Powder: Dutch process cocoa for a smoother chocolate taste.
Brown Sugar: Use all granulated sugar for a slightly crisper cookie.
Vanilla Extract: Almond extract for a subtle twist in the filling.
Spotlight on the Flavor Stars
Let’s highlight the key components.
Unsweetened Cocoa Powder: The heart of the cookie, delivering that bold, dark chocolate flavor.
Powdered Sugar: Creates the smooth, sweet filling that contrasts beautifully with the crisp cookies.
Let’s Bake Them Together
Ready to bring these cookies to life? Follow along step by step.
- Preheat Your Equipment: Preheat your oven to 350°F and line baking sheets with parchment paper.
- Combine Ingredients: In a bowl, whisk flour, cocoa powder, baking soda, and salt. In another bowl, cream softened butter with granulated sugar and brown sugar until light and fluffy. Beat in eggs and vanilla extract. Gradually mix in dry ingredients until a firm dough forms.
- Prepare Your Cooking Vessel: Lightly flour your surface and roll the dough to about 1/8 inch thickness.
- Assemble the Dish: Cut into rounds using a cookie cutter and place on prepared baking sheets.
- Cook to Perfection: Bake for 8 to 10 minutes, until set. Cool completely on a wire rack.
- Finishing Touches: Beat softened butter with powdered sugar and a splash of vanilla extract until smooth and fluffy. Spread or pipe filling onto half of the cookies, then top with remaining cookies to form sandwiches.
- Serve and Enjoy: Let the cookies sit for a few minutes so the filling sets slightly, then serve with a glass of milk.
Texture and Flavor in Every Bite
The cookies bake up thin and crisp, with a deep cocoa aroma that fills the kitchen. The filling is creamy and sweet, providing contrast to the slightly bittersweet chocolate layers. Each bite delivers that satisfying snap followed by smooth sweetness that melts gently on your tongue.
Helpful Baking Tips
Keep these in mind for best results.
- Chill the dough if it becomes too soft to roll.
- Use a ruler to ensure even thickness.
- Pipe the filling for a neat, bakery style finish.
What to Avoid
A few simple mistakes can change the texture.
- Overmixing the dough, which can make cookies tough.
- Rolling the dough too thick, which prevents crispness.
- Filling cookies before they cool completely.
Nutrition Facts
Servings: 24 sandwich cookies
Calories per serving: Approximately 210
Note: These are approximate values.
Preparation Time
Prep Time: 25 minutes
Cook Time: 10 minutes
Total Time: 35 minutes
Make Ahead and Storage Tips
Store finished sandwich cookies in an airtight container at room temperature for up to five days. You can also freeze unfilled cookies for up to two months and assemble later.
How to Serve
Serve stacked neatly on a simple white plate for a classic look. Pair with cold milk, coffee, or even crushed over ice cream for a fun twist.
Creative Leftover Transformations
Crush leftover cookies and use them as a topping for yogurt or ice cream. You can also pulse them into crumbs to create a chocolate cookie crust for pies.
Additional Tips
For an extra smooth filling, sift the powdered sugar before mixing. If you prefer a thicker center, double the filling and pipe generously.
Make It a Showstopper
Dip half of each sandwich cookie in melted chocolate and let set for a dramatic look. Keep the drizzle clean and even for bakery level presentation.
Variations to Try
- Add a hint of peppermint extract to the filling.
- Stir a tablespoon of cocoa into the filling for double chocolate.
- Tint the filling lightly for special occasions.
- Add a thin layer of chocolate ganache inside for extra richness.
FAQ’s
1. Can I make the dough ahead of time?
Yes, refrigerate it for up to 48 hours.
2. Can I freeze these cookies?
Yes, both filled and unfilled cookies freeze well.
3. How do I get a crisp texture?
Roll thin and avoid overbaking.
4. Can I use margarine instead of butter?
Butter is recommended for best flavor and texture.
5. Why are my cookies soft?
They may need a minute longer in the oven or more cooling time.
6. Can I make them smaller?
Yes, just adjust baking time slightly.
7. What type of cocoa is best?
High quality unsweetened cocoa powder works best.
8. Can I flavor the filling?
Yes, extracts like almond or peppermint work well.
9. How thick should I roll the dough?
About 1/8 inch for classic crispness.
10. Do I need to chill the dough?
Only if it becomes too soft to handle.
Conclusion
Oreo-Inspired Cocoa Sandwich Cookies bring all the nostalgic charm of the classic treat, but with richer chocolate flavor and homemade goodness. Crisp cocoa layers, smooth creamy filling, and that satisfying snap make every bite memorable. Let me tell you, it’s worth every bite. Once you make them from scratch, you may never look at store bought cookies the same way again.
Print
Oreo-Inspired Cocoa Sandwich Cookies
- Prep Time: 25 minutes
- Cook Time: 10 minutes
- Total Time: 35 minutes
- Yield: 24 sandwich cookies 1x
- Category: Dessert
- Method: Baking
- Cuisine: American
- Diet: Vegetarian
Description
Crisp and rich cocoa sandwich cookies filled with a smooth vanilla cream, inspired by the classic chocolate and cream favorite but made completely from scratch.
Ingredients
- 1 3/4 cups all purpose flour
- 3/4 cup unsweetened cocoa powder
- 1 teaspoon baking soda
- 1/2 teaspoon salt
- 1 cup unsalted butter, softened
- 1 cup granulated sugar
- 1/2 cup brown sugar, packed
- 2 large eggs
- 2 teaspoons vanilla extract
- 2 cups powdered sugar
- 1/2 cup unsalted butter, softened (for filling)
- 1 teaspoon vanilla extract (for filling)
Instructions
- Preheat oven to 350°F and line baking sheets with parchment paper.
- In a bowl, whisk together the all purpose flour, unsweetened cocoa powder, baking soda, and salt.
- In a separate large bowl, cream 1 cup softened unsalted butter with the granulated sugar and brown sugar until light and fluffy.
- Beat in the large eggs and 2 teaspoons vanilla extract until fully incorporated.
- Gradually mix the dry ingredients into the wet ingredients until a firm dough forms.
- Roll the dough on a lightly floured surface to about 1/8 inch thickness and cut into rounds.
- Place rounds on prepared baking sheets and bake for 8 to 10 minutes until set. Cool completely.
- In a bowl, beat 1/2 cup softened unsalted butter with the powdered sugar and 1 teaspoon vanilla extract until smooth and fluffy.
- Spread or pipe the filling onto half of the cooled cookies.
- Top with remaining cookies and press gently to form sandwich cookies.
Notes
- Roll the dough evenly for uniform baking.
- Allow cookies to cool completely before filling.
- Store in an airtight container at room temperature for up to 5 days.
- Unfilled cookies can be frozen for up to 2 months.
Nutrition
- Serving Size: 1 sandwich cookie
- Calories: 210
- Sugar: 16g
- Sodium: 150mg
- Fat: 11g
- Saturated Fat: 7g
- Unsaturated Fat: 3g
- Trans Fat: 0g
- Carbohydrates: 26g
- Fiber: 1g
- Protein: 2g
- Cholesterol: 35mg