
Get ready to elevate your dessert game with this delightful twist on a classic favorite: not yo mama’s banana pudding. This scrumptious treat combines layers of creamy custard, fresh bananas, and crunchy cookies, creating a delightful harmony of flavors and textures. Perfect for family gatherings, potlucks, or just satisfying your sweet tooth, this recipe will quickly become a beloved staple in your dessert repertoire.
Disclosure: This post contains affiliate links.If you click and make a purchase, I may earn a small commission at no extra cost to you.


Why You’ll Love This Recipe
- Rich and Creamy: The velvety custard base makes every bite a luxurious experience.
- Easy to Prepare: With simple steps and minimal effort, you can whip this up in no time.
- Customizable: Feel free to play around with flavors and ingredients to make it your own.
- Perfect for Any Occasion: Whether it’s a holiday feast or a casual weeknight treat, it fits right in.
- Kid-Friendly: Kids love this dessert, making it a hit for all ages at your table.
Ingredients You’ll Need
This recipe calls for a handful of simple yet essential ingredients, each contributing to the deliciousness of not yo mama’s banana pudding. These components work together to create a dessert that is both comforting and satisfying.
- Bananas: Ripe bananas add natural sweetness and a lovely texture to the pudding.
- Vanilla Pudding Mix: This forms the creamy base and infuses the dessert with a rich vanilla flavor.
- Milk: Whole milk is best for achieving that creamy custard consistency.
- Whipped Topping: Light and fluffy, this adds an airy layer that balances the pudding.
- Vanilla Wafers: These cookies provide a delightful crunch and soak up the pudding’s flavors beautifully.
Note: The full ingredients list, including measurements, is provided in the recipe card directly below.
Variations for not yo mama’s banana pudding
Feel free to get creative with not yo mama’s banana pudding. This recipe is incredibly versatile and can be adapted based on your dietary needs or taste preferences.
- Chocolate Lovers: Swap out the vanilla pudding for chocolate pudding for a decadent twist.
- Nutty Addition: Add chopped walnuts or pecans for an extra crunch and flavor boost.
- Berry Bliss: Incorporate fresh strawberries or blueberries for a fruity flair.
- Spiced Delight: Sprinkle in some cinnamon or nutmeg for a warm, cozy flavor.
- Dairy-Free Option: Use almond or coconut milk and dairy-free whipped topping for a vegan version.

How to Make not yo mama’s banana pudding
Step 1: Prepare the Pudding
In a large bowl, whisk together the vanilla pudding mix and milk until it thickens, usually about 2 minutes. Let it sit for a few minutes to firm up.
Step 2: Layer the Ingredients
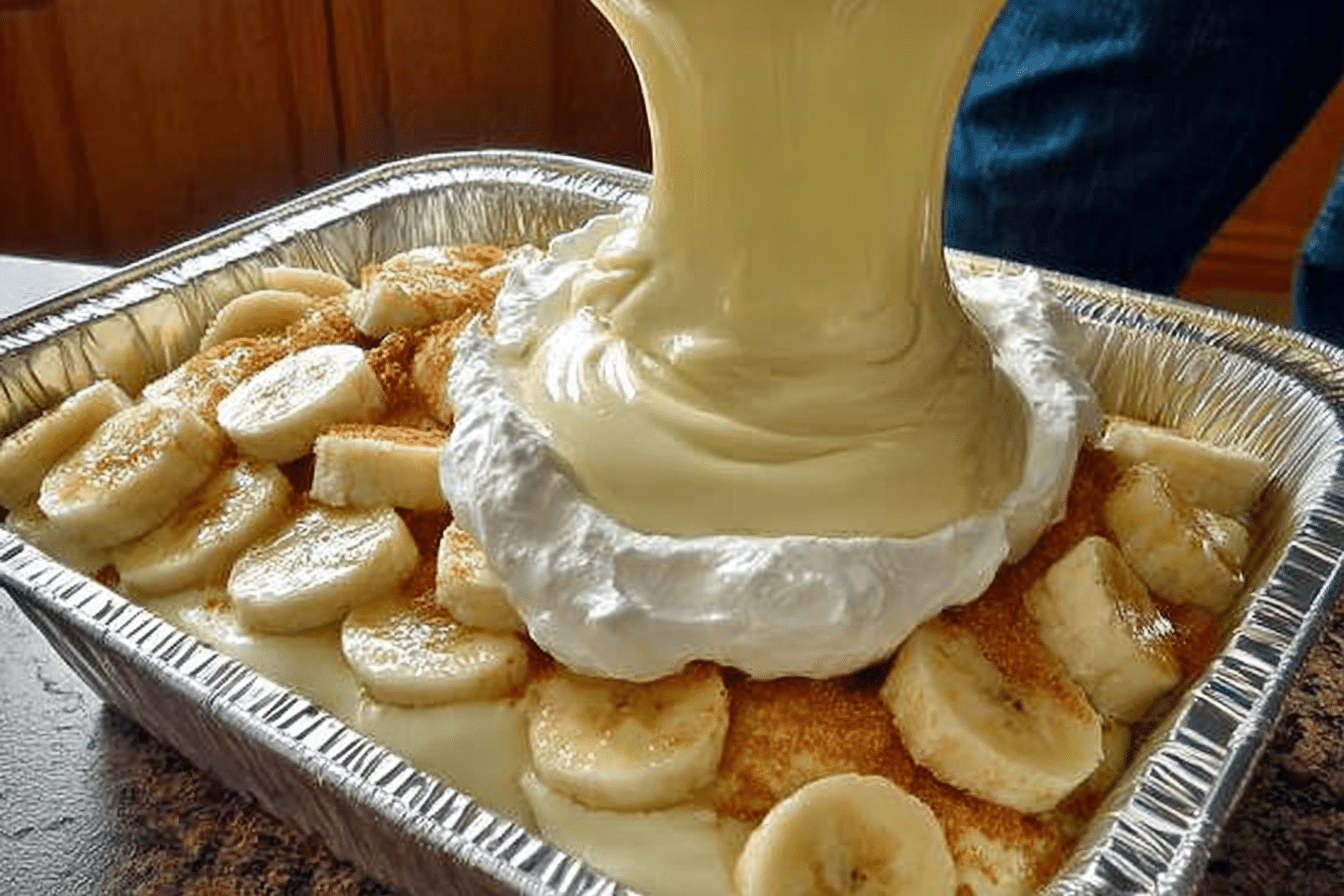
In a trifle dish or a large glass bowl, start layering your ingredients. Begin with a layer of vanilla wafers, followed by sliced bananas, and then a layer of the prepared pudding.
Step 3: Repeat the Layers
Continue to layer the ingredients until you run out, finishing with a layer of pudding on top. Spread the whipped topping over the final layer for a beautiful finish.
Step 4: Chill
Cover the dish with plastic wrap and place it in the refrigerator for at least 4 hours, or overnight if possible. This allows the flavors to meld and the cookies to soften.
Pro Tips for Making not yo mama’s banana pudding
- Use Ripe Bananas: The riper the bananas, the sweeter and more flavorful your pudding will be.
- Chill Thoroughly: Allowing the pudding to chill overnight enhances the overall taste and texture.
- Layer Thoughtfully: Distributing the ingredients evenly ensures that every bite is just as delicious as the last.
- Experiment with Flavors: Don’t be afraid to mix and match different flavors to create your own signature version.
- Serve Cold: This dessert is best when served chilled, so make sure to keep it refrigerated until serving.
How to Serve not yo mama’s banana pudding
Garnishes
Top your pudding with additional sliced bananas, a sprinkle of crushed vanilla wafers, or a drizzle of chocolate syrup for an extra touch of elegance.
Side Dishes
This dessert pairs beautifully with a light salad or a fruit platter, balancing the sweetness of the banana pudding with something fresh and light.
Creative Ways to Present
Consider serving individual portions in mason jars for a fun and portable option, or use clear cups to showcase the beautiful layers of not yo mama’s banana pudding.
Make Ahead and Storage
Storing Leftovers
If you have any leftovers, store them in an airtight container in the refrigerator. They will remain fresh for up to 3 days, although they are best enjoyed within the first couple of days.
Freezing
While not recommended for the best texture, you can freeze the pudding if needed. Just be aware that the texture may change upon thawing.
Reheating
This dessert is best served cold and does not require reheating. Enjoy it straight from the fridge for the best experience.
FAQs
Can I make this recipe gluten-free?
Yes! Simply substitute the vanilla wafers with gluten-free cookies to accommodate dietary restrictions.
How long can I keep not yo mama’s banana pudding in the fridge?
It can be stored in the refrigerator for up to 3 days, but the bananas may start to brown after that time.
Can I use other fruits in this recipe?
Absolutely! Feel free to experiment with different fruits like strawberries or peaches for a fruity twist.
Is it possible to make this recipe dairy-free?
Definitely! Use almond milk or coconut milk along with a dairy-free whipped topping for a delicious dairy-free version.
Can I prepare not yo mama’s banana pudding in advance?
Yes, making it a day ahead is actually recommended to allow the flavors to meld beautifully.
Final Thoughts
Not yo mama’s banana pudding is a delightful dessert that will surely impress your family and friends. With its creamy layers and sweet flavor, it’s bound to become a favorite in your household. So why not give it a try? You might just find yourself making it again and again!
Related Posts
- Irresistible Banana Bread Cinnamon Rolls
- Delightful 1-2-3-4 Cake: Simple & Delicious
- Indulgent Praline Crunch Recipe You Can’t Resist
not yo mama’s banana pudding
- Prep Time: 15 minutes
- Cook Time: 0 minutes
- Total Time: 4 hours 15 minutes
- Yield: 8 servings 1x
- Category: Dessert
- Method: No-Bake
- Cuisine: American
- Diet: Vegetarian
Description
Get ready to elevate your dessert game with this delightful twist on a classic favorite: not yo mama’s banana pudding. This scrumptious treat combines layers of creamy custard, fresh bananas, and crunchy cookies, creating a delightful harmony of flavors and textures. Perfect for family gatherings, potlucks, or just satisfying your sweet tooth.
Ingredients
Bananas
- 4 ripe bananas, sliced
Vanilla Pudding Mix
- 1 box (3.4 oz) vanilla pudding mix
Milk
- 2 cups whole milk
Whipped Topping
- 1 container (8 oz) whipped topping
Vanilla Wafers
- 1 box (11 oz) vanilla wafers
Instructions
- Prepare the Pudding: In a large bowl, whisk together the vanilla pudding mix and milk until it thickens, usually about 2 minutes. Let it sit for a few minutes to firm up.
- Layer the Ingredients: In a trifle dish or a large glass bowl, start layering your ingredients. Begin with a layer of vanilla wafers, followed by sliced bananas, and then a layer of the prepared pudding.
- Repeat the Layers: Continue to layer the ingredients until you run out, finishing with a layer of pudding on top. Spread the whipped topping over the final layer for a beautiful finish.
- Chill: Cover the dish with plastic wrap and place it in the refrigerator for at least 4 hours, or overnight if possible. This allows the flavors to meld and the cookies to soften.
Notes
- Use ripe bananas for the best flavor.
- Chill thoroughly for enhanced taste and texture.
- Layer thoughtfully to ensure even distribution of flavors.
- Experiment with different flavors to create your own version.
- Serve cold for the best experience.
Nutrition
- Serving Size: 1 serving
- Calories: 250
- Sugar: 18g
- Sodium: 150mg
- Fat: 7g
- Saturated Fat: 3g
- Unsaturated Fat: 4g
- Trans Fat: 0g
- Carbohydrates: 42g
- Fiber: 1g
- Protein: 3g
- Cholesterol: 15mg
Hi there, just became aware of your blog through Google, and found that it is truly informative. I’m going to watch out for brussels. I will be grateful if you continue this in future. Many people will be benefited from your writing. Cheers!
I have been reading out some of your posts and i can claim pretty clever stuff. I will definitely bookmark your site.
Hello. fantastic job. I did not expect this. This is a great story. Thanks!
My wife and i felt quite relieved when Albert managed to finish off his investigations through the entire ideas he made from your own weblog. It is now and again perplexing just to happen to be freely giving instructions that men and women could have been trying to sell. Therefore we do understand we now have you to give thanks to for that. These explanations you have made, the straightforward web site menu, the friendships you aid to promote – it is all great, and it’s assisting our son in addition to us understand the theme is brilliant, which is certainly particularly essential. Thanks for everything!
As a Newbie, I am constantly browsing online for articles that can be of assistance to me. Thank you
you’re really a good webmaster. The site loading speed is incredible. It seems that you’re doing any unique trick. Moreover, The contents are masterwork. you’ve done a great job on this topic!
I truly enjoy reading on this internet site, it contains great content. “Never fight an inanimate object.” by P. J. O’Rourke.
Hi! I know this is kinda off topic but I was wondering which blog platform are you using for this website? I’m getting sick and tired of WordPress because I’ve had issues with hackers and I’m looking at alternatives for another platform. I would be great if you could point me in the direction of a good platform.
It’s really a cool and helpful piece of information. I’m glad that you shared this helpful info with us. Please keep us up to date like this. Thanks for sharing.
Outstanding post, I think website owners should acquire a lot from this blog its rattling user pleasant.
My Blog – Really appreciate the examples you included—they helped a lot.
I’m really inspired with your writing skills and also with the format on your weblog. Is that this a paid subject matter or did you modify it yourself? Anyway stay up the nice high quality writing, it’s rare to peer a great weblog like this one today..
Click Me – This gave me a whole new understanding of the subject.
Visit Back – Amazing content! Thanks for breaking it down so clearly.
Visit Back – Absolutely loved the way you explained everything.
Oh my goodness! a tremendous article dude. Thanks However I am experiencing difficulty with ur rss . Don’t know why Unable to subscribe to it. Is there anyone getting similar rss downside? Anyone who knows kindly respond. Thnkx
Please let me know if you’re looking for a article author for your blog. You have some really great posts and I believe I would be a good asset. If you ever want to take some of the load off, I’d absolutely love to write some material for your blog in exchange for a link back to mine. Please send me an email if interested. Thank you!