
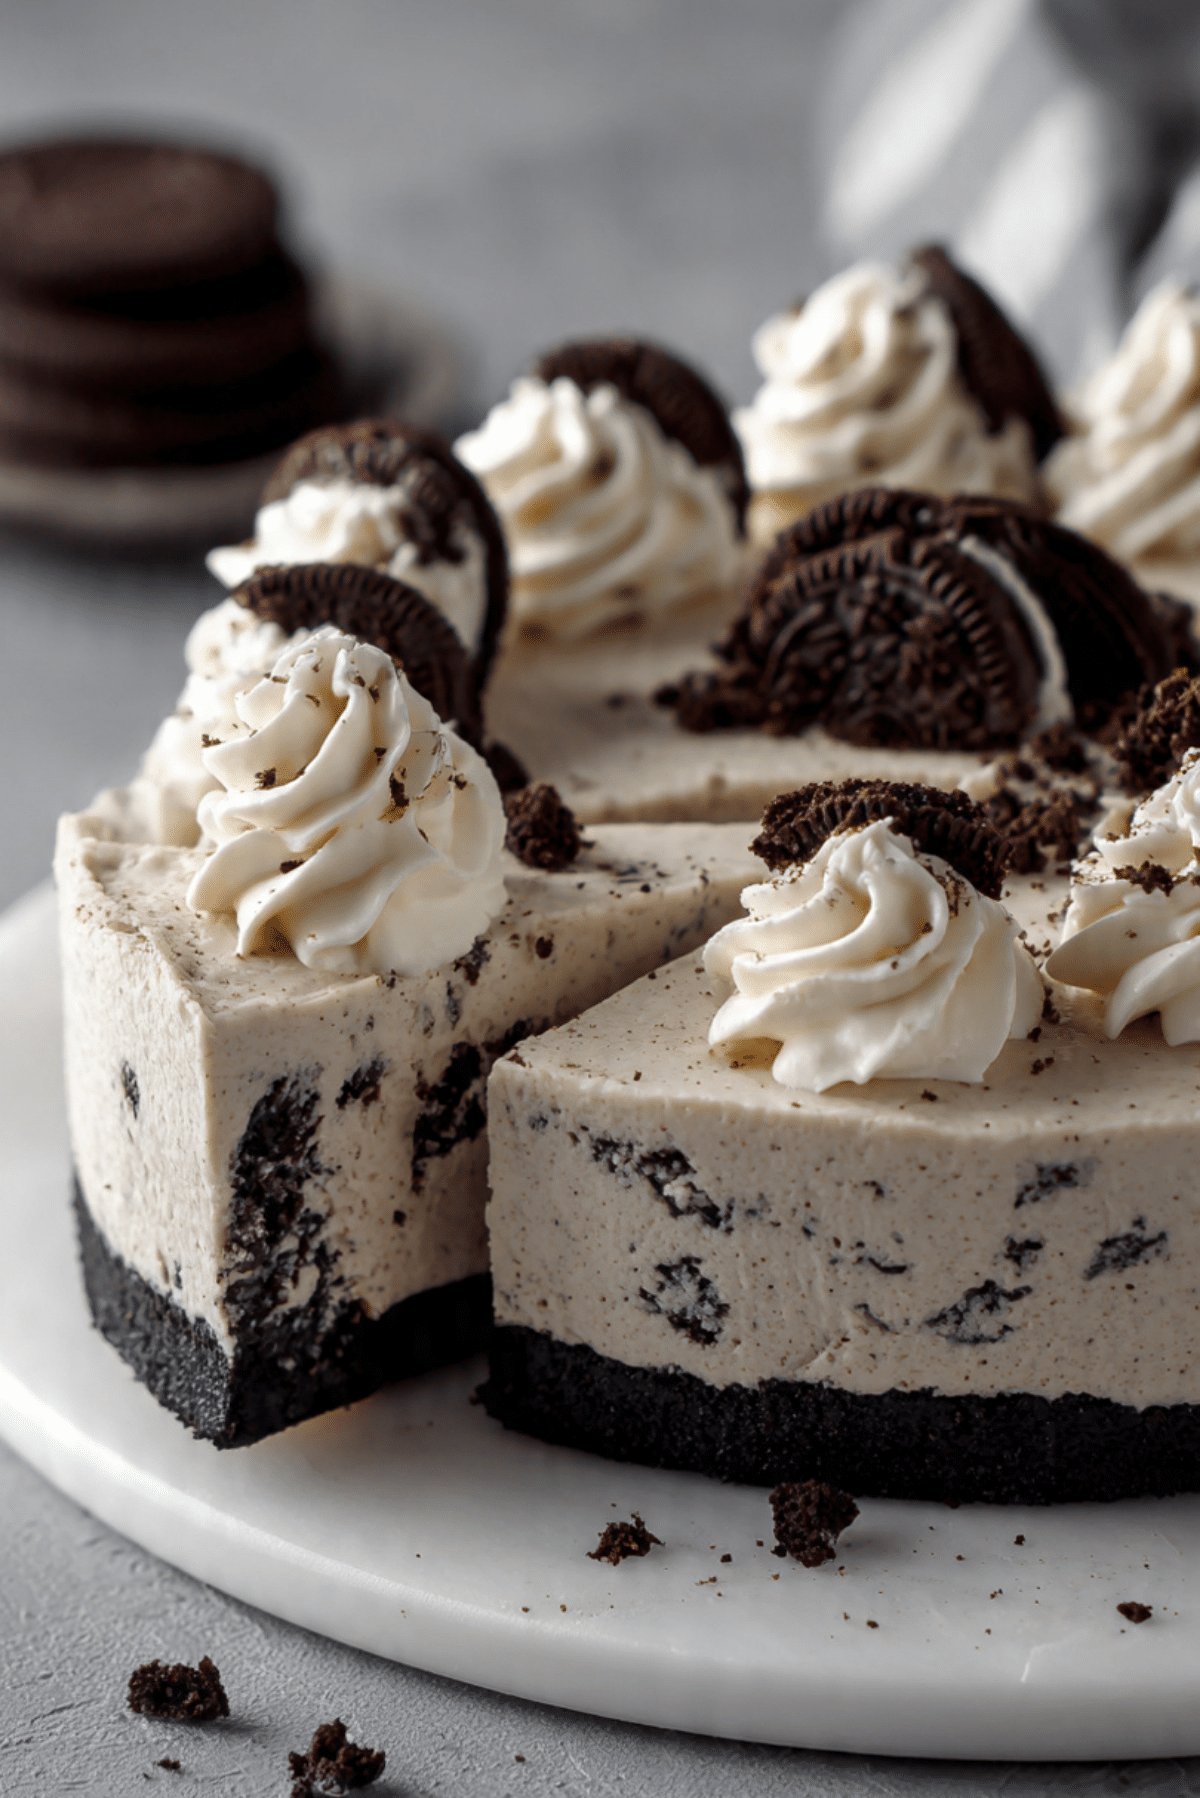
There is something undeniably comforting about a dessert that feels rich and indulgent, yet comes together without ever turning on the oven. This No-Bake Oreo Cheesecake is exactly that kind of treat. It is cool, creamy, and layered with deep chocolate cookie flavor in every bite. The contrast between the dark, slightly crunchy cookie crust and the smooth, fluffy filling is pure magic. Trust me, you’re going to love this.
Disclosure: This post contains affiliate links.If you click and make a purchase, I may earn a small commission at no extra cost to you.


It is the kind of dessert you pull out of the fridge, slice slowly, and watch everyone’s eyes light up. Simple ingredients, big flavor, and that classic cookies and cream combination that never goes out of style.
The Ultimate Creamy Cookies and Cream Dream
What makes this cheesecake so irresistible is the balance of textures. The crust is firm and chocolatey, holding everything together with just enough bite. The filling is silky, lightly sweet, and studded with crushed chocolate sandwich cookies that add little bursts of crunch throughout.
Because it sets in the refrigerator, the texture stays soft yet sliceable. Every forkful feels cool, creamy, and slightly crunchy at the same time.
A Modern Classic with Nostalgic Roots
Chocolate sandwich cookies have been a pantry favorite for generations. From lunchbox snacks to milk dipping traditions, they bring instant nostalgia.
Turning them into a no-bake cheesecake became popular because it is both practical and indulgent. No water baths, no worrying about cracks, no complicated steps. Just mix, chill, and enjoy. It is a modern dessert solution with classic flavor.
Why This Cheesecake Always Impresses
Before we dive into the process, here is why this dessert is such a winner.
Versatile:
Perfect for birthdays, holidays, summer gatherings, or casual family dinners.
Budget-Friendly:
Made with simple ingredients that are easy to find.
Quick and Easy:
No baking required, and the steps are straightforward.
Customizable:
Add extra cookie pieces, drizzle chocolate, or switch up the toppings.
Crowd-Pleasing:
Cookies and cream flavor appeals to almost everyone.
Make-Ahead Friendly:
In fact, it needs to chill, making it ideal to prepare in advance.
Great for Leftovers:
Stores beautifully in the refrigerator for several days.
Expert Tips for the Perfect Set and Texture
To get that bakery style finish, keep these tips in mind.
- Use room temperature cream cheese for a smooth filling.
- Crush cookies evenly so they distribute well throughout the batter.
- Whip the cream to soft peaks before folding for a light texture.
- Chill for at least six hours for clean slices.
Kitchen Tools You Will Need
You only need a few basic tools.
Springform Pan:
Allows easy removal and clean presentation.
Mixing Bowls:
For preparing the crust and filling separately.
Hand Mixer or Stand Mixer:
Ensures a smooth and fluffy filling.
Spatula:
For folding and smoothing the top.
Food Processor:
Helpful for crushing cookies evenly.
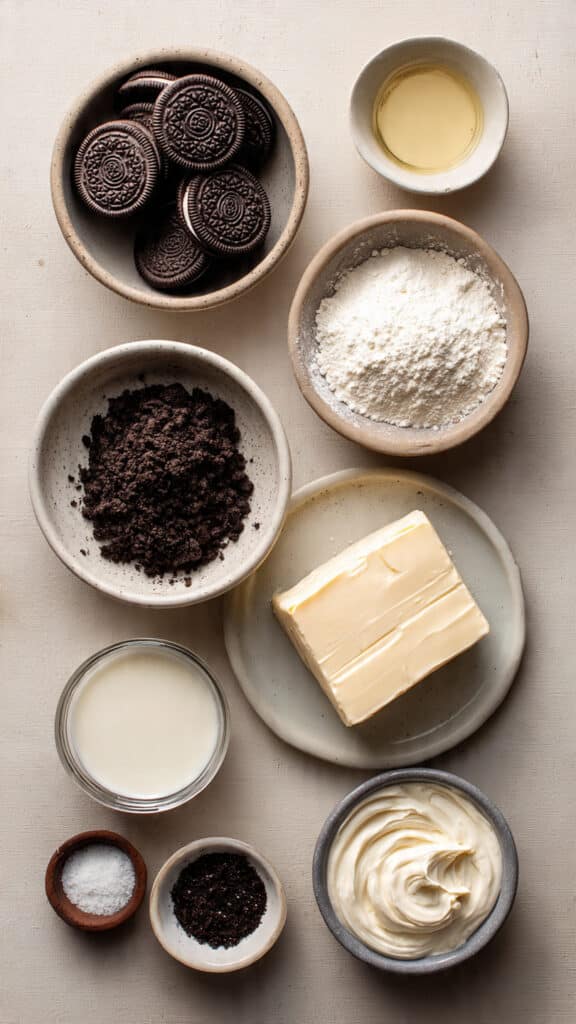
Ingredients That Build That Creamy Cookie Flavor
Each ingredient plays a key role in creating the perfect balance.
- Chocolate Sandwich Cookies: 30 cookies, divided, provide the crust and cookie pieces in the filling.
- Unsalted Butter: 6 tablespoons, melted, binds the crust together.
- Cream Cheese: 16 ounces, softened, forms the creamy base.
- Powdered Sugar: 1 cup, sweetens and smooths the filling.
- Vanilla Extract: 1 teaspoon, enhances the overall flavor.
- Heavy Whipping Cream: 1 1/2 cups, whipped, creates lightness and structure.
Easy Ingredient Substitutions
If you need flexibility, here are simple swaps.
Cream Cheese: Use full fat for best texture, but reduced fat works if necessary.
Heavy Whipping Cream: Whipping cream works similarly.
Powdered Sugar: Adjust slightly to taste if you prefer less sweetness.
Spotlight on the Star Ingredients
Chocolate Sandwich Cookies:
They provide both the deep chocolate crust and those signature cookie specks throughout the filling.
Cream Cheese:
The backbone of the cheesecake, delivering that smooth, tangy richness.
Let’s Make This Creamy Masterpiece
Now let dive into the step by step process.
-
Preheat Your Equipment:
No oven needed, but prepare a 9 inch springform pan by lightly greasing it. -
Combine Ingredients:
Crush 20 cookies into fine crumbs. Mix with melted butter until fully combined. -
Prepare Your Cooking Vessel:
Press the cookie mixture firmly into the bottom of the springform pan to form an even crust. Refrigerate for 20 minutes to set. -
Assemble the Dish:
In a large bowl, beat softened cream cheese until smooth. Add powdered sugar and vanilla extract, mixing until creamy. Crush the remaining 10 cookies into small chunks. -
Cook to Perfection:
In a separate bowl, whip heavy cream to soft peaks. Gently fold whipped cream into the cream cheese mixture. Fold in crushed cookie chunks. -
Finishing Touches:
Spread the filling evenly over the chilled crust. Smooth the top with a spatula. Refrigerate for at least 6 hours, or overnight, until fully set. -
Serve and Enjoy:
Remove from the springform pan, slice with a clean knife, and serve chilled.
Texture and Flavor That Melt Together
The crust holds firm with a slight crunch. The filling is airy yet rich. The cookie pieces add texture in every bite. The flavor is sweet, creamy, and chocolatey without being overwhelming.
This one’s a total game-changer for no-bake desserts.
Helpful Tips for Best Results
A few extra touches can elevate the final result.
- Chill overnight for the cleanest slices.
- Run a warm knife under hot water before slicing.
- Garnish with extra cookie halves for presentation.
Common Mistakes to Avoid
Even simple desserts require care.
- Using cold cream cheese can cause lumps.
- Skipping chill time leads to a soft center.
- Overmixing after adding whipped cream can deflate the filling.
Nutrition Snapshot
Servings: 10
Calories per serving: 420
Note: These are approximate values.
Time Planning
Prep Time: 20 minutes
Cook Time: 0 minutes
Total Time: 6 hours 20 minutes
Make Ahead and Storage Advice
This cheesecake can be made up to two days in advance and stored covered in the refrigerator. It stays fresh for up to four days. You can also freeze it tightly wrapped for up to one month. Thaw overnight in the refrigerator before serving.
Serving Suggestions for Maximum Enjoyment
Serve chilled with a dollop of whipped cream on top. Add extra cookie crumbs for a decorative finish. A drizzle of chocolate sauce adds extra indulgence if desired.
Creative Ways to Use Leftovers
Blend leftover slices into a milkshake for an ultra creamy treat. Crumble into parfait glasses with layered whipped cream. Or freeze small cubes for bite sized cheesecake snacks.
Extra Tips for Flavor and Presentation
Always use full fat cream cheese for the best texture. Press the crust firmly to avoid crumbling. Smooth the top carefully for a clean, professional look.
Make It Look Bakery Worthy
Pipe small swirls of whipped cream around the edges. Place whole cookie halves evenly spaced on top. A light sprinkle of cookie crumbs adds visual texture.
Fun Variations to Try
- Add mini chocolate chips to the filling.
- Swirl in a layer of chocolate ganache on top.
- Use golden sandwich cookies for a vanilla twist.
- Add a thin layer of chocolate pudding beneath the filling.
FAQ’s
1. Can I freeze this cheesecake?
Yes, wrap tightly and freeze up to one month.
2. How long does it need to chill?
At least six hours, overnight is best.
3. Can I use a regular cake pan?
A springform pan is recommended for easy removal.
4. Why is my cheesecake soft?
It likely needs more chilling time.
5. Can I use store bought whipped topping?
Yes, but freshly whipped cream gives better texture.
6. How do I crush the cookies?
Use a food processor or place in a sealed bag and crush with a rolling pin.
7. Can I reduce the sugar?
You can slightly reduce powdered sugar to taste.
8. Do I need gelatin?
No, the whipped cream and chilling provide structure.
9. How do I get clean slices?
Use a warm knife and wipe between cuts.
10. Is this dessert overly sweet?
It is sweet but balanced by the tang of cream cheese.
Conclusion
No-Bake Oreo Cheesecake is everything you want in a dessert, creamy, chocolatey, easy, and incredibly satisfying. It brings together nostalgic cookie flavor and smooth cheesecake texture without any complicated steps. Make it once, chill patiently, and enjoy every cool, indulgent bite.
Print
No-Bake Oreo Cheesecake
- Prep Time: 20 minutes
- Cook Time: 0 minutes
- Total Time: 6 hours 20 minutes
- Yield: 10 servings 1x
- Category: Dessert
- Method: No Bake
- Cuisine: American
- Diet: Vegetarian
Description
A rich and creamy No-Bake Oreo Cheesecake made with a chocolate cookie crust and a smooth cookies and cream filling. This easy chilled dessert requires no oven and delivers the perfect balance of crunchy cookie texture and silky cheesecake in every bite.
Ingredients
- 30 chocolate sandwich cookies, divided
- 6 tablespoons unsalted butter, melted
- 16 ounces cream cheese, softened
- 1 cup powdered sugar
- 1 teaspoon vanilla extract
- 1 1/2 cups heavy whipping cream
Instructions
- Lightly grease a 9 inch springform pan and set aside.
- Crush 20 chocolate sandwich cookies into fine crumbs using a food processor.
- Mix the crushed cookies with melted butter until fully combined.
- Press the mixture firmly into the bottom of the prepared pan to form an even crust. Refrigerate for 20 minutes to set.
- In a large mixing bowl, beat softened cream cheese until smooth and creamy.
- Add powdered sugar and vanilla extract, mixing until fully incorporated.
- Crush the remaining 10 cookies into small chunks.
- In a separate bowl, whip heavy whipping cream to soft peaks.
- Gently fold the whipped cream into the cream cheese mixture until smooth.
- Fold in the crushed cookie chunks.
- Spread the filling evenly over the chilled crust and smooth the top with a spatula.
- Refrigerate for at least 6 hours or overnight until fully set.
- Remove from the springform pan, slice, and serve chilled.
Notes
- Ensure cream cheese is at room temperature to prevent lumps.
- Chill overnight for the cleanest slices and best texture.
- Use a warm knife and wipe between cuts for neat servings.
- Store covered in the refrigerator for up to four days.
Nutrition
- Serving Size: 1 slice
- Calories: 420
- Sugar: 26g
- Sodium: 320mg
- Fat: 32g
- Saturated Fat: 18g
- Unsaturated Fat: 11g
- Trans Fat: 0g
- Carbohydrates: 30g
- Fiber: 1g
- Protein: 5g
- Cholesterol: 85mg