
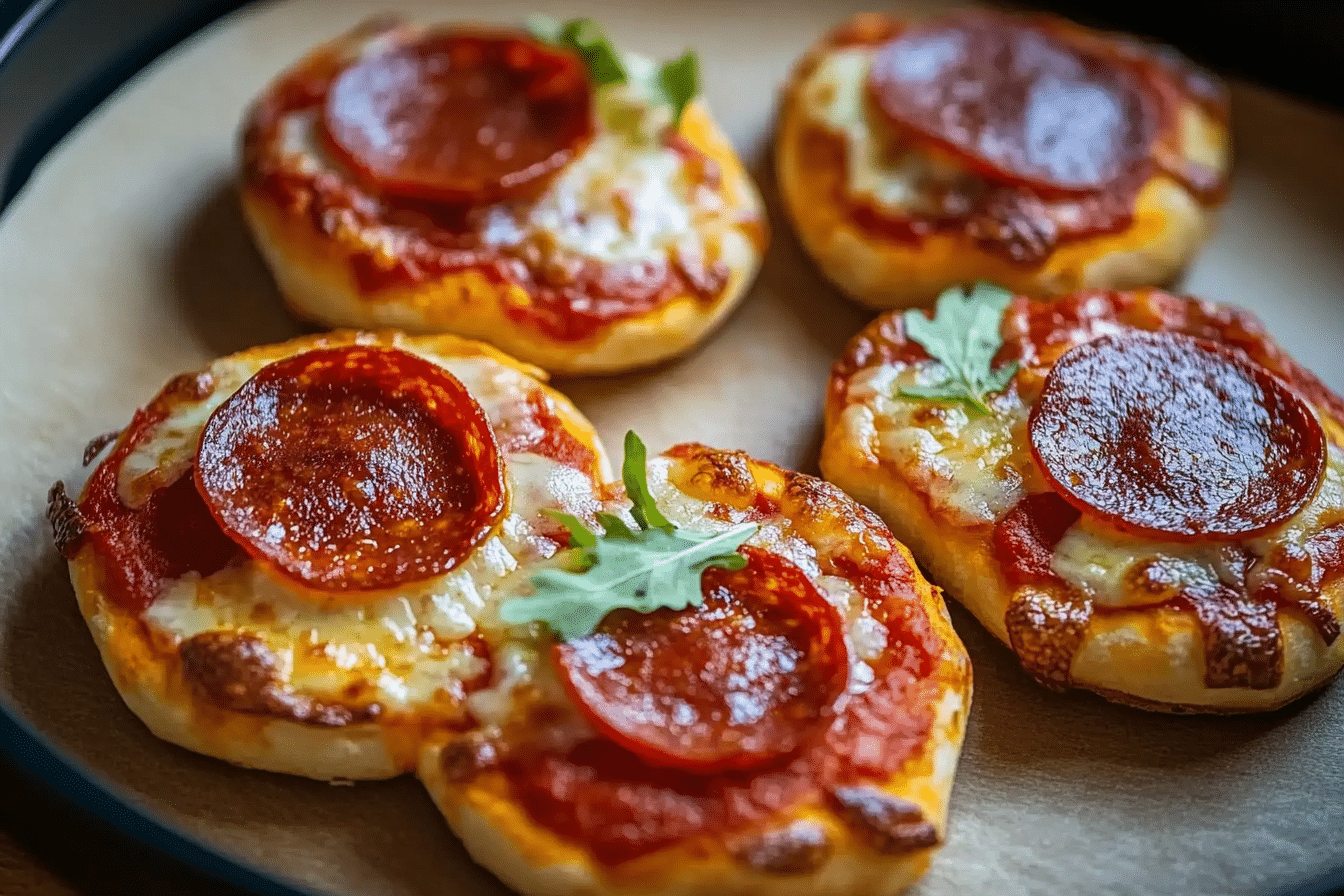
There’s something undeniably fun about pizza, but what if you could have all that cheesy, saucy goodness in a bite-sized, lunchbox-friendly form? Enter Mini Lunchbox Pizzas—your new go-to for a quick and satisfying snack. These little gems are perfect for busy school mornings, lazy weekend lunches, or even a fun make-your-own pizza night. They’re customizable, easy to make, and, most importantly, absolutely delicious. Trust me, once you try them, you’ll wonder how you ever lived without them!
Disclosure: This post contains affiliate links.If you click and make a purchase, I may earn a small commission at no extra cost to you.


Why You’ll Love Mini Lunchbox Pizzas
This recipe isn’t just about the ingredients—it’s about creating moments. Whether you’re whipping these up for school lunches, a casual get-together, or just satisfying a pizza craving, Mini Lunchbox Pizzas are the perfect fit. Here’s why:
Versatile
Great for lunchboxes, snacks, or party appetizers. They’re just the right size for little hands and big cravings!
Budget-Friendly
Made with simple, affordable ingredients you probably already have in your kitchen. No need to break the bank for a delicious homemade treat.
Quick and Easy
Minimal prep and baking time mean you can have a batch ready in no time. Perfect for busy mornings or last-minute meal planning.
Customizable
Let everyone choose their own toppings! Whether you love classic pepperoni, extra veggies, or a spicy kick, these little pizzas can be tailored to suit any taste.
Kid-Approved
Who doesn’t love pizza? These are a guaranteed hit with kids (and adults too!). Plus, they make mealtime fun and interactive.
Ingredients in Mini Lunchbox Pizzas
The beauty of these pizzas lies in their simplicity. Here’s what you’ll need:
Pizza Dough
The foundation of any great pizza! Use store-bought dough for convenience or make your own for an extra homemade touch.
Pizza Sauce
A rich, flavorful tomato sauce brings everything together. You can use a store-bought version or make a quick homemade one with crushed tomatoes, garlic, and Italian seasoning.
Cheese
Mozzarella is the classic choice for that perfect melty goodness, but feel free to mix in cheddar or provolone for extra flavor.
Toppings
Get creative! Pepperoni, mushrooms, bell peppers, olives, and even pineapple (if you’re a fan of the sweet-savory combo) all work beautifully.
Olive Oil
A light brush of olive oil on the dough gives it a crispy, golden-brown finish.
Italian Seasoning
A sprinkle of Italian herbs adds a burst of flavor to every bite.
(Note: The full ingredient list, including measurements, is provided in the recipe card below.)
Instructions
Let’s dive into the steps to create these irresistible mini pizzas:
Preheat Your Oven
Set your oven to 400°F (200°C). Preheating ensures your pizzas cook evenly and develop that deliciously crisp crust.
Prepare the Dough
Roll out the pizza dough on a lightly floured surface. Use a round cutter or a small glass to cut out mini circles. These will be your pizza bases.
Assemble the Pizzas
Place the dough circles onto a lined baking sheet. Spread a spoonful of pizza sauce on each one, followed by a generous sprinkle of cheese and your favorite toppings.
Bake to Perfection
Pop them into the oven and bake for 10-12 minutes or until the cheese is bubbly and the crust is golden brown.
Cool and Pack
Let them cool for a few minutes before serving or packing into lunchboxes. These taste great warm or at room temperature!
How to Serve Mini Lunchbox Pizzas
These little pizzas are delicious on their own, but if you want to make them even better, try these serving ideas:
With a side of veggies: Serve with baby carrots, cucumber slices, or a small side salad for a balanced meal.
With a dipping sauce: Ranch, marinara, or garlic butter make perfect dipping companions.
As part of a lunchbox: Pair them with fruit, yogurt, or a granola bar for a well-rounded meal.
For a fun party platter: Serve them alongside different toppings and let guests customize their own pizzas!
Additional Tips
Make-Ahead Friendly: Bake a batch and store them in an airtight container in the fridge for up to 3 days. They reheat beautifully in the microwave or oven.
Freeze for Later: Freeze baked pizzas for up to a month. Just pop them in the oven for a quick and easy meal.
Dough Alternatives: Try using whole wheat dough, crescent roll dough, or even English muffins for a fun twist.
Healthier Options: Load up on veggie toppings, use part-skim cheese, and opt for a whole wheat crust to keep things nutritious.
FAQ Section
Q1: Can I use store-bought pizza dough?
A1: Absolutely! Store-bought dough makes this recipe super quick and convenient.
Q2: Can I make these ahead of time?
A2: Yes! You can bake them ahead and store them in the fridge or freezer. Just reheat before serving.
Q3: How do I store leftovers?
A3: Keep them in an airtight container in the fridge for up to 3 days. Reheat in the oven or microwave.
Q4: Can I freeze these mini pizzas?
A4: Yes! Freeze them in a single layer, then transfer to a freezer bag. Reheat in the oven for the best texture.
Q5: What’s the best way to reheat these?
A5: Reheat in a 350°F (175°C) oven for 5-7 minutes or microwave in 20-second bursts until warm.
Q6: Can I use pita bread or tortillas instead of dough?
A6: Definitely! Pita bread, naan, or tortillas make great quick pizza bases.
Q7: Can I make these gluten-free?
A7: Yes! Just use gluten-free pizza dough or a gluten-free alternative like cauliflower crust.
Q8: How can I make these dairy-free?
A8: Use dairy-free cheese or skip the cheese altogether and load up on flavorful toppings.
Q9: Can I add protein to these mini pizzas?
A9: Of course! Add shredded chicken, ground beef, or even tofu for an extra protein boost.
Q10: How do I keep them from getting soggy in a lunchbox?
A10: Let them cool completely before packing and place them in a ventilated container to avoid condensation.
Final Thoughts
Mini Lunchbox Pizzas are the ultimate meal-prep-friendly, crowd-pleasing, and downright delicious snack. Whether you’re packing them for school, serving them at a party, or just indulging in a mini pizza night at home, these little bites will never disappoint. So go ahead, get creative with your toppings, and enjoy every cheesy, crispy, delicious bite!
Print
Mini Lunchbox Pizzas
- Prep Time: 10 minutes
- Cook Time: 12 minutes
- Total Time: 22 minutes
- Yield: 10 mini pizzas 1x
- Category: Snacks
- Method: Baking
- Cuisine: Italian
Description
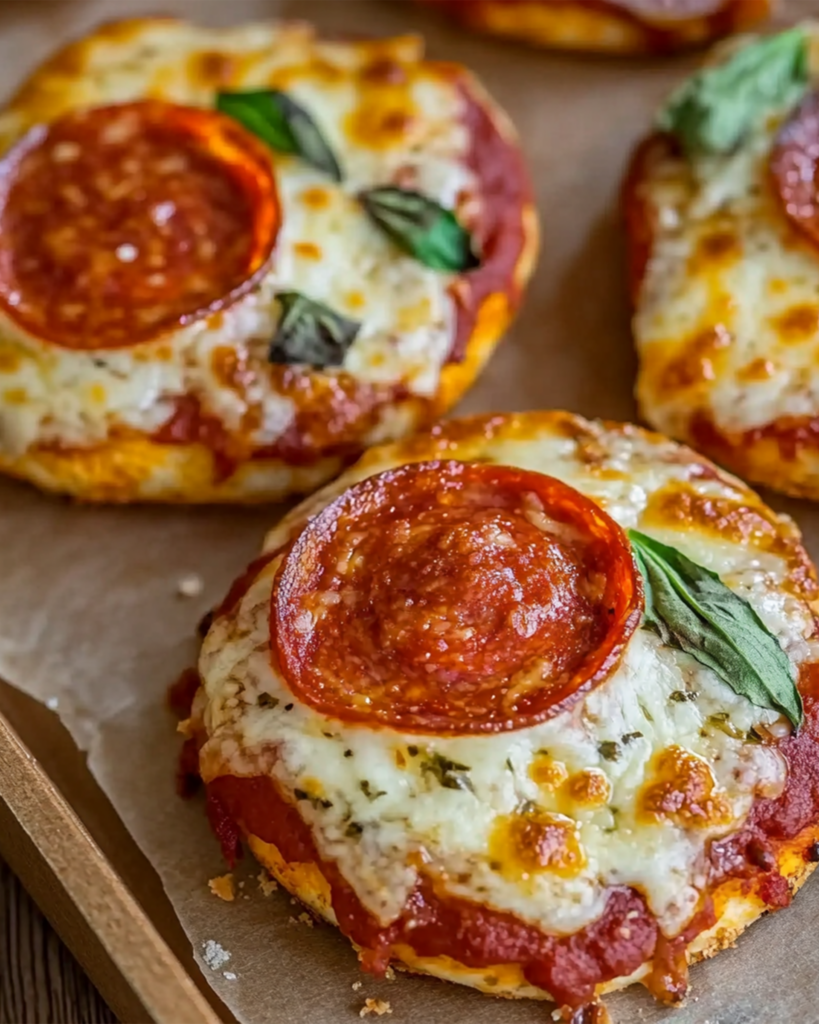
These Mini Lunchbox Pizzas are fluffy, cheesy, and made with an easy two-ingredient dough. Topped with mozzarella and pepperoni, they’re perfect for school lunches, meal prepping, or a quick snack. Ready in under 15 minutes, they’re a must-try!
Ingredients
For the Dough:
- 2 cups (300g) self-raising flour (see note for all-purpose flour substitution)
- 1 cup (250g) full-fat plain Greek yogurt
For the Toppings:
- 1/3 cup (90g) tomato paste (concentrated puree)
- 1 cup (125g) freshly shredded mozzarella
- 1/2 cup (80g) pepperoni slices
Instructions
- Preheat & Prepare: Preheat oven to 200°C (400°F) (or 180°C/350°F for fan-forced). Line a baking tray with parchment paper.
- Make the Dough: In a large bowl, combine self-raising flour and Greek yogurt. Mix with a spoon until crumbly, then knead by hand for 1–2 minutes until a soft dough forms.
- Roll & Cut: Lightly flour a clean surface and roll the dough to about 1 cm (½ inch) thickness. Use a large mug or cookie cutter to cut out rounds. Re-roll any leftover dough to create more rounds.
- Assemble: Place the dough rounds on the prepared baking tray. Spread a small amount of tomato paste on each round, then top with mozzarella and pepperoni.
- Bake: Bake for 12–14 minutes or until the dough is golden and the cheese has melted. If using two trays, place one on the top and one on the bottom of the oven.
- Cool & Serve: Let the mini pizzas cool slightly on the tray before serving.
Notes
- No self-raising flour? Use 2 cups all-purpose flour + 3 tsp baking powder.
- Customize with different toppings like veggies, ham, or a sprinkle of oregano.
- Perfect for freezing—just bake, cool, and store in an airtight container.
Nutrition
- Serving Size: 1 mini pizza
- Calories: 150 kcal
- Sugar: 2g
- Sodium: 280mg
- Fat: 6g
- Saturated Fat: 3 g
- Unsaturated Fat: 2g
- Trans Fat: 0 g
- Carbohydrates: 18g
- Fiber: 1g
- Protein: 7g
- Cholesterol: 15mg