
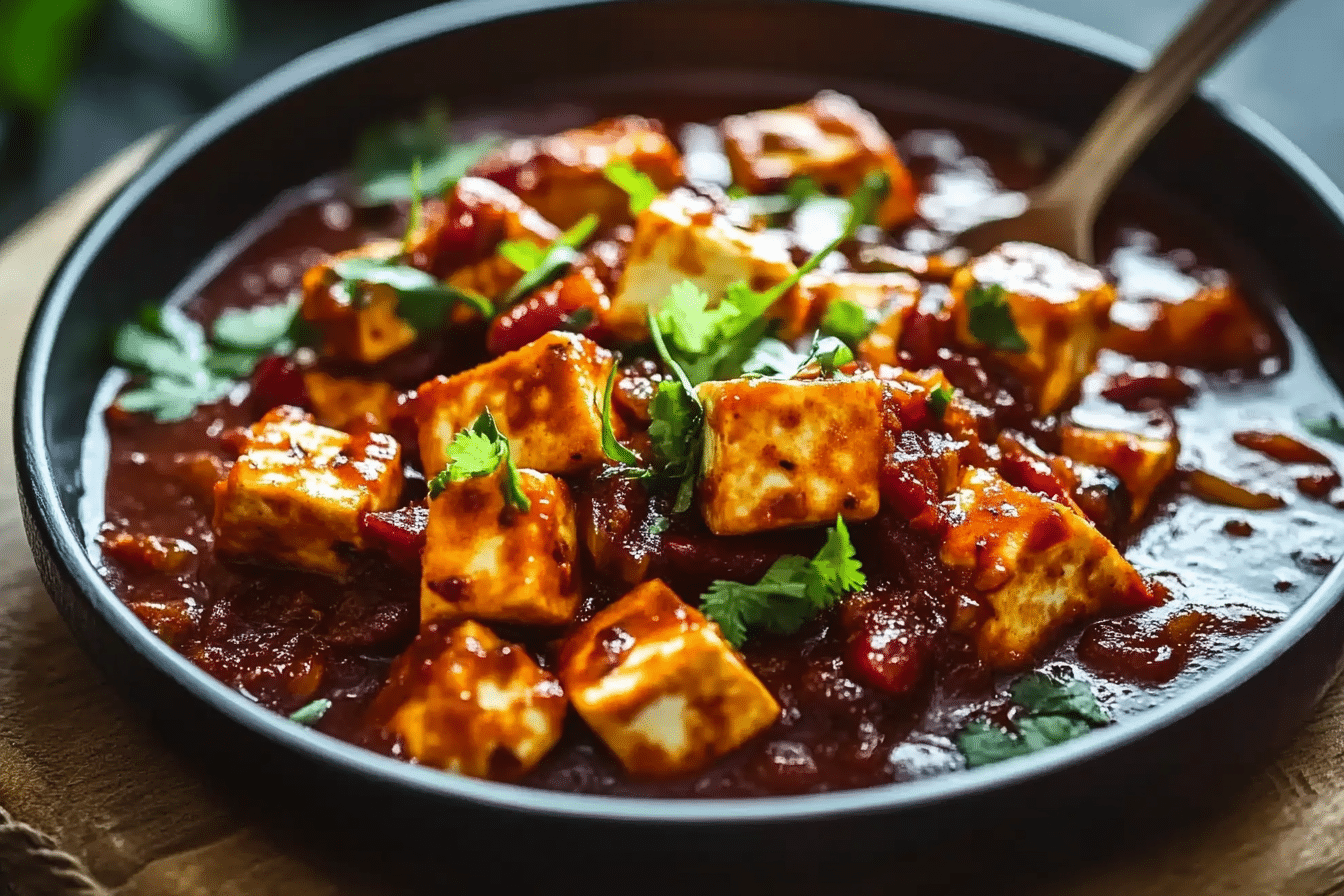
Get ready to turn up the heat with this unforgettable Indian Chili Paneer recipe—a sizzling Indo-Chinese delight that’s packed with bold flavors, crisp veggies, and irresistibly tender paneer cubes. Whether you’re a spice enthusiast or simply in the mood for a vibrant, restaurant-style dish that’s easy enough to whip up at home, this recipe captures that perfect balance of fiery, tangy, and savory notes in every bite. Indian Chili Paneer is a sensational appetizer or main that’ll take your taste buds on an exciting adventure!
Disclosure: This post contains affiliate links.If you click and make a purchase, I may earn a small commission at no extra cost to you.


Why You’ll Love This Recipe
- Fiery Flavor Bomb: Every bite bursts with a perfect blend of spicy, tangy, and savory notes that awaken your palate.
- Restaurant Quality at Home: Enjoy that coveted Indo-Chinese taste without any complicated steps or hard-to-find ingredients.
- Customizable Spice Levels: Easily adjust chilies and sauces to cater to your personal heat preference.
- Perfect for Any Occasion: Serve as an appetizer, side, or main dish—this recipe adapts effortlessly to your meal plans.
- Vegetarian & Vegan Friendly: Swap paneer for tofu for a plant-based version that everyone can savor.
Ingredients You’ll Need
With a handful of fresh vegetables, aromatic spices, and pantry staples, making Indian Chili Paneer is surprisingly simple. Each ingredient is carefully chosen to add its unique taste, color, and texture, resulting in a dish that’s simultaneously spicy, crunchy, creamy, and bursting with umami.
- Paneer (400 grams, cubed): The star of the dish—soft, milky, and indulgent; use firm tofu for a vegan twist.
- Bell Peppers (1 cup, diced): Adds crispness and a rainbow of colors; use a mix for best visual appeal.
- Onion (1 large, square-cut): Lends sweetness and a subtle bite that complements the spice.
- Garlic (4 cloves, finely chopped): Infuses that unforgettable garlicky aroma essential for Indo-Chinese cuisine.
- Ginger (1-inch, finely chopped): Adds warmth and brightness to balance out the fiery flavors.
- Green Chilies (2, slit): Delivers a customizable kick; adjust for your preferred heat level.
- Soy Sauce (2 tablespoons): Templates the umami and deepens the overall flavor; opt for gluten-free if needed.
- Tomato Ketchup (2 tablespoons): Provides sweet-tangy complexity and a hint of zest.
- Red Chili Sauce (1 tablespoon): Brings fiery heat and vibrant color; add more or less to taste.
- Vinegar (1 teaspoon): Adds acidity that balances rich, spicy elements.
- Cornstarch (2 tablespoons, dissolved in 1/4 cup water): Essential for creating that signature glossy, thick sauce.
- Spring Onions (chopped, for garnish): Infuses freshness and a pop of green at the finish.
- Oil (for cooking): Helps achieve the perfect stir-fry texture for paneer and veggies.
- Salt (to taste): Brings out all the flavors harmoniously.
- Black Pepper (1/2 teaspoon, freshly ground): Adds a subtle spicy undertone that lingers deliciously.
Variations
The beauty of Indian Chili Paneer is how easily the recipe adapts to fit any occasion, dietary need, or ingredient you have on hand. Let your creativity guide you—this dish welcomes experimentation!
- Vegan Chili Paneer: Simply replace paneer with extra-firm tofu while keeping the rest of the process unchanged.
- Extra Saucy: Double the sauce ingredients and add a splash of water for a gravy-style dish that pairs beautifully with rice.
- Low Spice: Omit green chilies and reduce chili sauce for a milder, family-friendly version.
- Mixed Veggies: Toss in baby corn, snap peas, or mushrooms for added crunch and nutrients.
- Air-Fried Paneer: Air fry paneer cubes until golden for a lighter, less oily version retaining all the flavor.

How to Make Indian Chili Paneer
Step 1: Prep the Paneer and Vegetables
Begin by cubing the paneer into bite-sized pieces. If you prefer, blot the paneer with a paper towel to remove excess moisture, which helps achieve a delightful crisp when stir-fried. Dice the bell peppers and cut the onion into even squares. Finely chop garlic and ginger, and slit the green chilies lengthwise so they can infuse the stir-fry with heat without overwhelming the dish.
Step 2: Fry the Paneer until Golden
Heat oil in a large nonstick skillet or wok over medium-high flame. Gently add the cubed paneer and shallow-fry, turning occasionally, until each piece is golden brown on all sides. This forms the perfect chewy-yet-soft texture that makes Indian Chili Paneer addictive. Remove and set aside on a plate lined with kitchen tissue to absorb any excess oil.
Step 3: Sauté the Aromatics and Veggies
In the same pan (add a bit more oil if needed), toss in the chopped garlic, ginger, and green chilies. Sauté for a minute until fragrant, taking care not to let the garlic burn. Add the onions and bell peppers and stir-fry on high heat for 2-3 minutes. The goal is to keep the veggies vibrant and just tender with plenty of crunch remaining.
Step 4: Build the Signature Sauce
Lower the flame and add the soy sauce, tomato ketchup, red chili sauce, and vinegar to the sizzling vegetables. Stir briskly to evenly coat all the veggies and unlock the fusion flavors that hallmark Indian Chili Paneer. Sprinkle in salt and black pepper to taste, stirring well to blend everything together into a glossy, aromatic mixture.
Step 5: Thicken the Sauce and Combine
Give your cornstarch slurry a quick stir and pour it into the pan. Immediately toss everything together on high heat for about 1-2 minutes as the sauce thickens to a luscious coat, wrapping lovingly around every ingredient. Gently fold in the fried paneer cubes, taking care not to break them. Continue tossing until everything is well combined and heated through.
Step 6: Garnish and Serve
Turn off the heat and promptly transfer your delicious Indian Chili Paneer to a serving dish. Generously top with fresh chopped spring onions for a vibrant finishing touch. Serve hot for maximum flavor and textural contrast!
Pro Tips for Making Indian Chili Paneer
- Use Fresh Paneer: Fresh, soft paneer gives the creamiest bite and absorbs flavors better; soak store-bought paneer in hot water for 10 minutes for best texture.
- Stir-Fry on High Heat: Mixing vegetables on high heat keeps them crisp and brings that restaurant-style smoky flavor.
- Adjust Sauce Consistency: For a drier appetizer, let the sauce coat everything thinly; for a meal, add a bit more water while adjusting cornstarch for a gravy-like finish.
- Balance the Heat: Always taste your chili sauce and chili quantity before adding more—spice intensities can vary greatly!
- Quick Tossing: Overcooking can make paneer tough, so once all components are in, toss everything quickly and serve immediately.
How to Serve Indian Chili Paneer
Garnishes
Sprinkle with a generous handful of freshly chopped spring onions and, if you’re feeling fancy, dot the dish with extra slivers of green chili or sesame seeds for a bit of crunch and style.
Side Dishes
Indian Chili Paneer shines paired with steamed jasmine or basmati rice, egg-fried rice, or classic hakka noodles. For a lighter option, serve it over quinoa or with a crisp lettuce salad to let the bold flavors pop.
Creative Ways to Present
Transform the dish into playful finger food by skewering each cube with a toothpick (perfect for parties!), or tuck it into lettuce cups, wraps, or even as a spicy filling in soft pita bread for a global twist.
Make Ahead and Storage
Storing Leftovers
Transfer any leftover Indian Chili Paneer to an airtight container once cooled to room temperature. It will keep well in the refrigerator for up to 3 days without losing its flavor, though the veggies may soften slightly.
Freezing
While paneer freezes decently, the texture of the veggies and sauce can change after thawing. For best results, make and enjoy the dish fresh. However, if you must freeze, pop cooled Indian Chili Paneer (minus spring onion garnish) into freezer-safe containers for up to a month. Thaw overnight in the fridge before reheating.
Reheating
To reheat, transfer the paneer and veggies to a skillet with a splash of water, tossing on medium heat just until warmed through. Avoid microwaving for extended periods, as it can make paneer rubbery—gentle heating is best for preserving texture and taste.
FAQs
Can I make Indian Chili Paneer without frying the paneer?
Absolutely! You can lightly sauté or even grill the paneer cubes for a less oily, but equally delicious result—this method works especially well if you prefer a lighter version.
What is the difference between dry and gravy-style Indian Chili Paneer?
Dry chili paneer is coated in just enough sauce to cling to each piece, ideal for appetizers or finger food, while the gravy-style includes more sauce, perfect for serving with rice or noodles as a main course.
Is this recipe gluten-free?
Yes, it can be easily adapted to be gluten-free by using gluten-free soy sauce and ensuring none of your sauces contain wheat-derived thickeners or additives—always check the labels!
How spicy is this dish, and can I tone it down for kids?
Indian Chili Paneer can be quite fiery, but you’re in complete control—reduce or skip the green chilies and red chili sauce for a milder version kids will love, letting the sweet and tangy notes take center stage.
Can I use store-bought paneer or do I need to make it fresh?
Store-bought paneer works perfectly, though soaking it briefly in warm water can revive its softness; homemade paneer is even more creamy if you have the time, but either option delivers great results.
Final Thoughts
With its crowd-pleasing flavors and playful textures, Indian Chili Paneer is the fiery, crave-worthy dish you need to try—whether for a lively dinner, a quick snack, or your next get-together. I can’t wait for you to experience that burst of zesty, spicy goodness in every bite! Give this recipe a whirl and watch it become a favorite at your table too.
Print
- Prep Time: 15 minutes
- Cook Time: 20 minutes
- Total Time: 35 minutes
- Yield: 4 servings 1x
- Category: Appetizers
- Method: Stir-Fry
- Cuisine: Indo-Chinese
- Diet: Vegetarian, Vegan Adaptable, Gluten Free
Description
Indian Chili Paneer is a sizzling Indo-Chinese fusion dish featuring golden, tender paneer cubes tossed in a tangy, spicy, and umami-rich sauce with crisp, colorful veggies. Easy to make at home, it’s a flavor-packed appetizer or main that can be customized for any spice preference, and is vegetarian or vegan-friendly. Enjoy restaurant-style chili paneer with rice, noodles, or as a delicious finger food.
Ingredients
For the Paneer and Vegetables
- Paneer – 400 grams, cubed (use firm tofu for vegan alternative)
- Bell Peppers – 1 cup, diced (mixed colors preferred)
- Onion – 1 large, cut into squares
- Garlic – 4 cloves, finely chopped
- Ginger – 1-inch piece, finely chopped
- Green Chilies – 2, slit lengthwise
- Spring Onions – chopped, for garnish
For the Sauce
- Soy Sauce – 2 tablespoons (use gluten-free if needed)
- Tomato Ketchup – 2 tablespoons
- Red Chili Sauce – 1 tablespoon (or to taste)
- Vinegar – 1 teaspoon
- Cornstarch – 2 tablespoons, dissolved in 1/4 cup water
- Salt – to taste
- Black Pepper – 1/2 teaspoon, freshly ground
Other
- Oil – for cooking and frying paneer
Instructions
- Prep the Paneer and Vegetables: Cut paneer into bite-sized cubes and gently blot with a paper towel to remove any excess moisture for crispier results. Dice bell peppers and cut the onion into squares. Finely chop garlic and ginger, slit the green chilies lengthwise, and chop spring onions for garnish.
- Fry the Paneer until Golden: Heat oil in a large nonstick skillet or wok over medium-high heat. Add paneer cubes and shallow-fry, turning occasionally, until golden on all sides. Remove and place on a plate lined with kitchen tissue to drain excess oil.
- Sauté the Aromatics and Veggies: In the same pan, add more oil if needed, and toss in chopped garlic, ginger, and green chilies. Sauté for a minute until fragrant without burning the garlic. Add onions and bell peppers, then stir-fry on high for 2–3 minutes to keep them vibrant and crisp.
- Build the Signature Sauce: Lower the flame and add soy sauce, tomato ketchup, red chili sauce, and vinegar to the pan. Stir briskly to coat the veggies. Season with salt and freshly ground black pepper, mixing until veggies are coated in a glossy mixture.
- Thicken the Sauce and Combine: Stir the prepared cornstarch slurry and pour into the wok. Cook on high heat for 1–2 minutes until the sauce thickens and coats the veggies. Gently fold in the fried paneer cubes and toss to coat everything evenly. Heat through.
- Garnish and Serve: Take off the heat, transfer to a serving dish, and garnish generously with chopped spring onions. Serve hot for best taste and texture!
Notes
- Use Fresh Paneer: Soak store-bought paneer in hot water for 10 minutes for optimal texture.
- High Heat Stir-Fry: This ensures veggies remain crisp and adds a slight smoky flavor.
- Adjust Sauce Consistency: For a drier version, keep the sauce to a minimum; for gravy-style, add extra water and adjust the cornstarch proportion.
- Customizable Heat: Taste your sauces and add chilies in increments to match your spice preference.
- Quick Finishing: Don’t overcook after adding paneer to keep it tender and prevent toughness.
- Vegan Version: Swap paneer for extra-firm tofu and keep the process the same.
- Make Ahead: Leftovers last up to 3 days refrigerated. For best results, reheat gently with a splash of water to preserve texture.
Nutrition
- Serving Size: 1/4 recipe (approx. 200g)
- Calories: 265
- Sugar: 5g
- Sodium: 650mg
- Fat: 16g
- Saturated Fat: 7g
- Unsaturated Fat: 7g
- Trans Fat: 0g
- Carbohydrates: 16g
- Fiber: 2g
- Protein: 13g
- Cholesterol: 28mg