
Homemade Honey Bun recipes have been in my life for as long as I can remember, not because I stumbled upon them in a cookbook, but because they’ve been a family tradition passed down like a little golden treasure. I still remember sitting at my grandmother’s kitchen table, my feet dangling off the chair, watching her hands dance between a bowl of warm dough and a pot of bubbling glaze. The air smelled like cinnamon, honey, and pure happiness. Back then, I didn’t know the science behind yeast or the importance of dough rest times — I just knew that when she said, “They’re ready!”, my world instantly got sweeter.
Disclosure: This post contains affiliate links.If you click and make a purchase, I may earn a small commission at no extra cost to you.


When I launched my cooking journey online, the About page on my site became more than just a place to introduce myself — it became a love letter to these honey buns. I told the story of how my grandmother never measured the honey; she simply let it pour until her heart said, “That’s enough.” It was about feel, patience, and love — the three ingredients no recipe card can truly capture. Over time, I adapted her process into a step-by-step guide anyone can follow, making sure the end result would still carry that same homemade magic.
Today, I’m sharing with you not just a recipe, but the secrets and little tips that turn a Homemade Honey Bun from a nice dessert into an unforgettable bite of comfort. We’ll walk through every step together — from the dough that rises with a fluffy promise, to the cinnamon sugar swirl that hugs every bite, and finally, the sticky-sweet glaze that makes you close your eyes and sigh. If you’ve ever only had store-bought honey buns, this is your moment to see why homemade will win your heart every single time.
Table of Contents
Table of Contents
Why the Homemade Honey Bun Beats Store-Bought Every Time
The first time you bite into a Homemade Honey Bun, you’ll notice something remarkable — the softness isn’t just in the texture, it’s in the flavor. Store-bought versions often taste overly sweet, heavy, and a little artificial, but homemade? It’s light, delicate, and fresh in a way that only comes from making it yourself. The dough is airy but substantial, the cinnamon sugar swirl feels like it was placed there with care, and the honey glaze clings just enough to your fingertips to make licking them absolutely acceptable.
It’s not just about taste, either — it’s about control. When you make your own, you choose the quality of the ingredients, the exact level of sweetness, and even the thickness of the glaze. You can opt for organic honey, fresh spices, and good flour, all of which contribute to a more wholesome treat. And let’s be honest, nothing beats the satisfaction of serving a plate of Homemade Honey Buns and watching friends or family take that first, warm bite.
Print
Homemade Honey Bun – 7 Simple Steps to Bakery-Perfect Bliss
- Prep Time: 20 mins (plus 1 hr 30 mins rising)
- Cook Time: 25 mins
- Total Time: 2 hrs 15 mins
- Yield: 12 buns 1x
- Category: Breakfast, Dessert
- Method: Baking
- Cuisine: American
- Diet: Vegetarian
Description
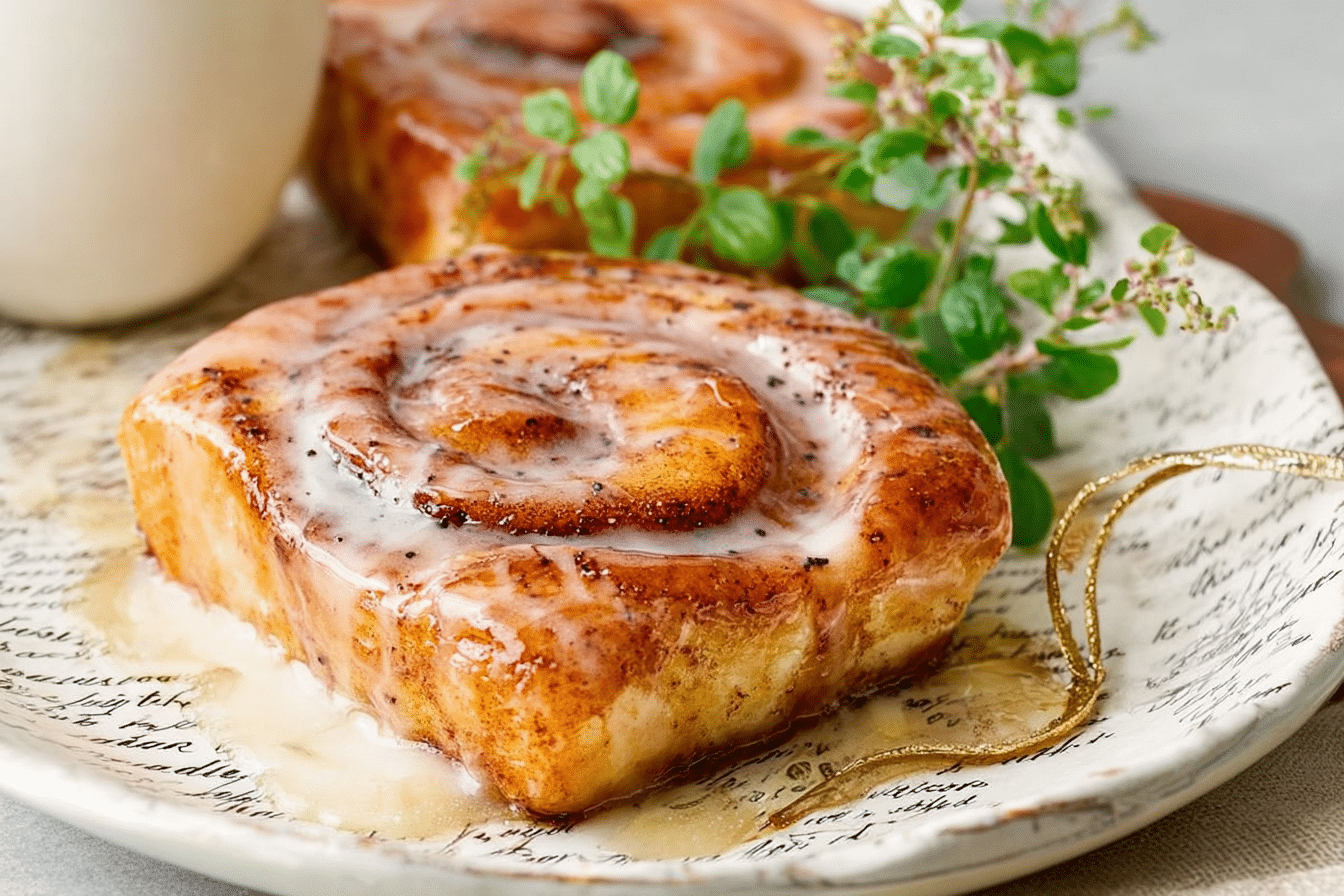
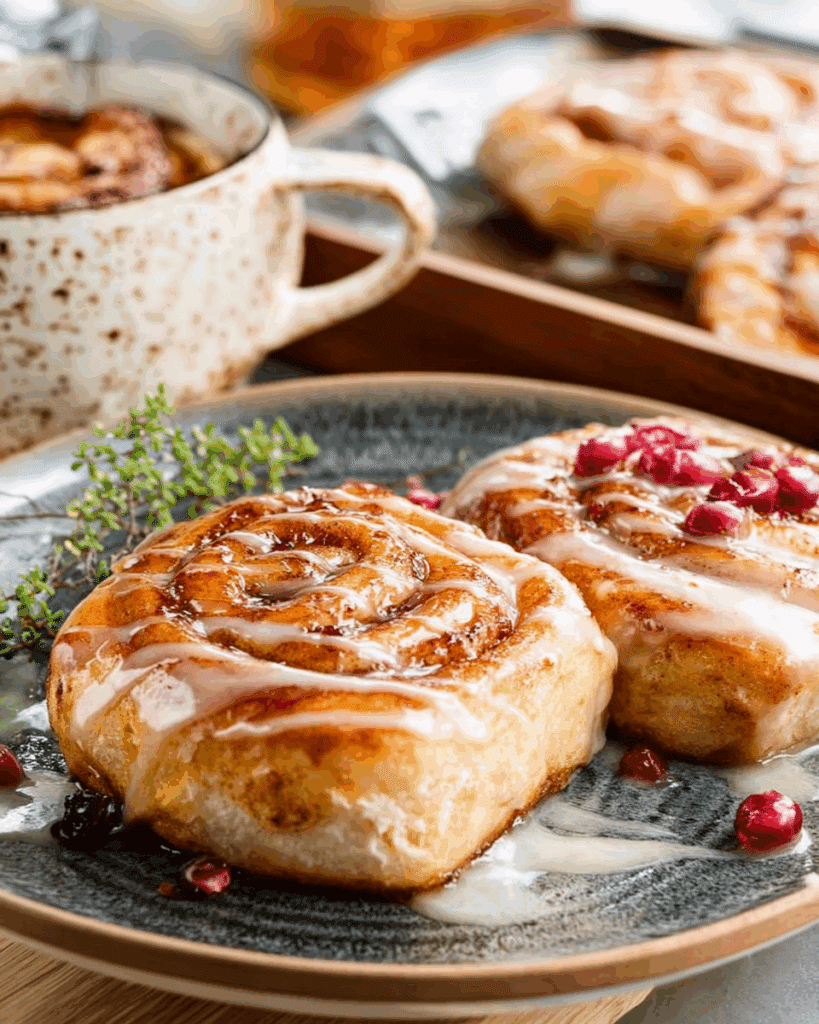
Homemade Honey Buns are soft, fluffy, cinnamon-swirled pastries glazed with a sweet honey icing. Perfect for breakfast, brunch, or an indulgent snack, these buns bring bakery-style goodness right to your kitchen.
Ingredients
- 4 cups all-purpose flour
- 1 packet (2 1/4 tsp) active dry yeast
- 1 cup warm milk (110°F)
- 1/3 cup granulated sugar
- 1/3 cup unsalted butter, melted
- 1 tsp salt
- 2 large eggs
- 1/2 cup packed brown sugar
- 1 tbsp ground cinnamon
- 1/4 cup unsalted butter, softened (for filling)
- 1/4 cup honey
- 1 cup powdered sugar
- 2–3 tbsp milk (for glaze)
Instructions
- In a large bowl, dissolve yeast in warm milk. Let sit for 5 minutes until foamy.
- Stir in granulated sugar, melted butter, salt, and eggs. Gradually add flour and mix until a dough forms.
- Knead dough on a floured surface for 6–8 minutes until smooth and elastic. Place in a greased bowl, cover, and let rise for 1 hour or until doubled in size.
- In a small bowl, mix brown sugar and cinnamon.
- Roll dough into a rectangle about 1/4 inch thick. Spread softened butter over dough, sprinkle evenly with cinnamon sugar, and drizzle with honey.
- Roll dough tightly from the long side and cut into 1-inch slices.
- Place buns in a greased baking dish, cover, and let rise for 30 minutes.
- Preheat oven to 350°F (175°C) and bake for 20–25 minutes or until golden brown.
- Mix powdered sugar with milk to make glaze. Drizzle over warm buns and serve.
Notes
- For extra honey flavor, brush buns with warm honey right after baking.
- Can be made ahead and refrigerated overnight before baking.
- Adjust cinnamon to taste for a more or less spiced bun.
Nutrition
- Serving Size: 1 bun
- Calories: 290
- Sugar: 18g
- Sodium: 220mg
- Fat: 8g
- Saturated Fat: 5g
- Unsaturated Fat: 2g
- Trans Fat: 0g
- Carbohydrates: 48g
- Fiber: 1g
- Protein: 6g
- Cholesterol: 35mg
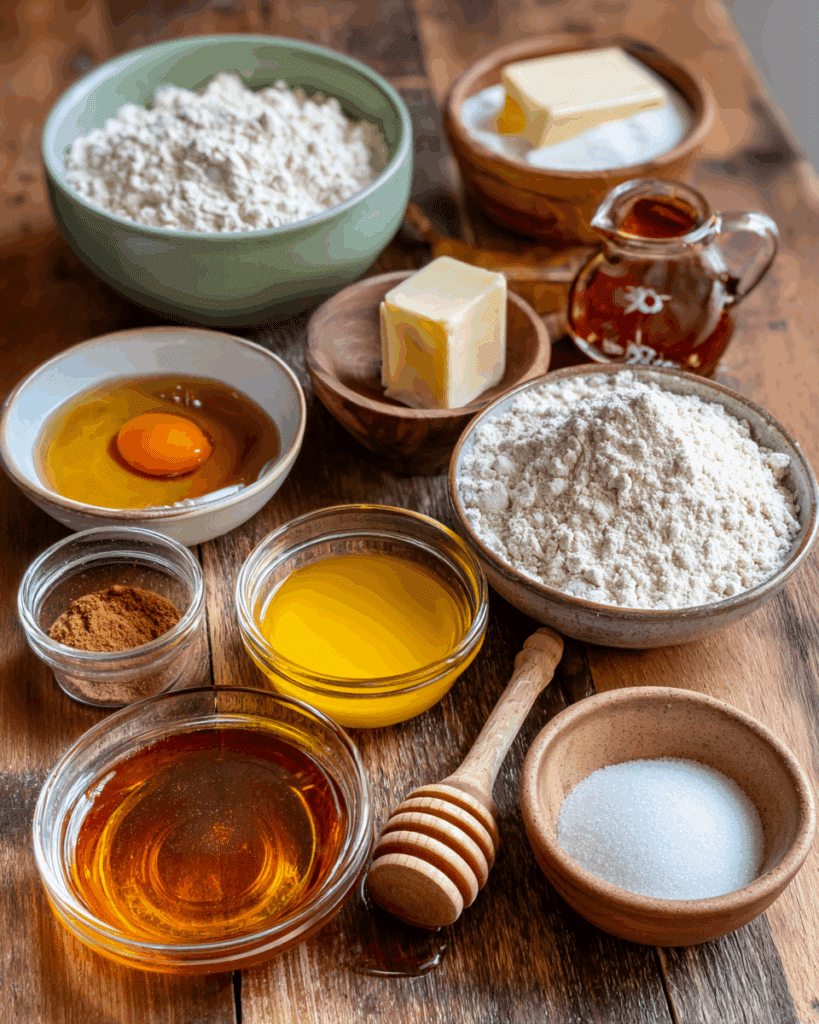
Essential Ingredients for the Perfect Homemade Honey Bun
One of the most beautiful things about the Homemade Honey Bun is how it transforms a handful of simple ingredients into something that feels like it belongs in a bakery display. Each element has a job to do, and when they work together, the result is a swirl of soft dough, warm spice, and sticky-sweet glaze that’s impossible to resist.
Dough Ingredients Breakdown
The dough is where the magic begins, and the right balance of ingredients will decide if your Homemade Honey Bun comes out fluffy and tender or dense and heavy.
- All-purpose flour – The backbone of the dough, providing structure and softness. The “plus more for rolling” is essential because you’ll need it to keep the dough from sticking during shaping.
- Granulated sugar – A touch of sweetness in the dough itself, helping feed the yeast and ensuring a light golden crust.
- Instant yeast – The engine of the rise. Instant yeast works quickly and consistently, meaning your buns puff beautifully every time.
- Salt – It’s easy to forget, but salt balances flavor and strengthens gluten so the dough holds its shape.
- Warm water (105°F–115°F) – Yeast’s favorite environment. Too cold, and the yeast will be lazy; too hot, and you risk killing it.
- Honey – The heart of the Homemade Honey Bun. It adds natural sweetness, moisture, and that signature floral note.
- Egg – Adds richness, structure, and a subtle chewiness.
- Vanilla extract – Brings a warm, aromatic undertone to the dough.
- Shortening (melted) – Softens the crumb and helps the dough stay tender for days.
Cinnamon Sugar Magic
The swirl inside a Homemade Honey Bun isn’t just for looks — it’s the flavor powerhouse. A perfect blend of sugar and cinnamon creates that warm, spiced bite in every roll.
- Granulated sugar – Melts into the dough during frying, giving tiny pockets of sweetness.
- Cinnamon – Earthy, aromatic, and essential. Using fresh, high-quality cinnamon makes a noticeable difference in flavor.
This combination is pressed into the dough before rolling, ensuring every bite has that classic honey bun taste.
Sweet, Sticky Glaze Perfection
The glaze is where a Homemade Honey Bun really earns its name. Without it, you’d just have a cinnamon swirl roll — good, but not iconic.
- Powdered sugar – Creates that smooth, luscious coating.
- Honey – Doubles down on flavor and adds shine.
- Melted butter – Brings richness and helps the glaze cling to the bun.
- Vanilla extract – Rounds out the sweetness with depth.
- Salt – Balances the sugar so it doesn’t become cloying.
- Warm water (as needed) – Adjusts the consistency so the glaze flows smoothly over the bun without being too thin.
Step-by-Step Guide to Making the Best Homemade Honey Bun
The process of making a Homemade Honey Bun is part science, part art. Follow these steps and you’ll be rewarded with golden, pillowy spirals that melt in your mouth.
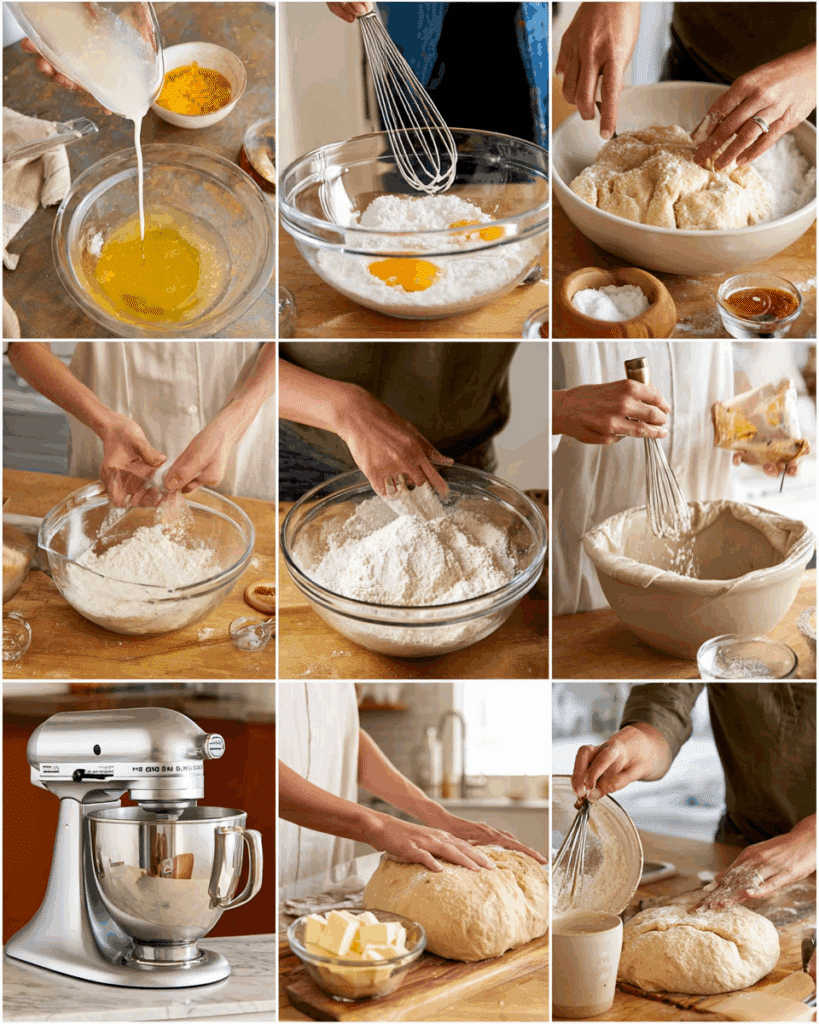
Mixing the Dough
Start by whisking together the flour, sugar, yeast, and salt. In another bowl, combine warm water, honey, egg, and vanilla extract until the egg is fully blended. Melt the shortening and add it to the wet ingredients. With your stand mixer fitted with a dough hook, slowly combine wet and dry until they form a sticky dough.
Once mixed, knead on medium speed for about 8 minutes. The dough should still be a little tacky but manageable. Shape into a ball, place it in an oiled glass bowl, and turn it once to coat. Cover with plastic wrap or a kitchen towel and let it rise in a warm, draft-free spot until it’s noticeably puffed — usually 1 to 2 hours.
Filling, Rolling, and Shaping the Homemade Honey Bun
Once your dough has risen and feels airy to the touch, it’s time to give it that signature swirl. This is where the Homemade Honey Bun starts to take on its recognizable look and flavor.
Lightly flour a clean surface and gently turn the dough out onto it. Using a rolling pin, shape the dough into a rectangle about 12 inches long and 8 inches wide. You don’t want to press too hard — keep some of that fluffy rise intact.
Now comes the cinnamon sugar magic. Sprinkle the mixture evenly over the dough, making sure it reaches close to the edges but leaving a clean strip on one long side. That clean edge will act like glue when sealing the roll. Press the cinnamon sugar down lightly with your hand so it adheres to the dough instead of falling out when you roll.
Starting from the opposite long edge, roll the dough tightly toward the clean strip. When you reach it, lightly brush that edge with water, then press to seal. Smooth it gently with your fingers to make sure the roll stays closed during frying.
Shaping and Second Rise
To get the classic oblong Homemade Honey Bun shape, trim the ends of the roll (about 1½ inches) — those can be saved and fried separately as a cook’s treat. Slice the remaining roll into 1-inch pieces, spacing them at least 2 inches apart on a parchment-lined baking sheet.
Use your fingers to gently press each slice down, elongating them slightly into that signature oval. Don’t flatten them too much — they’ll puff up again during the second rise. Cover the tray loosely with plastic wrap or a towel and let them rest for about 45 minutes. They won’t double in size, but they should look puffy and feel lighter to the touch.
Frying the Homemade Honey Bun to Perfection
Frying is where the magic turns from dough to golden bliss. Heat your vegetable or peanut oil to around 350°F. The right temperature is crucial — too hot and your Homemade Honey Bun will brown before the inside is cooked; too cool and it will absorb oil and feel greasy.
Gently lower each bun into the oil using a slotted spoon or tongs, frying only a few at a time to avoid crowding. Fry for about 1–2 minutes on each side, turning once for even color. You’re looking for a deep golden brown.
Once done, transfer to a wire rack lined with paper towels. Let them cool just slightly — enough that they can be handled — before moving on to the glaze. This way, the glaze will stick beautifully without sliding off.
If you’re looking for the ultimate comfort dessert, Blueberry Scones Recipe is a must-try.
The Science Behind the Homemade Honey Bun
Behind every soft, fluffy, and perfectly glazed Homemade Honey Bun is a little bit of kitchen chemistry. Understanding what’s happening at each stage will not only make you a better baker but will also help you troubleshoot if something doesn’t go as planned.
Yeast and the Rise
Yeast is a living organism, and when it’s mixed with warm water and sugar (or honey in this case), it wakes up and starts feeding. As it eats, it releases carbon dioxide, which gets trapped inside the dough’s gluten structure. This is what creates those airy pockets in a honey bun. If the water is too hot, you’ll kill the yeast; too cold, and it won’t activate fully — both of which affect the texture.
The Role of Gluten
Flour contains proteins that, when hydrated and kneaded, form gluten strands. These strands act like tiny balloons, holding in the gas produced by the yeast. For a Homemade Honey Bun, you want strong enough gluten to trap air, but soft enough to keep the bun tender — which is why all-purpose flour is perfect for this recipe.
Why Frying Works So Well
Frying at the right temperature seals the dough quickly, locking in moisture while creating a golden exterior. It’s a quick cooking process, which means the inside stays soft while the outside develops that irresistible bite.
Glaze Absorption
The moment the buns come out of the fryer, their surface is still slightly porous. This is the perfect time to glaze — the heat helps the sugar mixture cling and set into that beautiful glossy coat that makes the Homemade Honey Bun so iconic.
Pro Tips for Flawless Results
Preventing Dense Dough
If your Homemade Honey Bun turns out heavy instead of airy, the most likely culprit is over- or under-proofing. Always give the dough enough time to rise in a warm spot, but don’t let it over-rise, or the yeast will exhaust itself before baking or frying.
Achieving Even Glaze Coverage
Instead of dunking your buns all at once, work with one at a time while they’re still warm. Pour glaze over the top, letting it drip down naturally. This creates that bakery-style finish without clumping or uneven spots.
Controlling Oil Temperature
Invest in a kitchen thermometer — guessing oil temperature is one of the fastest ways to ruin a good Homemade Honey Bun. Too cold and you’ll get greasy buns; too hot and the outside will scorch before the inside cooks.
Choosing the Right Honey
Not all honey is created equal. For the richest flavor, go for a raw, unfiltered honey with a floral note. It adds depth and complexity to the glaze, setting your homemade version apart from anything store-bought.
Creative Variations on the Homemade Honey Bun
One of the joys of making a Homemade Honey Bun is that the recipe is endlessly adaptable. Once you master the classic version, you can start experimenting with new flavors and textures while keeping that same comforting swirl.
Fruit-Filled Honey Buns
Swap the cinnamon sugar for a thin layer of fruit preserves before rolling the dough. Raspberry, apricot, or blueberry add a sweet-tart kick that pairs beautifully with the honey glaze. Just make sure to spread the filling thinly to avoid leaking during frying.
Nutty Crunch
For extra texture, sprinkle finely chopped pecans, walnuts, or almonds over the cinnamon sugar layer. The nuts toast slightly during frying, adding a warm, earthy flavor to your Homemade Honey Bun.
Chocolate Swirl
Replace the cinnamon sugar with cocoa powder mixed with a bit of sugar and melted butter. The result is a rich chocolate ribbon that melts into the dough, turning your honey bun into a dessert lover’s dream.
Healthier Ingredient Swaps
You can make a lighter version by replacing part of the all-purpose flour with whole wheat flour, swapping shortening for coconut oil, and using coconut sugar instead of white sugar. The texture will be slightly denser, but the flavor will still be delicious.

How to Store and Reheat Homemade Honey Buns
A fresh Homemade Honey Bun is a thing of beauty, but they can be just as enjoyable the next day if stored correctly.
Short-Term Storage
Keep cooled buns in an airtight container at room temperature for up to two days. The glaze acts as a moisture seal, keeping them soft longer than you might expect.
Freezing for Later
If you want to keep them longer, freeze them without the glaze. Wrap each bun individually in plastic wrap, then place in a freezer bag. They’ll last up to two months. When ready to enjoy, thaw at room temperature and warm in the oven before glazing.
Reheating Without Losing Texture
For the best results, reheat in a 300°F oven for about 5 minutes. This gently warms the bun without drying it out. Avoid microwaving for too long, as it can make the glaze sticky and the bread rubbery.
Pairing Ideas for the Perfect Honey Bun Experience
While a Homemade Honey Bun is satisfying all on its own, pairing it with the right drink or side can make the experience even better.
- Coffee – The bitterness of coffee balances the sweetness perfectly.
- Cold Milk – A classic choice, especially for kids.
- Hot Tea – Herbal teas like chamomile or rooibos complement the honey flavor.
- Fresh Fruit – A small bowl of berries can refresh your palate between bites.
Conclusion
The Homemade Honey Bun is more than just a dessert — it’s a little piece of kitchen magic that combines comfort, nostalgia, and pure indulgence. From the warm cinnamon swirl to the golden honey glaze, every bite tells a story of care and craftsmanship. Whether you stick to the classic or try creative variations, you’ll find that making them from scratch turns a simple treat into something unforgettable.
So the next time you’re craving something sweet, skip the packaged version. Roll up your sleeves, warm up the oil, and let your home fill with the aroma of honey, cinnamon, and love. Once you take that first bite, you’ll understand why the Homemade Honey Bun will always be worth the effort.
FAQs About Homemade Honey Buns
Can I bake instead of fry a Homemade Honey Bun?
Yes! If you’d like a lighter version, place shaped buns on a parchment-lined baking sheet and bake at 350°F for 15–18 minutes until golden. Brush with glaze while still warm.
How do I make them fluffier?
Fluffiness comes from proper proofing. Give your dough enough time to rise in a warm, draft-free spot, but don’t let it over-rise or the yeast will lose its strength before cooking.
Can I make the dough ahead of time?
Absolutely. Prepare the dough, let it rise once, then cover and refrigerate overnight. The next day, shape, proof again, and fry. The flavor even improves with this slow fermentation.
What’s the best oil for frying?
Neutral oils like vegetable or peanut oil work best. They have high smoke points and won’t overpower the delicate honey flavor.
How do I keep them from going stale?
Keep your Homemade Honey Bun in an airtight container at room temperature. For longer storage, freeze without glaze and reheat before serving.