
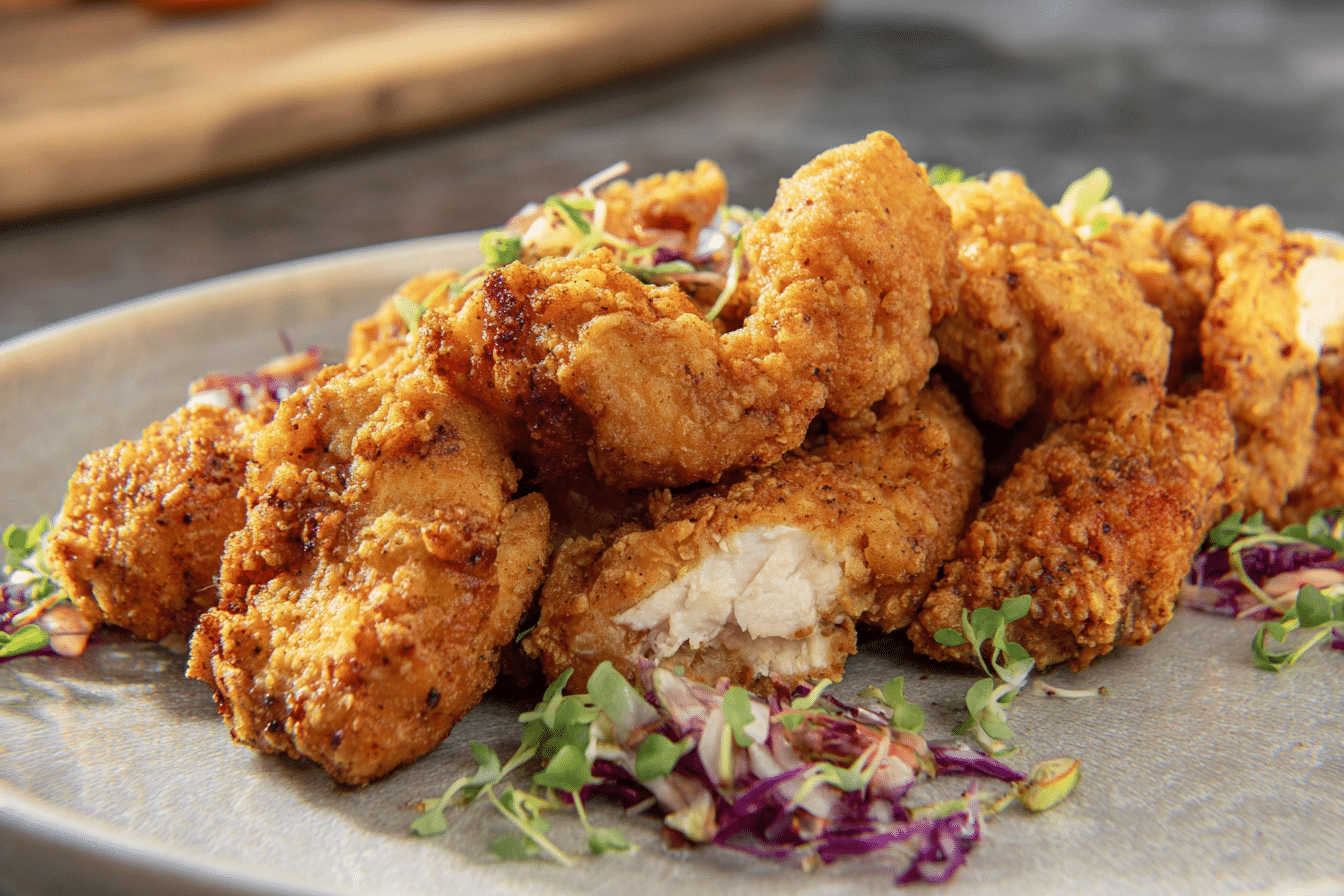
Let’s be real—there’s something about golden, crispy chicken tenders that just hits differently. They’re the ultimate comfort food: crunchy on the outside, juicy and tender on the inside, and full of flavor that makes you want to keep sneaking bites straight from the fryer. Whether you’re making them for a casual family dinner, a weekend treat, or a fun game-night snack, these tenders are guaranteed to disappear fast. Trust me, once you make them, they’ll become a go-to in your kitchen.
Disclosure: This post contains affiliate links.If you click and make a purchase, I may earn a small commission at no extra cost to you.


We’re taking the classic fried chicken to the next level by layering flavors in both the wet and dry mixes, ensuring each tender is perfectly seasoned and impossibly crispy. Bonus: this recipe uses everyday pantry ingredients, so you don’t need to hunt for anything exotic.
Recipe Origin
Crispy fried chicken has a storied history in American cuisine, with roots tracing back to Southern traditions where seasoning and frying techniques were perfected over generations. Chicken tenders, a modern twist on the classic fried chicken, became popular for their convenient size and kid-friendly appeal. This recipe combines those Southern-inspired flavors with a foolproof method that gives you restaurant-quality tenders right at home.
Kitchen Tools You’ll Need
Mixing Bowls: For the milk/egg mixture and seasoned flour.
Whisk or Fork: To beat the egg and combine wet ingredients.
Measuring Cups & Spoons: To get seasoning proportions just right.
Large Deep Pan or Dutch Oven: For frying the tenders.
Tongs or Slotted Spoon: For safely lowering and removing chicken from hot oil.
Wire Rack: To drain excess oil and keep the tenders crispy.
Paper Towels: Optional, for extra draining if needed.
Why You’ll Love Fried Chicken Tenders
This recipe isn’t just about fried chicken—it’s about moments. Perfect for busy weeknights, snack attacks, or casual gatherings, these tenders are crowd-pleasers that satisfy both kids and adults alike. Here’s why they’re irresistible:
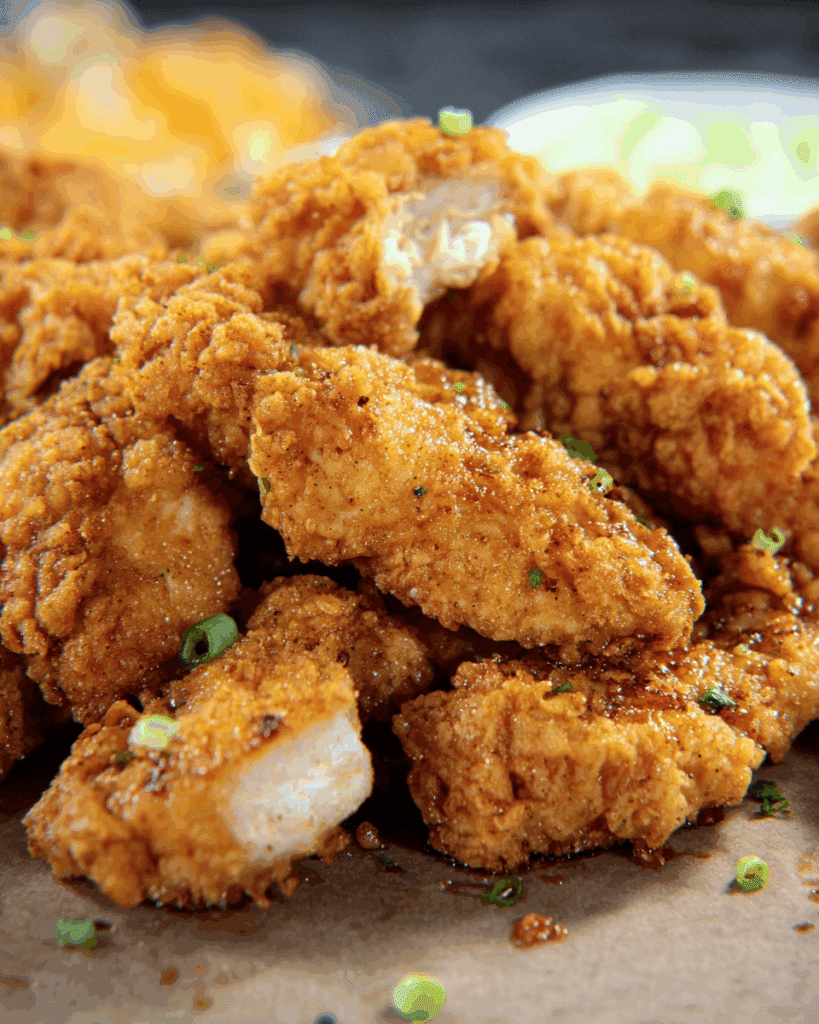
Crispy Perfection: A seasoned flour coating gives every bite a satisfying crunch. The exterior shatters lightly, revealing juicy chicken inside.
Juicy & Tender: Soaking the chicken in a milk, water, and egg mixture keeps it moist and flavorful, preventing the dreaded dry chicken scenario.
Flavor-Packed: Garlic, onion, paprika, and poultry seasoning work together to create a depth of savory flavor that hits every bite.
Kid-Friendly: Easy to eat and universally loved, these tenders are great for picky eaters without compromising on flavor.
Quick & Easy: With a simple dredge-and-fry method, this recipe is straightforward but delivers maximum satisfaction.
Chef’s Pro Tips for Perfect Results
- Use neutral oil with a high smoke point (canola, peanut, or vegetable) to ensure crispiness without burning.
- Keep the oil at a steady 350–360°F—too hot and the exterior burns before the inside cooks; too low and the tenders absorb excess oil.
- Don’t overcrowd the pan—fry in batches to maintain even cooking and crispiness.
- Let tenders rest briefly on a wire rack to drain excess oil and retain crunch.
- Customize the seasoning in the flour mix for extra zing, like smoked paprika, cayenne, or dried herbs.
Ingredients in Fried Chicken Tenders
(Note: the full ingredients list, including measurements, is provided in the recipe card directly below.)
Chicken Tenders: Naturally tender and perfect for frying. They cook quickly and stay juicy, making them ideal for this recipe.
Milk & Water: Creates a light soaking mixture that keeps the chicken moist and adds a subtle richness.
Egg: Helps the seasoned flour adhere to the chicken, forming a crisp crust.
All-Purpose Flour: The foundation of the crispy coating, forming a golden, crunchy exterior.
Garlic & Onion Powder: Add savory depth that makes every bite flavorful.
Poultry Seasoning & Paprika: Bring classic seasoning flavors and a warm, slightly smoky undertone.
Baking Soda: Helps the coating crisp up beautifully during frying.
Salt & Black Pepper: Enhance and balance all the other flavors.
Neutral Oil: For deep frying—canola, vegetable, or peanut oil works perfectly for consistent heat and crispiness.
Seasoned Flour: A second coating step with extra flour, salt, and pepper ensures maximum crunch and flavor adherence.
Instructions
Let’s dive into the steps to make these crispy, juicy chicken tenders:
Prepare Your Wet Mix: In a large mixing bowl, combine milk, water, and egg. Whisk together until fully blended. This mixture will tenderize the chicken and help the flour stick.
Mix the Dry Ingredients: In another bowl, combine flour, garlic powder, onion powder, poultry seasoning, paprika, baking soda, salt, and pepper. This seasoned flour will create that irresistible crispy coating.
Coat the Chicken: Dip each chicken tender into the wet mixture, letting excess drip off, then dredge thoroughly in the seasoned flour. For extra crunch, double-dip by repeating the wet and dry step.
Prepare Your Frying Oil: Heat oil in a large deep pan or Dutch oven to 350–360°F. Use a thermometer to maintain steady heat.
Fry the Tenders: Carefully lower chicken into hot oil in batches, ensuring not to overcrowd the pan. Fry for 3–5 minutes per side, depending on thickness, until golden brown and cooked through. Internal temperature should reach 165°F.
Drain & Rest: Remove tenders using tongs or a slotted spoon and place on a wire rack to drain excess oil. Avoid paper towels directly under tenders if you want to keep the crust extra crispy.
Serve and Enjoy: Serve immediately with your favorite dipping sauces, like honey mustard, ranch, or spicy aioli. These tenders are perfect for dipping, sharing, and devouring.
Nutrition Facts
Servings: 6
Calories per serving: Approximately 400 (depending on oil absorption and chicken size)
Preparation Time
Prep Time: 20 minutes
Cook Time: 15–20 minutes
Total Time: 35–40 minutes
How to Serve Fried Chicken Tenders
Classic Sides: Serve with fries, mashed potatoes, or mac and cheese for a full comfort meal.
Fresh Veggies: Pair with a crisp salad or veggie sticks to balance the richness.
Sandwich Style: Use toasted buns and lettuce to make fried chicken sandwiches.
Dipping Sauces: Honey mustard, barbecue, ranch, or sriracha mayo all work beautifully.
As a Snack: Perfect for parties or game nights—easy to grab and share.
Make-Ahead and Storage Tips
- Prep Ahead: Coat the chicken in flour and refrigerate up to 2 hours before frying.
- Storage: Keep leftovers in an airtight container in the fridge for up to 3 days.
- Reheating: Reheat in a 375°F oven for 10–15 minutes to maintain crispiness.
- Freezing: Freeze uncooked coated tenders on a sheet tray, then transfer to a freezer bag. Fry straight from frozen, adding a couple of minutes to cooking time.
Variations to Try
- Spicy Version: Add cayenne or chili powder to the flour mix.
- Herb Infusion: Mix dried thyme, oregano, or rosemary into the coating for extra aroma.
- Gluten-Free: Use a gluten-free flour blend and make sure the baking soda is gluten-free.
- Air Fryer Option: Cook at 400°F for 12–15 minutes, flipping halfway through.
- Panko Crunch: Substitute half the flour with panko for a lighter, crunchier coating.
Additional Tips
- Don’t skip seasoning both the wet and dry mixtures—it layers flavor beautifully.
- Maintain oil temperature—fluctuations can make tenders greasy or unevenly cooked.
- Let tenders rest briefly after frying to lock in juices.
- Serve immediately for the ultimate crispy texture experience.
FAQ Section
Q1: Can I use chicken breasts instead of tenders?
A1: Yes! Slice into strips about the same size as tenders for even cooking.
Q2: Can I bake them instead of frying?
A2: Absolutely. Bake at 400°F for 20–25 minutes, flipping halfway for golden crispiness.
Q3: Can I make them ahead of time?
A3: Coat them and store in the fridge up to 2 hours before frying. Fry just before serving.
Q4: How do I store leftovers?
A4: Refrigerate in an airtight container for up to 3 days.
Q5: Can I freeze cooked tenders?
A5: Yes! Freeze cooled tenders in a freezer-safe container for up to 2 months. Reheat in the oven.
Q6: What dipping sauce pairs best?
A6: Honey mustard, ranch, barbecue, or spicy aioli all complement the seasoned chicken beautifully.
Q7: Can I use buttermilk instead of milk and water?
A7: Yes! Buttermilk adds extra tang and tenderness.
Q8: How do I keep the coating from falling off?
A8: Double-dip in the wet and dry mixtures and let them rest a few minutes before frying.
Q9: Can I make them gluten-free?
A9: Substitute all-purpose flour with a gluten-free flour blend and use gluten-free baking soda.
Q10: Can I air fry them?
A10: Yes! Air fry at 400°F for 12–15 minutes, flipping halfway through.
Conclusion
These fried chicken tenders are the perfect combination of crispy, juicy, and flavorful. They’re easy enough for weeknight dinners but impressive enough for parties or family gatherings. With a golden crust that shatters on the first bite and tender, juicy chicken inside, this recipe is destined to become a staple in your kitchen. Once you taste these, you’ll never look at frozen tenders the same way again. Grab your favorite dipping sauces, gather your loved ones, and dig in—these tenders are meant to be devoured hot, crispy, and straight from the fryer.
Print
Fried Chicken Tenders
- Prep Time: 15 minutes
- Cook Time: 15-20 minutes
- Total Time: 30-35 minutes
- Yield: 4–6 servings 1x
- Category: Main Dish
- Method: Deep Frying
- Cuisine: American
- Diet: Halal
Description
Crispy, golden fried chicken tenders that are tender on the inside and perfectly seasoned on the outside. Ideal for a quick dinner, snack, or game-day treat.
Ingredients
- 2 pounds chicken tenders
- 1/2 cup whole milk
- 3/4 cup water
- 1 large egg
- 1 3/4 cups all-purpose flour
- 3/4 teaspoon garlic powder
- 3/4 teaspoon onion powder
- 1 teaspoon poultry seasoning
- 1 teaspoon paprika
- 1/2 teaspoon baking soda
- 1 3/4 teaspoons salt
- 1/2 teaspoon black pepper
- Neutral oil for deep frying (canola, vegetable, or peanut oil)
- For the seasoned flour:
- 1 1/2 cups all-purpose flour
- 3/4 teaspoon salt
- 1/2 teaspoon black pepper
Instructions
- In a bowl, whisk together milk, water, and egg until well combined.
- In another bowl, mix 1 3/4 cups flour, garlic powder, onion powder, poultry seasoning, paprika, baking soda, salt, and black pepper.
- Dip each chicken tender into the wet mixture, then dredge in the seasoned flour until fully coated.
- For extra crispiness, double-dip: dip back into the wet mixture and coat again with the seasoned flour.
- Heat enough neutral oil in a deep fryer or large skillet to 350°F (175°C).
- Carefully fry chicken tenders in batches, avoiding overcrowding, until golden brown and fully cooked, about 4-6 minutes per side depending on thickness.
- Remove and drain on paper towels before serving.
Notes
- Ensure oil temperature stays around 350°F for the crispiest coating.
- Do not overcrowd the pan; fry in batches for even cooking.
- Seasoned flour can be adjusted with extra spices like cayenne for heat.
- Serve immediately for the best texture, or keep warm in a low oven while frying remaining batches.
Nutrition
- Serving Size: 4 pieces
- Calories: 420
- Sugar: 1g
- Sodium: 750mg
- Fat: 25g
- Saturated Fat: 5g
- Unsaturated Fat: 18g
- Trans Fat: 0g
- Carbohydrates: 32g
- Fiber: 1g
- Protein: 28g
- Cholesterol: 105mg
I’ve been absent for a while, but now I remember why I used to love this blog. Thanks , I will try and check back more often. How frequently you update your web site?
I reckon something truly special in this site.
Wow! Thank you! I always wanted to write on my site something like that. Can I take a part of your post to my blog?
whoah this blog is excellent i love reading your articles. Keep up the great work! You know, a lot of people are looking around for this information, you could aid them greatly.
I’m curious to find out what blog system you’re using? I’m having some small security issues with my latest blog and I’d like to find something more safe. Do you have any recommendations?
It’s in reality a great and useful piece of information. I’m happy that you simply shared this helpful information with us. Please keep us informed like this. Thank you for sharing.
My wife and i were quite delighted when Louis could conclude his web research from your precious recommendations he discovered through the web pages. It’s not at all simplistic to simply be releasing helpful tips some other people have been making money from. We really acknowledge we have the website owner to give thanks to for this. All of the illustrations you have made, the straightforward blog menu, the friendships your site assist to instill – it is mostly impressive, and it is aiding our son and us imagine that the subject matter is fun, which is truly important. Thank you for the whole lot!
Thank you for any other magnificent post. Where else may anyone get that kind of information in such a perfect approach of writing? I’ve a presentation subsequent week, and I am at the search for such information.
Excellent blog! Do you have any suggestions for aspiring writers? I’m hoping to start my own website soon but I’m a little lost on everything. Would you advise starting with a free platform like WordPress or go for a paid option? There are so many options out there that I’m completely confused .. Any suggestions? Many thanks!
I don’t think the title of your article matches the content lol. Just kidding, mainly because I had some doubts after reading the article. https://accounts.binance.info/register-person?ref=IXBIAFVY
There are certainly a lot of particulars like that to take into consideration. That may be a great level to carry up. I supply the thoughts above as common inspiration however clearly there are questions just like the one you carry up the place a very powerful factor shall be working in trustworthy good faith. I don?t know if finest practices have emerged round issues like that, however I’m certain that your job is clearly recognized as a fair game. Each boys and girls feel the affect of just a moment’s pleasure, for the remainder of their lives.
**mitolyn official**
Mitolyn is a carefully developed, plant-based formula created to help support metabolic efficiency and encourage healthy, lasting weight management.
I like this web blog so much, saved to favorites. “Respect for the fragility and importance of an individual life is still the mark of an educated man.” by Norman Cousins.