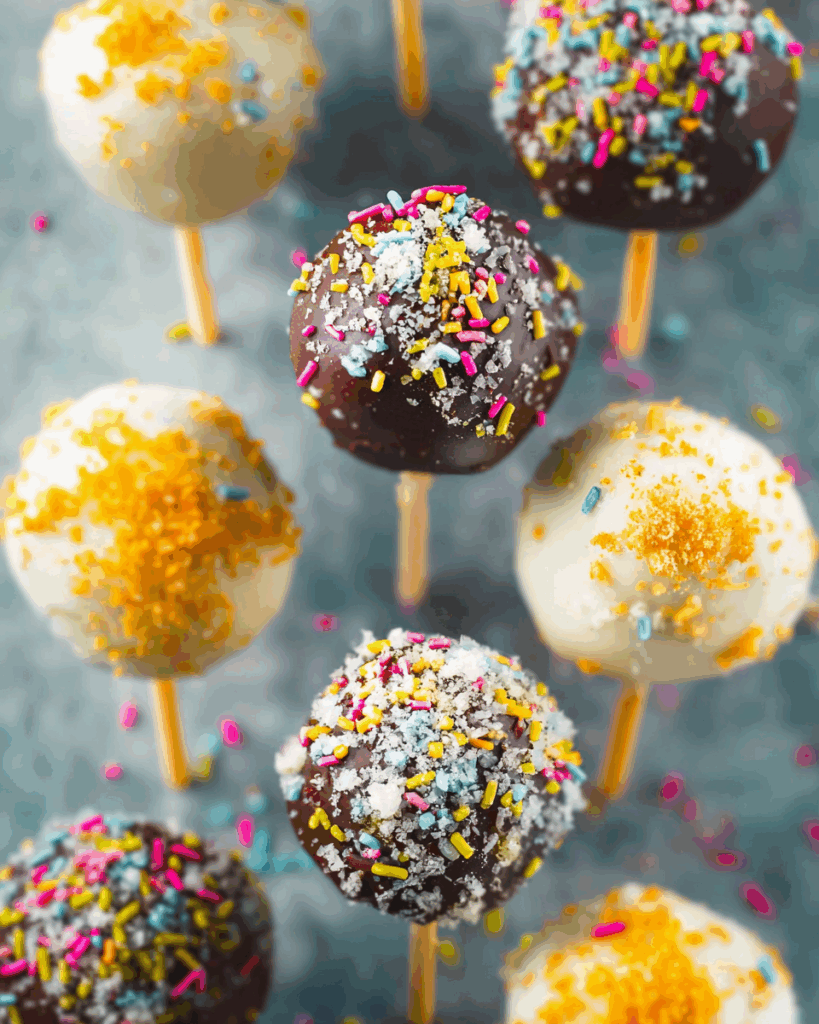
Cake pops—tiny bites of cake on a stick—are pure joy in every sense. They’re whimsical, fun, and ridiculously satisfying to eat. Imagine sinking your teeth into moist, chocolatey cake, coated in a glossy chocolate shell, and holding it on a stick like a little edible wand of happiness. Sounds delightful, right? These Easy Homemade Cake Pops are the perfect treat for parties, gifts, or just indulging your sweet tooth at home.
Disclosure: This post contains affiliate links.If you click and make a purchase, I may earn a small commission at no extra cost to you.
The best part? They’re simpler to make than you might think. Moist chocolate cake, smooth buttercream frosting, and a glossy chocolate coating come together in a way that feels magical but is totally doable. Even better—they’re customizable! You can sprinkle, drizzle, or dip in different chocolates to make them uniquely yours. Trust me, once you make these, you’ll never buy store-bought cake pops again.
Why You’ll Love This Recipe
This isn’t just a dessert—it’s an experience. Here’s why these cake pops are worth making:
Fun and Interactive
Perfect for parties or family cooking sessions. Kids and adults alike love shaping and decorating their own pops.
Moist and Flavorful
Chocolate cake blended with buttercream frosting ensures every bite is rich, moist, and decadent.
Customizable
Switch up coatings, add sprinkles, or drizzle white chocolate for endless creativity.
Perfect for Gifting
Wrapped individually, they make charming homemade gifts or party favors.
Beginner-Friendly
Even if you’ve never made cake pops before, this recipe walks you through every step so you’ll get professional-looking results.
Print
Easy Homemade Cake Pops
- Prep Time: 30 minutes
- Cook Time: 30 minutes
- Total Time: 1 hour
- Yield: 24 cake pops
- Category: Dessert
- Method: Baking and dipping
- Cuisine: American
- Diet: Vegetarian
Description
These easy homemade cake pops are a fun and delicious treat! Moist chocolate cake is crumbled and mixed with rich buttercream, then dipped in chocolate for a perfect bite-sized dessert that’s great for parties or an everyday sweet treat.
Ingredients
-
Chocolate Cake:
- 1 cup all-purpose flour
- 1/2 cup Dutch-processed cocoa powder (20%-22%)
- 1 teaspoon baking soda
- 1/2 teaspoon salt
- 1 cup granulated sugar
- 1/4 cup butter, melted
- 1 large egg
- 1 teaspoon pure vanilla extract
- 1/2 cup buttermilk
- 1/2 cup strong black coffee, cooled
-
Buttercream Frosting:
- 2 cups confectioners’ sugar
- 1/2 cup butter, softened
- 1/4 cup Dutch-processed cocoa powder (20%-22%)
- 6 teaspoons milk, divided
- 1 teaspoon vanilla extract
-
Chocolate Coating:
- 2 cups candy melts or high-quality chocolate
- 24 lollipop sticks or bamboo skewers
Instructions
- Preheat oven to 350°F (175°C) and line a baking pan with parchment paper.
- In a large bowl, whisk together flour, cocoa powder, baking soda, and salt.
- In another bowl, combine sugar, melted butter, egg, vanilla, buttermilk, and cooled coffee until smooth.
- Gradually add the dry ingredients to the wet mixture and mix until well combined.
- Pour batter into the prepared pan and bake for 25–30 minutes or until a toothpick comes out clean. Allow to cool completely.
- For the buttercream, beat together butter, confectioners’ sugar, cocoa powder, 5 teaspoons milk, and vanilla until smooth. Adjust consistency with remaining milk if needed.
- Crumble the cooled cake into a large bowl, then mix with buttercream until it holds together but is not too wet.
- Shape mixture into 24 small balls and insert lollipop sticks. Chill in the refrigerator for at least 1 hour.
- Melt chocolate or candy melts according to package instructions. Dip each cake pop into the chocolate, allowing excess to drip off.
- Place dipped cake pops on parchment paper to set. Optionally, decorate before chocolate sets.
Notes
- Ensure the cake is completely cooled before crumbling to prevent a soggy mixture.
- Chill the cake balls well before dipping for a smooth coating.
- Use high-quality chocolate for the coating for best taste and shine.
- Store cake pops in an airtight container at room temperature for up to 3 days or refrigerate for longer shelf life.
Nutrition
- Serving Size: 1 cake pop
- Calories: 210
- Sugar: 20g
- Sodium: 80mg
- Fat: 12g
- Saturated Fat: 7g
- Unsaturated Fat: 4g
- Trans Fat: 0g
- Carbohydrates: 24g
- Fiber: 2g
- Protein: 2g
- Cholesterol: 35mg
Recipe Origin
Cake pops were popularized by a well-known bakery in the U.S. as a fun, portable dessert. The concept is simple—cake crumbs combined with frosting to form a dough, molded onto sticks, and dipped in chocolate. Over time, the trend caught on worldwide for its visual appeal and delicious flavor, making cake pops a beloved treat for birthdays, holidays, and special celebrations.
Kitchen Tools You’ll Need
- Mixing bowls
- Electric mixer or hand whisk
- Spatula
- Measuring cups and spoons
- Baking pan
- Parchment paper
- Microwave-safe bowl or double boiler for melting chocolate
- Lollipop sticks or bamboo skewers
Chef’s Pro Tips for Perfect Results
- Chill the cake balls before dipping to ensure the coating sticks and doesn’t slide off.
- Don’t overmix when combining cake and frosting; the mixture should be firm but pliable.
- Dip gently and let excess chocolate drip off before standing upright to dry.
- Decorate immediately before the coating sets if adding sprinkles or drizzle.
- Store properly in an airtight container to maintain freshness.
Ingredients in Easy Homemade Cake Pops
Here’s what makes these little treats irresistible:
Chocolate Cake
Soft, moist, and rich. This is the foundation of every cake pop, providing that chocolatey satisfaction we all crave.
All-Purpose Flour & Cocoa Powder
Flour provides structure, while Dutch-processed cocoa adds deep, rich chocolate flavor.
Baking Soda & Salt
Balances flavors and ensures the cake rises perfectly.
Granulated Sugar
Sweetens the cake without overpowering the chocolate notes.
Butter & Egg
Butter adds richness, while eggs provide moisture and help bind everything together.
Vanilla Extract
Enhances the chocolate flavor with a warm, aromatic note.
Buttermilk & Coffee
Buttermilk adds tang and tenderness, while coffee deepens the chocolate flavor naturally.
Buttercream Frosting
Smooth, sweet, and creamy—it binds the cake crumbs into moldable cake balls.
Confectioners’ Sugar & Cocoa Powder
Sweetens and flavors the buttercream, creating the perfect coating for cake crumbs.
Chocolate Coating
Candy melts or high-quality chocolate form the glossy, decadent shell that makes cake pops irresistible.
Lollipop Sticks or Bamboo Skewers
Hold the cake balls securely and make them fun to serve or gift.
(Note: the full ingredients list, including measurements, is provided in the recipe card directly below.)
Instructions
Let’s make these little chocolate wonders come to life:
Bake the Cake
Preheat your oven to 350°F (175°C). Mix all the chocolate cake ingredients until smooth and bake in a prepared pan until a toothpick comes out clean. Let it cool completely.
Make the Buttercream
In a bowl, beat butter until smooth. Gradually add confectioners’ sugar, cocoa powder, milk, and vanilla extract until creamy and fluffy.
Crumble the Cake
Once cooled, crumble the chocolate cake into fine crumbs using your hands or a fork.
Combine with Frosting
Add buttercream frosting to the cake crumbs a little at a time. Mix gently until the mixture holds together but is not overly sticky.
Shape Cake Balls
Roll the mixture into small balls and place on a parchment-lined baking sheet. Chill in the fridge for at least 30 minutes to firm up.
Insert Sticks
Dip the tip of each lollipop stick into melted chocolate, then insert halfway into the cake ball. This helps secure the stick.
Coat in Chocolate
Melt candy melts or chocolate in a microwave or double boiler. Dip each cake ball into the chocolate, letting excess drip off, then stand upright to set.
Decorate
While the chocolate is still wet, sprinkle with decorations or drizzle with contrasting chocolate. Allow to set completely.
Serve and Enjoy
Once set, these cake pops are ready to delight your family, friends, or guests. Each bite is rich, chocolatey, and perfectly bite-sized!
Nutrition Facts
Servings: 12–16 cake pops
Calories per serving: Approx. 200–250
Preparation Time
Prep Time: 20–30 minutes
Cook Time: 25–30 minutes
Total Time: 1 hour

How to Serve Easy Homemade Cake Pops
- Party Treats: Display in a stand or jar for a fun centerpiece.
- Gifts: Wrap individually in cellophane with a ribbon.
- Dessert Table: Pair with cupcakes, cookies, or brownies.
- Snack: Perfect bite-sized treat for kids’ lunchboxes.
- Themed Decorations: Customize colors and sprinkles for holidays or birthdays.
Make-Ahead and Storage Tips
- Prep Ahead: Bake and crumble cake the day before; mix with frosting and chill.
- Storage: Keep cake pops in an airtight container at room temperature for up to 3 days. Refrigerate for longer storage.
- Freeze: Wrap individually and freeze for up to 2 months; thaw before serving.
- Reheat: Not necessary—serve cold or at room temperature.
Variations to Try
- Different Coatings: White chocolate, milk chocolate, or colored candy melts.
- Flavor Twists: Add flavored extracts like almond, mint, or orange.
- Mix-ins: Tiny chocolate chips, crushed cookies, or sprinkles inside the cake mixture.
- Shape Variations: Hearts, stars, or themed molds for special occasions.
- Drizzle Decoration: Melt contrasting chocolate and drizzle over set pops for a professional look.
Additional Tips
- Chill Cake Balls: Firming the cake balls makes coating easier and reduces breakage.
- Use Good Chocolate: High-quality chocolate gives the best shine and taste.
- Decorate While Wet: Adds vibrant textures and colors that stick beautifully.
- Don’t Overfill Frosting: Too much frosting makes the balls sticky and difficult to coat.
FAQ Section
Q1: Can I use boxed cake mix instead of homemade?
A1: Yes! Boxed chocolate cake works perfectly. Just follow the same steps for crumbling and mixing with frosting.
Q2: Can I use cream cheese frosting instead of buttercream?
A2: Absolutely! Cream cheese frosting works well but may slightly change texture.
Q3: How do I prevent cake pops from falling off sticks?
A3: Dip the stick in melted chocolate before inserting into the cake ball; this acts as glue.
Q4: Can I make these gluten-free?
A4: Yes! Use a gluten-free flour blend for the cake and ensure decorations are gluten-free.
Q5: Can I use milk chocolate instead of candy melts?
A5: Yes, but tempering the chocolate ensures a shiny, smooth coating.
Q6: How long do cake pops last?
A6: At room temperature, up to 3 days; refrigerated, up to a week.
Q7: Can I freeze cake pops?
A7: Yes, individually wrap and freeze for up to 2 months. Thaw before serving.
Q8: How do I make them colorful?
A8: Use colored candy melts, sprinkles, or edible dust.
Q9: Can I add flavorings to the cake mixture?
A9: Yes! Coffee, citrus zest, or extracts can add a delicious twist.
Q10: Do I have to bake the cake, or can I use leftovers?
A10: Leftover cake works wonderfully—just crumble it and mix with frosting.
Conclusion
These Easy Homemade Cake Pops are fun, customizable, and irresistible. From the moist chocolate cake to the creamy buttercream and glossy chocolate coating, every bite is a little celebration. Perfect for gifts, parties, or simply indulging yourself, these cake pops are a show-stopping dessert that’s surprisingly simple to make. Grab your sticks, melt some chocolate, and enjoy the sweet, chocolatey magic of homemade cake pops!


