

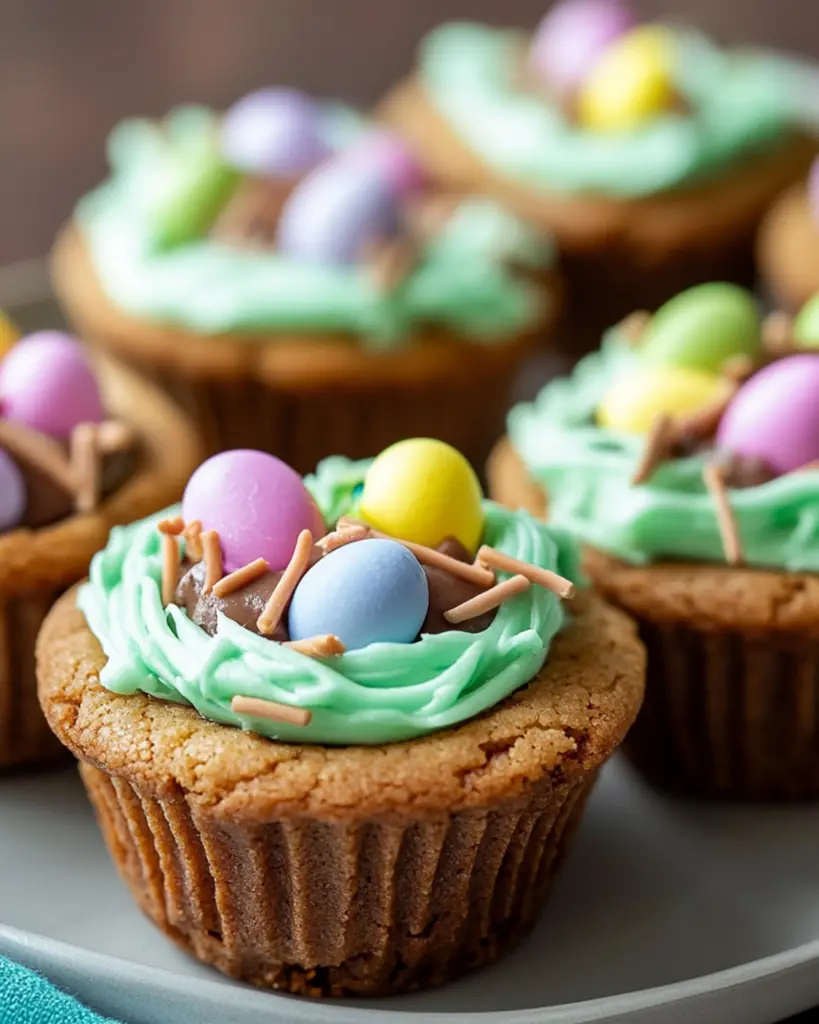
Easter is all about bright colors, sweet treats, and a little bit of magic—and these Easter Basket Cookie Cups bring all of that together in one bite! Imagine a soft, chewy sugar cookie shaped into the perfect little basket, filled with creamy frosting or chocolate, and topped with festive candies. They’re cute, delicious, and so much fun to make! Whether you’re baking with kids, prepping for an Easter party, or just looking for a festive dessert, these cookie cups will be the star of the table.
Disclosure: This post contains affiliate links.If you click and make a purchase, I may earn a small commission at no extra cost to you.


Why You’ll Love This Recipe
- Adorably Festive – These mini cookie baskets look like they came straight from the Easter Bunny’s kitchen.
- Soft & Chewy Cookies – A perfect sugar cookie base that’s buttery, soft, and delicious.
- Fun to Decorate – Get creative with colorful frosting, candy eggs, and sprinkles!
- Make-Ahead Friendly – Bake the cookie cups in advance and decorate when you’re ready.
- Kid-Friendly – A fun baking project that little hands will love helping with.
Ingredients in Easter Basket Cookie Cups
These sweet treats are made with simple ingredients that create a bakery-style cookie cup with a festive twist.
Sugar Cookie Dough – The buttery, soft base that forms the “basket.” You can use homemade dough or store-bought for convenience.
Vanilla Frosting – Acts as the glue to hold the candy eggs and decorations in place. You can also use chocolate frosting or tinted buttercream for variety.
Shredded Coconut – Dyed green to resemble Easter grass, adding a fun texture and festive touch.
Candy Eggs – Mini chocolate eggs, jelly beans, or malted eggs make the perfect “basket fillers.”
Licorice or Pretzel Handles – A cute finishing touch to create the basket look. Soft licorice strings work best, but you can also use pretzel sticks for a crunchy twist.
(Note: The full ingredients list, including measurements, is provided in the recipe card directly below.)
Instructions
Let’s make these adorable Easter Basket Cookie Cups step by step:
Preheat the Oven: Set your oven to 350°F (175°C) and grease a mini muffin tin. This will help the cookie cups pop out easily after baking.
Form the Cookie Cups: Roll the cookie dough into small balls and press them into the mini muffin tin, shaping them into little cups. Gently press down in the center to create space for the filling.
Bake Until Golden: Bake for about 10-12 minutes, or until the edges are lightly golden. They’ll puff up a bit, so as soon as they come out of the oven, use the back of a spoon to gently press down the centers again.
Cool Completely: Let the cookie cups cool in the tin for a few minutes, then transfer them to a wire rack to cool completely before decorating.
Prepare the “Grass” Topping: In a small bowl, mix shredded coconut with a few drops of green food coloring until evenly coated. This will be the “Easter grass.”
Fill the Baskets: Pipe or spoon a dollop of frosting into each cookie cup. This will help hold the toppings in place.
Decorate with Candy Eggs: Place a few candy eggs on top of the frosting, nestling them into the coconut “grass.”
Add the Basket Handles: If using licorice, cut it into small arcs and gently press each end into the cookie cup to create a handle. If using pretzels, stick them into the frosting for a fun crunchy alternative.
Serve & Enjoy: Arrange these adorable treats on a festive platter and watch them disappear in no time!
How to Serve Easter Basket Cookie Cups
These cookie cups are the perfect addition to any Easter celebration! Here’s how to enjoy them:
- On an Easter Dessert Table – A show-stopping treat among your holiday desserts.
- As a Gift – Wrap them in clear treat bags and tie with a ribbon for a cute homemade Easter gift.
- With a Cup of Tea or Coffee – A sweet little bite-sized treat to pair with your favorite drink.
- For a Fun Kids’ Activity – Set up a decorating station and let kids customize their own baskets!
Additional Tips
- Make the Cookie Cups Ahead: Bake the cookie cups in advance and store them in an airtight container. Decorate them right before serving for the freshest look.
- Use Different Frosting Colors: Try pastel pink, blue, or yellow frosting for an extra festive touch.
- Swap the Candy Eggs: Not a fan of chocolate eggs? Use jelly beans, mini marshmallows, or even small fruit pieces.
- Keep the Handles Secure: If the licorice handles won’t stay in place, use a bit of frosting to “glue” them in.
- Store Leftovers Properly: Keep decorated cookie cups in an airtight container at room temperature for up to 2 days, or refrigerate for longer freshness.
FAQ Section
Q1: Can I use store-bought cookie dough?
A1: Absolutely! Store-bought dough makes this recipe even easier, and it still tastes amazing.
Q2: Can I make these cookie cups in a regular muffin tin?
A2: You can, but they’ll be larger. Just adjust the baking time and press a deeper well into the center.
Q3: How do I dye coconut green?
A3: Simply mix shredded coconut with a few drops of green food coloring and stir until evenly coated.
Q4: Can I use different types of cookies for the cups?
A4: Yes! Try chocolate chip cookie dough, peanut butter dough, or even brownie batter for a fun variation.
Q5: How far in advance can I make these?
A5: You can bake the cookie cups 2-3 days ahead and store them in an airtight container. Decorate them the day of serving for the best results.
Q6: What if I don’t have licorice for the handles?
A6: You can use pretzel sticks, candy canes (cut into small arcs), or even pipe a frosting handle.
Q7: Can I freeze these cookie cups?
A7: Yes! Freeze the baked (undecorated) cookie cups in an airtight container for up to 2 months. Thaw and decorate when needed.
Q8: Do I have to use coconut for the grass?
A8: Nope! You can also use crushed green sprinkles or edible Easter grass candy.
Q9: How do I make these dairy-free?
A9: Use a dairy-free cookie dough, frosting, and candy options to keep them dairy-free.
Q10: Can kids help make these?
A10: Yes! This is a perfect kid-friendly recipe. Let them shape the dough, add frosting, and decorate their own baskets.
Final Thoughts
These Easter Basket Cookie Cups are the ultimate festive treat—adorable, fun to make, and absolutely delicious. Whether you’re whipping them up for an Easter party, as a sweet surprise for kids, or just for yourself (no judgment here!), they’re guaranteed to bring a little extra joy to your holiday. Give them a try, and let me know how you decorate yours!
Print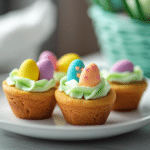
Easter Basket Cookie Cups
- Prep Time: 10 minutes
- Cook Time: 10 minutes
- Total Time: 20 minutes
- Yield: 24 cookies
- Category: Dessert
- Method: Baking
- Cuisine: American
Description
These adorable Easter Basket Cookies are a fun and festive treat! Made with a soft peanut butter cookie base and topped with homemade buttercream frosting, they are decorated with colorful Peanut Butter M&Ms for a perfect Easter celebration.
Ingredients
Cookie Cups
- 1 cup sugar
- 1 cup brown sugar
- 1 cup shortening
- 1 cup creamy peanut butter
- 1 tsp salt
- 1 tsp vanilla extract
- 2 eggs
- 1/4 cup milk
- 3 1/2 cups all-purpose flour
- 2 tsp baking soda
Buttercream Frosting
- 1/2 cup unsalted butter
- 3–4 cups powdered sugar
- 1/4 cup milk
- 1 tsp vanilla extract
- Food coloring (your choice)
- Peanut Butter M&Ms (for topping)
Instructions
Make the Cookie Cups
-
Preheat the Oven
- Set oven to 350°F (175°C). Grease a muffin tin.
-
Prepare the Dough
- In a large bowl, mix sugar, brown sugar, shortening, peanut butter, salt, and vanilla until well combined.
- Add eggs and milk, mixing until smooth.
- Fold in flour and baking soda until fully incorporated.
-
Shape the Cookies
- Using a large cookie scoop, place dough balls into the greased muffin tin cups.
- Use a tart press or similar tool to create an indent in each dough ball.
-
Bake
- Bake for 10-12 minutes until golden.
- The cookies will rise while baking and settle once removed. Let them cool completely.
Make the Frosting
-
Mix the Frosting
- Beat butter, milk, vanilla, and 2 cups of powdered sugar until creamy (about 5 minutes).
- Gradually add the remaining powdered sugar and food coloring of choice.
-
Assemble the Cookies
- Pipe frosting into the cooled cookie cups.
- Decorate with Peanut Butter M&Ms.
-
Serve & Enjoy
- Let the frosting set before serving.
Notes
- Storage: Store in an airtight container at room temperature for up to 3 days or in the refrigerator for up to a week.
- Make-Ahead Tip: Cookie cups can be baked in advance and frozen. Frost just before serving.
- Variations: Try different frosting colors or swap M&Ms for mini chocolate eggs for variety.
Nutrition
- Serving Size: 1 cookie
- Calories: 200
- Sugar: 18g
- Sodium: 120mg
- Fat: 10g
- Saturated Fat: 3g
- Unsaturated Fat: 5g
- Trans Fat: 0g
- Carbohydrates: 25 g
- Fiber: 1g
- Protein: 3g
- Cholesterol: 15mg