

If you’ve ever wished you could eat a Drumstick ice cream cone without worrying about melting it down your arm—well, today is your lucky day! These Drumstick Ice Cream Cone Cookies are like the ice cream truck’s greatest hit turned into a fun, no-mess, no-melt dessert you can make right in your kitchen. They’re crispy, creamy, chocolaty, and utterly charming. Perfect for parties, picnics, or when you’re just craving a sweet throwback to summer days.
Disclosure: This post contains affiliate links.If you click and make a purchase, I may earn a small commission at no extra cost to you.


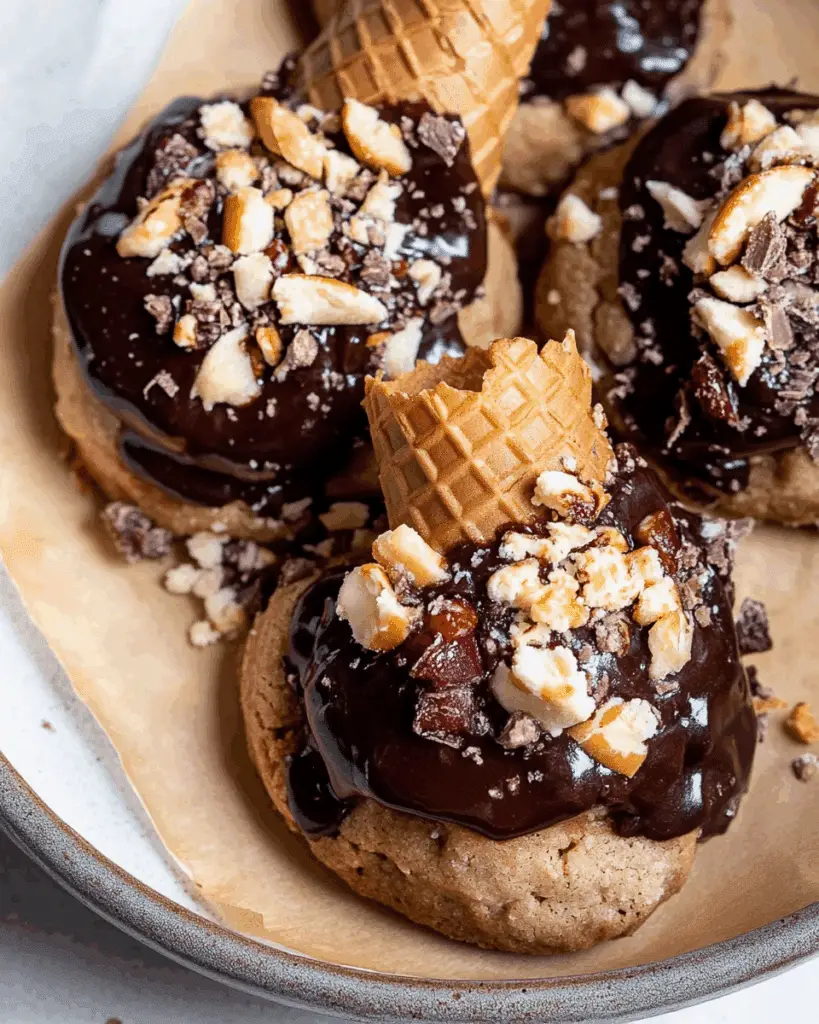
Think crisp sugar cones filled with creamy cookie goodness, dipped in chocolate, and topped with crunchy peanuts and a drizzle of magic. The first bite? Crunchy, rich, a little nostalgic, and totally addictive. Trust me, this one’s a game-changer.
Why You’ll Love Drumstick Ice Cream Cone Cookies
This recipe isn’t just about the ingredients—it’s about creating moments. Whether you’re cooking for a casual family dinner, hosting a get-together with friends, or simply indulging in some comforting flavors for yourself, this dish is versatile enough to fit the occasion. Here’s why it’s a favorite:
Versatile: Perfect for birthday parties, summer BBQs, or just a cozy weekend bake. Whether you’re trying to impress guests or treat yourself, these cookies are always a hit.
Budget-Friendly: You won’t need fancy ingredients—just simple pantry staples. Yet somehow, the result tastes like you spent hours at a fancy bakery.
Quick and Easy: These are surprisingly easy to make, even if you’re not a pro baker. You get big visual impact with minimal stress.
Customizable: Want to swap the peanuts for sprinkles? Go for it. Add caramel drizzle? Yes, please! You can tailor these to your sweet tooth.
Crowd-Pleasing: They look adorable, taste amazing, and make people smile. What more could you ask from a dessert?
Ingredients in Drumstick Ice Cream Cone Cookies
Here’s the magic of these cookies—they’re playful, nostalgic, and packed with flavor. Let’s break it down:
Sugar Cones: These act as your base and “cookie cup.” They’re crunchy, sweet, and perfectly shaped to hold all that goodness.
Chocolate Chips: For that signature Drumstick chocolate coating. Melted and drizzled over the top for a decadent finish.
Peanut Butter: Adds a creamy, nutty surprise in every bite and helps mimic the flavor of the original ice cream cone.
Brown Sugar: Adds moisture and a deep caramel flavor that complements the chocolate beautifully.
All-Purpose Flour: The structure that keeps your cookie dough together—basic but essential.
Butter: Because every good cookie starts with butter. It adds richness and helps everything bind.
Egg: For structure and softness.
Vanilla Extract: A splash of vanilla gives that classic cookie aroma and warmth.
Salted Peanuts: Crushed and sprinkled on top for crunch, saltiness, and that authentic Drumstick finish.
(Note: the full ingredients list, including measurements, is provided in the recipe card directly below.)
Instructions
Let’s dive into the steps to create this flavorful masterpiece:
Preheat Your Equipment: Start by preheating your oven to 350°F (175°C). This gets your cones crispy and ensures the cookie centers bake evenly.
Combine Ingredients: In a large bowl, cream together butter, brown sugar, and peanut butter until smooth and fluffy. Then add the egg and vanilla and mix well. Slowly fold in the flour and chocolate chips until combined.
Prepare Your Cooking Vessel: Line a baking sheet with parchment paper or use a muffin tin to hold the sugar cones upright. You don’t want any toppling cones mid-bake!
Assemble the Dish: Fill each cone about ¾ of the way full with your cookie dough mixture. Don’t overpack—they’ll rise a bit in the oven!
Cook to Perfection: Bake for 12–15 minutes until the tops are golden and the dough is set. Keep an eye on them—they can go from perfect to overbaked quickly.
Finishing Touches: While still warm, press a few extra chocolate chips on top. Once cooled, drizzle melted chocolate over each cone and sprinkle with chopped peanuts.
Serve and Enjoy: Let the chocolate set before serving (or pop them in the fridge for a few minutes). Then take a bite and prepare to swoon.
Nutrition Facts
Servings: 12 cones
Calories per serving: 290
Preparation Time
Prep Time: 15 minutes
Cook Time: 15 minutes
Total Time: 30 minutes
How to Serve Drumstick Ice Cream Cone Cookies
These cuties shine all on their own, but if you want to get a little extra, here’s how to make them pop:
Mini Dessert Bar: Set them up in a tray with toppings like mini marshmallows, sprinkles, or extra chocolate drizzle for a DIY cookie cone bar.
With Ice Cream: Yes, really. Pair one with a scoop of actual vanilla or chocolate ice cream for the full Drumstick experience.
Party Favors: Wrap each in a little plastic bag with a ribbon for the cutest take-home treat.
Holiday Twists: Change the toppings with red and green sprinkles for Christmas or pastel candies for Easter. They’re endlessly adaptable.
Additional Tips
Prep Ahead: You can make the dough a day ahead and chill it. When you’re ready, just fill and bake!
Spice It Up: Add a dash of cinnamon or even a sprinkle of sea salt on top of the chocolate for a gourmet twist.
Dietary Adjustments: Use gluten-free cones and flour if needed. You can also sub in almond butter or sunflower seed butter.
Storage Tips: Store in an airtight container for up to 4 days. If you drizzle with chocolate, let them fully set before stacking.
Double the Batch: They’re freezer-friendly! Just bake, cool, and freeze in a sealed container. Thaw and enjoy anytime.
FAQ Section
Q1: Can I substitute peanut butter with another nut butter?
A1: Absolutely! Almond butter or sunflower seed butter works beautifully. Just make sure it’s creamy.
Q2: Can I make these ahead of time?
A2: Yes! Bake them a day or two ahead, then drizzle with chocolate and top with peanuts just before serving for best texture.
Q3: How do I store leftovers?
A3: Keep them in an airtight container at room temperature for 3–4 days, or refrigerate if your kitchen is warm.
Q4: Can I freeze these cookies?
A4: Definitely. Let them cool completely, then freeze in a zip-top bag for up to 2 months.
Q5: What’s the best way to reheat them?
A5: If frozen, thaw at room temperature. You can warm them in a low oven (300°F) for 5–6 minutes to get that fresh-baked feel.
Q6: Can I use waffle cones instead of sugar cones?
A6: Waffle cones work too, but they’re a bit more fragile. Just be gentle when filling them.
Q7: Can I add candy inside the cookie dough?
A7: For sure! Mini M&Ms, chopped Snickers, or caramel bits would be amazing.
Q8: Do I need a muffin tin to hold the cones upright?
A8: Not necessarily, but it helps. You can also nestle them in a baking dish with crumpled foil for support.
Q9: Can I make these without eggs?
A9: Yes—use a flax egg (1 tbsp ground flax + 2.5 tbsp water) as a replacement.
Q10: What if I don’t like peanuts?
A10: Just skip them or swap in crushed pretzels, sprinkles, or toasted coconut for crunch.
Final Thoughts
These Drumstick Ice Cream Cone Cookies are what dessert dreams are made of—fun to make, even more fun to eat, and guaranteed to bring smiles all around. Whether you’re making them for a crowd or just because you can’t stop thinking about them, they’re the kind of recipe that turns any day into something special. So grab your cones, fire up that oven, and let the cookie magic begin. You’ve got this!
Print
Drumstick Ice Cream Cone Cookies
- Prep Time: 15 minutes
- Cook Time: 15 minutes
- Total Time: 30 minutes
- Yield: 12 cookies 1x
- Category: Dessert
- Method: Baking
- Cuisine: American
- Diet: Gluten Free
Description
These Drumstick Ice Cream Cone Cookies are a gluten-free treat inspired by the classic drumstick ice cream cone. With a crunchy cookie base, a hint of molasses, and dark chocolate chips, they’re topped with crushed peanuts for the ultimate nostalgic snack.
Ingredients
- Gluten Free Sugar Cones
- Crushed Peanuts
- All Purpose Gluten Free Flour
- Coconut Sugar
- Blackstrap Molasses
- Baking soda
- Sea salt
- Non Dairy Butter
- Eggs
- Vanilla Extract
- Dark Chocolate Chips (Optional: use Hu Kitchen for 20% off with ‘GUTSYBAKER’)
- Non Dairy Milk of choice
Instructions
- Preheat the oven to 350°F (175°C). Line a baking sheet with parchment paper.
- In a large mixing bowl, combine the gluten-free flour, coconut sugar, baking soda, and sea salt. Stir to combine.
- Add the non-dairy butter, eggs, vanilla extract, and blackstrap molasses to the dry ingredients. Mix until a dough forms.
- Gradually add in the non-dairy milk of choice, starting with a tablespoon at a time, until the dough reaches a thick but scoopable consistency.
- Fold in the dark chocolate chips and crushed peanuts.
- Using a spoon, scoop small portions of dough and roll them into balls. Place them on the prepared baking sheet, flattening them slightly to form cookie shapes.
- Bake for 12-15 minutes, or until the edges are golden brown and the centers are set.
- Allow the cookies to cool on the baking sheet for a few minutes before transferring to a wire rack to cool completely.
- Once cooled, drizzle additional melted dark chocolate over the top and sprinkle with more crushed peanuts for a finishing touch. Serve and enjoy!
Notes
- For extra crunch, consider dipping the cookies in extra melted chocolate and rolling them in crushed peanuts.
- Feel free to experiment with different types of non-dairy milk, such as almond, oat, or coconut milk, depending on your preference.
- Store any leftover cookies in an airtight container at room temperature for up to 5 days.
Nutrition
- Serving Size: 1 cookie
- Calories: 210
- Sugar: 14g
- Sodium: 120mg
- Fat: 12g
- Saturated Fat: 3g
- Unsaturated Fat: 8g
- Trans Fat: 0g
- Carbohydrates: 26g
- Fiber: 2g
- Protein: 2g
- Cholesterol: 35mg