
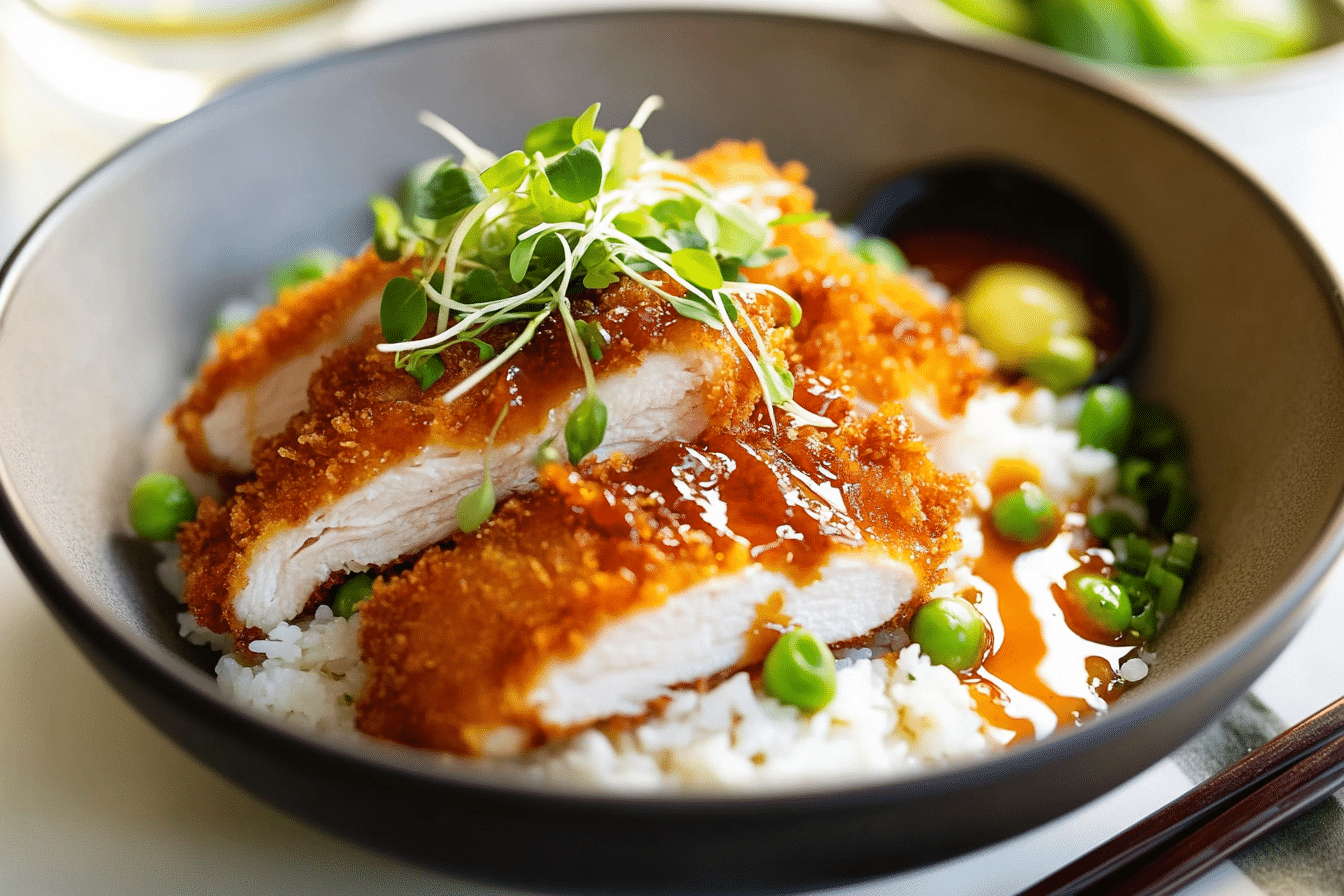
If you’re craving a dish that combines golden, crunchy goodness with juicy, tender chicken, look no further than this Crispy Chicken Katsu recipe. Get crispy, juicy bites every time with this easy-to-make Crispy Chicken Katsu recipe that pairs perfectly with a tangy dipping sauce. It’s a classic Japanese comfort food that’s simple to prepare but packed with flavor, offering a satisfyingly crunchy texture coupled with savory chicken that melts in your mouth.
Disclosure: This post contains affiliate links.If you click and make a purchase, I may earn a small commission at no extra cost to you.


Why You’ll Love This Recipe
- Simple and Reliable: The straightforward ingredients and clear steps make this recipe beginner-friendly but always delicious.
- Perfectly Crispy Texture: Achieve that unbeatable crunchy coating on the outside and tender, juicy chicken inside every single time.
- Versatile Flavor Profile: The crispy chicken melds effortlessly with a tangy sauce, perfect for dipping or drizzling over rice and veggies.
- Quick to Prepare: Ready in under 30 minutes, it’s ideal for busy weeknights or a quick weekend treat.
- Kid-Friendly and Crowd-Pleasing: Everyone loves the crispy crunch, making it a hit for family dinners or casual gatherings.
Ingredients You’ll Need
These ingredients are simple but essential for creating the perfect Crispy Chicken Katsu — each item plays a vital role in balancing flavor, crunch, and juiciness.
- Chicken Breasts: Boneless, skinless cuts that get pounded thin for even cooking and maximum tenderness.
- Flour: The first layer in the dredging process for the batter to hold onto the coating.
- Eggs: Beaten and used as a sticky binding agent to keep the panko crumbs firmly attached.
- Panko Breadcrumbs: A Japanese-style breadcrumb that creates the signature light and ultra-crispy crust.
- Salt and Pepper: Simple seasonings that enhance the natural flavor of the chicken.
- Vegetable Oil: Needed for frying to get that deep golden crunch without absorbing too much grease.
- Tangy Sauce Ingredients: A mix of soy sauce, Worcestershire sauce, ketchup, and mirin to create a delicious, balanced dipping sauce.
Variations for Crispy Chicken Katsu
Customizing your Crispy Chicken Katsu couldn’t be easier. You can adapt this recipe to fit different tastes, dietary needs, or ingredient availability without losing that incredible crunch and flavor.
- Use Chicken Thighs: For extra moist and flavorful meat, swap breasts for boneless, skinless chicken thighs.
- Gluten-Free Option: Substitute regular flour and panko with rice flour and gluten-free breadcrumbs to keep it crispy and celiac-friendly.
- Spicy Touch: Add chili powder or cayenne pepper to the panko breadcrumbs for a subtle kick in every bite.
- Air-Fried Version: Use an air fryer instead of deep frying for a less oily, healthier alternative that still delivers crispiness.
- Vegetarian Substitute: Try breaded and fried tofu or eggplant slices for a plant-based twist with the same crispy texture.

How to Make Crispy Chicken Katsu
Step 1: Prepare the Chicken
Start by trimming the chicken breasts of any excess fat and tendons, then place them between two sheets of plastic wrap. Use a meat mallet or rolling pin to gently pound the chicken to about 1/2 inch thickness. This ensures even cooking and tender results.
Step 2: Set Up the Breading Station
Arrange three shallow dishes: one with flour seasoned lightly with salt and pepper, one with beaten eggs, and one with panko breadcrumbs. This classic three-step coating process helps achieve the signature crispy crust.
Step 3: Coat the Chicken
Dredge each chicken piece in the flour, shaking off excess. Dip it into the beaten eggs, ensuring it’s completely covered. Finally, press firmly into the panko breadcrumbs, coating well on all sides.
Step 4: Fry the Chicken
Heat vegetable oil in a large skillet over medium-high heat until shimmering (around 350°F or 175°C). Carefully place the breaded chicken breasts in the oil and fry for about 3-4 minutes per side, or until golden brown and cooked through. Avoid overcrowding the pan for even frying.
Step 5: Drain and Rest
Transfer the fried chicken to a wire rack or paper towels to drain excess oil, ensuring the crust stays crunchy. Let it rest for a couple of minutes before slicing.
Step 6: Prepare the Tangy Sauce
Whisk together soy sauce, Worcestershire sauce, ketchup, mirin, and a touch of sugar or honey. This tangy sauce adds a perfect balance of sweet and savory flavors to complement the crispy chicken.
Pro Tips for Making Crispy Chicken Katsu
- Use Fresh Panko: Fresher breadcrumbs yield a lighter, crunchier crust.
- Don’t Skip Pounding Chicken: Even thickness ensures even cooking and prevents dryness.
- Maintain Oil Temperature: Keep the oil hot but not smoking to avoid greasy katsu.
- Press Panko Firmly: This prevents coating from falling off during frying.
- Rest After Frying: A few minutes of rest helps the juices redistribute for tender bites.
How to Serve Crispy Chicken Katsu
Garnishes
Freshly shredded cabbage, a sprinkle of sesame seeds, and chopped scallions add color, crunch, and a mild freshness that brightens the dish beautifully.
Side Dishes
Serve with steamed white rice, fluffy Japanese sticky rice, or even a light miso soup for the ultimate comfort food experience. Pickled vegetables or a simple cucumber salad bring a refreshing contrast.
Creative Ways to Present
Slice the crispy chicken and arrange it over rice bowls or katsu sandwiches with fresh lettuce and mayo for a fun twist. You can also drizzle the tangy sauce over the whole piece for a visually appealing plate.
Make Ahead and Storage
Storing Leftovers
Keep leftover Crispy Chicken Katsu in an airtight container in the refrigerator for up to 3 days. To maintain best texture, reheat it properly (see below).
Freezing
Wrap cooled chicken katsu tightly in plastic wrap and then foil before freezing. It can be frozen for up to 1 month. Thaw overnight in the refrigerator before reheating.
Reheating
Reheat in a preheated oven or air fryer at 350°F (175°C) for about 10 minutes until heated through and crispy again. Avoid the microwave to prevent sogginess.
FAQs
Can I use chicken thighs instead of breasts?
Absolutely! Chicken thighs are slightly more flavorful and juicy, making them a delicious alternative to chicken breasts for Crispy Chicken Katsu.
Is panko breadcrumbs necessary?
Panko creates the signature light and crispy texture, but if unavailable, regular breadcrumbs can work—though the crunch won’t be quite the same.
How do I keep the katsu crispy after frying?
Drain on a wire rack instead of paper towels to prevent steam from softening the crust. Reheating in the oven or air fryer helps maintain crispiness.
What can I substitute for the tangy dipping sauce?
You can try tonkatsu sauce if you can find it, or mix Worcestershire sauce with ketchup and a touch of sugar to mimic the flavor.
Can I make this recipe gluten-free?
Yes! Use gluten-free flour and panko breadcrumbs, and double-check your sauce ingredients to keep it gluten-free.
Final Thoughts
This Crispy Chicken Katsu recipe is a wonderful crowd-pleaser that’s simple to make and endlessly satisfying. Whether you’re cooking for family, friends, or just treating yourself, these golden crispy bites paired with that tangy sauce will bring smiles all around. Don’t be surprised if this recipe soon becomes a favorite to return to again and again!
Related Posts
- Bangers and Mash with Stout Onion Gravy Classic Comfort Food
- Honey Walnut Shrimp Recipe with Crispy Sweet Coating
- Gnocchi with Chorizo and Creamy Harissa Sauce
Crispy Chicken Katsu
- Prep Time: 10 minutes
- Cook Time: 15 minutes
- Total Time: 25 minutes
- Yield: 2 servings 1x
- Category: Appetizers
- Method: Frying
- Cuisine: Japanese
- Diet: Non-Vegetarian
Description
This Crispy Chicken Katsu recipe delivers golden, crunchy chicken with a juicy, tender inside, paired perfectly with a tangy dipping sauce. A classic Japanese comfort food, it’s quick and easy to prepare, boasting a satisfyingly crisp texture and rich flavor that’s perfect for family dinners or quick meals.
Ingredients
Chicken & Coating
- 2 boneless, skinless chicken breasts
- 1 cup all-purpose flour
- 2 large eggs, beaten
- 1 1/2 cups panko breadcrumbs
- Salt, to taste
- Black pepper, to taste
- Vegetable oil, for frying (about 1-2 cups)
Tangy Dipping Sauce
- 3 tbsp soy sauce
- 1 tbsp Worcestershire sauce
- 2 tbsp ketchup
- 1 tbsp mirin
- 1 tsp sugar or honey (optional)
Instructions
- Prepare the Chicken: Trim any excess fat and tendons from the chicken breasts. Place each breast between two sheets of plastic wrap and gently pound with a meat mallet or rolling pin to about 1/2 inch thickness, ensuring even cooking and tenderness.
- Set Up the Breading Station: Arrange three shallow dishes: one with flour lightly seasoned with salt and pepper, one with beaten eggs, and one with panko breadcrumbs. This setup is essential for the classic breading process.
- Coat the Chicken: Dredge each chicken breast first in the flour, shaking off any excess. Next, dip it fully into the beaten eggs. Finally, press firmly into the panko breadcrumbs to cover evenly on all sides.
- Fry the Chicken: Heat vegetable oil in a large skillet over medium-high heat until shimmering (about 350°F / 175°C). Carefully place the breaded chicken breasts in the hot oil, frying for 3-4 minutes on each side until golden brown and fully cooked. Avoid overcrowding the pan to ensure even frying.
- Drain and Rest: Transfer the fried chicken to a wire rack or paper towels to remove excess oil, keeping the crust crunchy. Let rest for a few minutes before slicing.
- Prepare the Tangy Sauce: Whisk together soy sauce, Worcestershire sauce, ketchup, mirin, and sugar or honey until well combined. Serve as a dipping sauce alongside the chicken.
Notes
- Use fresh panko breadcrumbs for the crispiest crust.
- Ensure chicken breasts are pounded to even thickness to prevent uneven cooking.
- Maintain oil temperature around 350°F (175°C) to avoid greasy chicken.
- Press panko firmly onto chicken to prevent coating from falling off during frying.
- Let the chicken rest after frying to redistribute juices for tender bites.
Nutrition
- Serving Size: 1 chicken breast with sauce
- Calories: 450 kcal
- Sugar: 4 g
- Sodium: 800 mg
- Fat: 20 g
- Saturated Fat: 3.5 g
- Unsaturated Fat: 16 g
- Trans Fat: 0 g
- Carbohydrates: 35 g
- Fiber: 2 g
- Protein: 35 g
- Cholesterol: 110 mg