

Disclosure: This post contains affiliate links.If you click and make a purchase, I may earn a small commission at no extra cost to you.


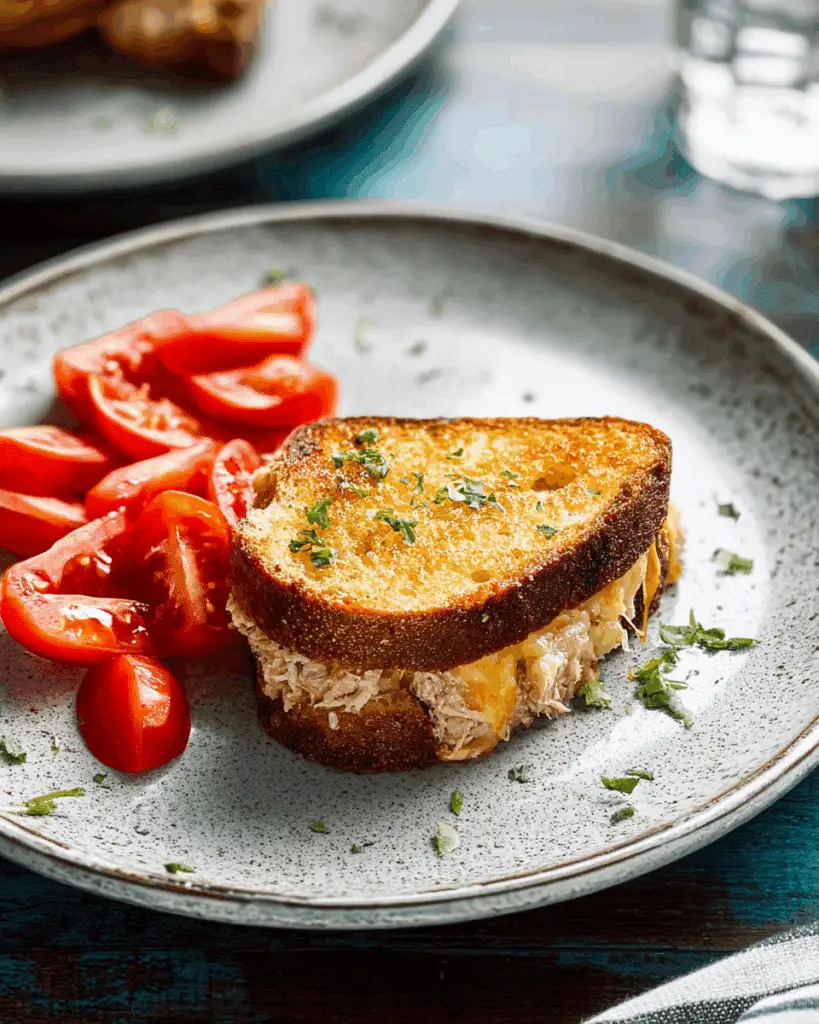
There’s something magical about a Crispy Cheesy Tuna Melt—the way the golden, buttery bread crackles under your teeth, the gooey cheddar oozing into the savory tuna salad, and the tangy bite of pickles cutting through the richness. It’s comfort food at its finest, and the best part? It’s ridiculously easy to make. Whether you’re a kitchen newbie or a seasoned cook, this sandwich is a no-fail way to win hearts (and stomachs).
Trust me, this isn’t just another tuna sandwich. It’s a Crispy Cheesy Tuna Melt—a crispy, cheesy, flavor-packed masterpiece that’ll make you wonder why you ever settled for sad, soggy versions. Ready to make the best one yet? Let’s dive in!
Why You’ll Love Crispy Cheesy Tuna Melt
This recipe isn’t just about the ingredients—it’s about creating moments. Whether you’re cooking for a casual family dinner, hosting a get-together with friends, or simply indulging in some comforting flavors for yourself, this dish is versatile enough to fit the occasion. Here’s why it’s a favorite:
Versatile: Perfect for busy weeknights or as a standout dish at gatherings. Imagine coming home after a long day, knowing you can whip up something delicious and comforting in no time. Or envision serving this at a party, where guests ask for the recipe before the night ends.
Budget-Friendly: Uses ingredients you likely already have in your kitchen. No need for exotic items; this dish proves that simple ingredients can create extraordinary flavors. It’s perfect for when you’re trying to stick to a budget but still want something hearty and satisfying.
Quick and Easy: Straightforward steps that even beginners can follow. If you’re someone who usually avoids complex recipes, this one is for you. It’s designed to be foolproof, so you can enjoy cooking without stress.
Customizable: Easy to tweak with different flavors to suit your preferences. For example, if you love bold flavors, add a pinch of cayenne or smoked paprika. Prefer something milder? You can adjust the seasoning to make it kid-friendly.
Crowd-Pleasing: A guaranteed hit with both kids and adults. It’s always a win when a single dish can satisfy everyone at the table. This recipe strikes the perfect balance of flavor and comfort, making it a universal favorite.
Ingredients in Crispy Cheesy Tuna Melt
Here’s the magic of this sandwich—it’s made with just a few pantry staples, but the result is so much more than the sum of its parts. Let’s break it down:
Tuna: The star of the show. Wild Planet’s wild albacore tuna is my go-to for its firm texture and clean flavor. Drained well, it becomes the perfect base for the melt.
Mayonnaise: The glue that holds everything together. It adds creaminess and richness to the tuna salad.
Dill Pickles: For that tangy, crunchy contrast. Mince them finely so they distribute evenly in every bite.
Steak Seasoning: A sneaky flavor booster. It adds depth with its blend of spices—think garlic, onion, and a hint of pepper.
Cheddar Cheese: The meltiest, most indulgent layer. Sharp cheddar works best for its bold flavor, but any good melting cheese will do.
Bread: Canyon Bakehouse’s Heritage Loaf is my gluten-free pick, but use whatever you love. The key? A sturdy bread that crisps up beautifully.
Butter: The secret to that golden, crispy exterior. Softened butter spreads easily and fries the bread to perfection.
(Note: The full ingredients list, including measurements, is provided in the recipe card below.)
Instructions
Let’s dive into the steps to create this flavorful masterpiece:
1. Prep the Tuna Salad: In a bowl, combine the drained tuna, mayonnaise, minced pickles, and steak seasoning. Mix until evenly blended. Taste and adjust seasoning if needed.
2. Butter the Bread: Spread softened butter on one side of each bread slice. This will be the outer layer that crisps up in the pan.
3. Assemble the Sandwich: On the unbuttered side of two bread slices, layer a slice of cheddar, then the tuna mixture, and another slice of cheddar. Top with the remaining bread slices, buttered side out.
4. Cook to Crispy Perfection: Heat a skillet over medium-low heat. Place the sandwiches in the pan and cook for 3-4 minutes per side, pressing down lightly with a spatula, until the bread is golden and the cheese is melted.
5. Serve Immediately: Slice in half and enjoy while hot and crispy!
Nutrition Facts
Servings: 2
Calories per serving: ~450
Preparation Time
Prep Time: 10 minutes
Cook Time: 8 minutes
Total Time: 18 minutes
How to Serve Crispy Cheesy Tuna Melt
This sandwich pairs wonderfully with various sides and accompaniments. Here are a few serving suggestions to enhance your dining experience:
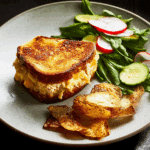
– Fresh Salads: A simple arugula salad with lemon vinaigrette cuts through the richness.
– Soup: Tomato soup is a classic pairing for a reason—it’s divine.
– Pickles or Chips: For extra crunch and tang on the side.
– Avocado Slices: Creamy avocado adds a luxurious touch.
Additional Tips
Here are some extra tips to help you get the most out of this recipe:
Spice It Up: Add a dash of hot sauce or cayenne to the tuna salad for heat.
Cheese Swap: Try pepper jack or Swiss for a different flavor profile.
Storage Tips: This sandwich is best eaten fresh, but you can prep the tuna salad ahead and store it in the fridge for up to 2 days.
Double the Batch: Make extra for lunch the next day—just reheat in a toaster oven to keep it crispy.
FAQ Section
Q1: Can I use canned chicken instead of tuna?
A1: Absolutely! The recipe works just as well with shredded chicken.
Q2: Can I make this gluten-free?
A2: Yes! Use gluten-free bread like Canyon Bakehouse, and ensure all other ingredients are GF.
Q3: What’s the best cheese for melting?
A3: Sharp cheddar is my favorite, but Gruyère or Monterey Jack also work beautifully.
Q4: Can I add veggies to the tuna salad?
A4: Of course! Diced celery or red onion adds great crunch.
Q5: How do I prevent the sandwich from getting soggy?
A5: Drain the tuna well and don’t over-mayo the salad. Also, cook on medium-low heat for even crisping.
Q6: Can I use a panini press?
A6: Yes! It’ll give you those gorgeous grill marks and even melting.
Q7: What’s a good substitute for steak seasoning?
A7: A mix of garlic powder, onion powder, and black pepper works in a pinch.
Q8: Can I make this dairy-free?
A8: Use vegan cheese and butter alternatives for a dairy-free version.
Q9: How do I reheat leftovers?
A9: Reheat in a skillet over low heat to revive the crispiness.
Q10: Can I freeze the assembled sandwiches?
A10: It’s best fresh, but you can freeze the tuna salad separately for up to a month.
Conclusion
There you have it—the ultimate Crispy Cheesy Tuna Melt, crispy on the outside, gooey on the inside, and packed with flavor in every bite. This sandwich is proof that simple ingredients can create something extraordinary. Whether it’s a quick lunch, a cozy dinner, or your new go-to comfort food, this recipe is a game-changer.
So grab that skillet, melt that cheese, and get ready to fall in love with tuna melts all over again. Trust me, once you try this version, there’s no going back!
“`
Crispy Cheesy Tuna Melt: 5 Best Tips for the Perfect Sandwich
- Prep Time: 5 minutes
- Cook Time: 5 minutes
- Total Time: 10 minutes
- Yield: 2 sandwiches
- Category: Sandwich
- Method: Grilled
- Cuisine: American
Description
Tuna melts don’t get much better than this! Crispy on the outside, gooey and cheesy on the inside, this classic tuna melt sandwich is a satisfying meal perfect for lunch or dinner. Made with wild albacore tuna, tangy pickles, and melty cheddar cheese, this easy recipe is both comforting and delicious.
Ingredients
-
1 (5 oz) can tuna, drained (Wild Planet brand wild albacore tuna recommended)
-
3-4 Tbsp mayonnaise
-
2 dill pickle spears, minced (see notes)
-
1/4 tsp steak seasoning (see notes)
-
2 slices cheddar cheese
-
4 slices bread (Canyon Bakehouse Heritage Loaf recommended for gluten-free)
-
Softened butter
Instructions
- Preheat Skillet: Preheat a large flat skillet or griddle over medium heat.
- Prepare Tuna Mixture: Flake the tuna into a medium-sized bowl. Add mayonnaise, minced pickles, and steak seasoning. Stir until well combined.
- Assemble Sandwiches: Butter one side of each slice of bread. Flip two slices over and top each with half of the tuna mixture. Add a slice of cheese on top, then cover with the remaining bread slices, buttered side up.
- Cook Sandwiches: Place the sandwiches on the preheated skillet or griddle. Cook until golden brown on the bottom, then flip and cook the other side until golden brown and the cheese has melted.
- Serve: Remove the sandwiches from the skillet, slice in half, and serve immediately.
Notes
- Use the Wild Planet brand for the best tuna flavor.
- You can adjust the steak seasoning to taste, or use your favorite seasoning blend.
Nutrition
- Serving Size: 1 sandwich
- Calories: 420 kcal
- Sugar: 5 g
- Sodium: 750 mg
- Fat: 25 g
- Saturated Fat: 7 g
- Unsaturated Fat: 14 g
- Trans Fat: 0 g
- Carbohydrates: 30 g
- Fiber: 2 g
- Protein: 23 g
- Cholesterol: 45 mg