
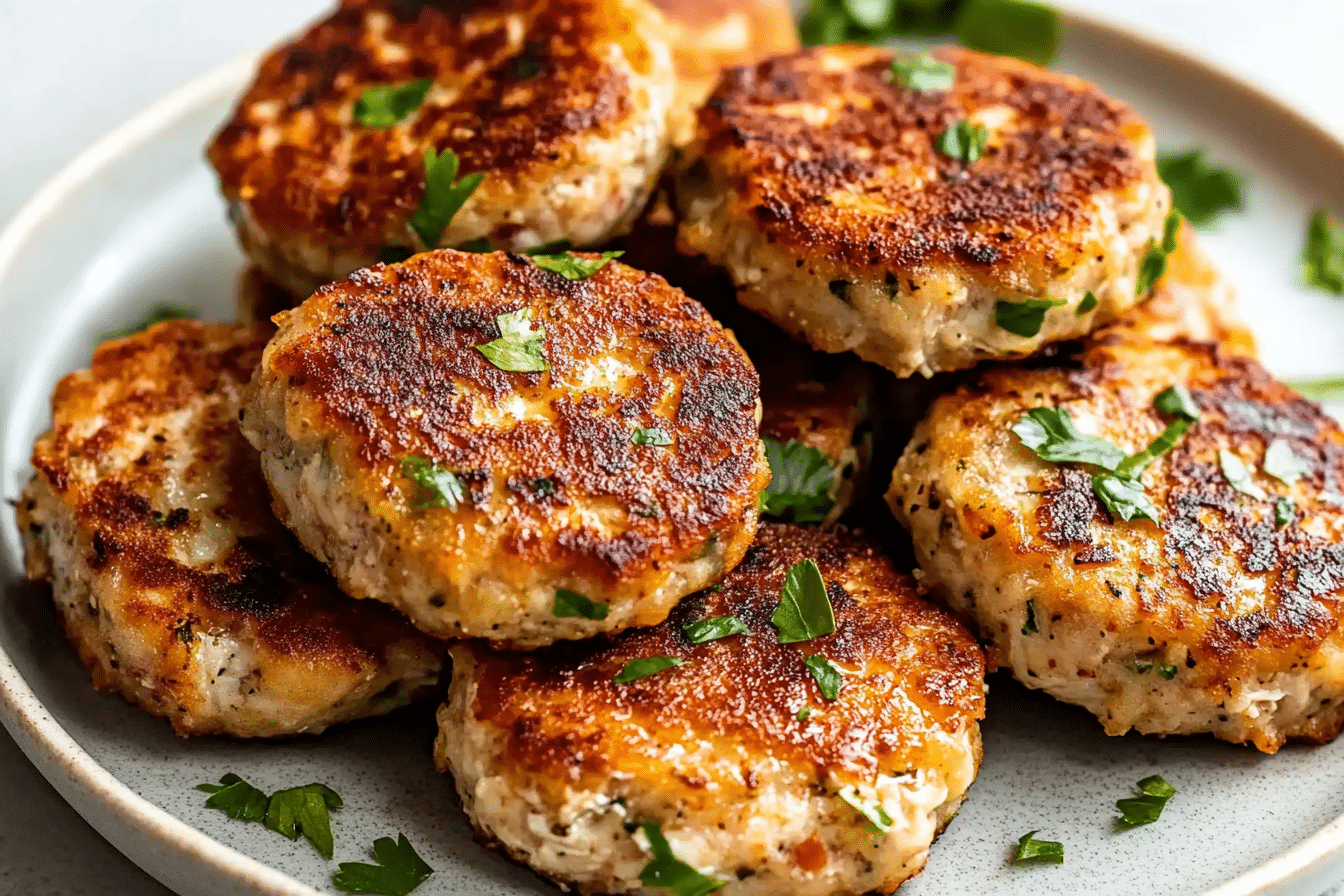
Craving a dinner that’s comforting, flavorful, and just a little bit indulgent? Well, get ready for these Chicken Rissoles! They’re golden, crispy on the outside, and perfectly juicy on the inside—everything you want in a simple yet delicious meal. Whether you serve them as a main, alongside some greens, or tucked into a soft roll for a quick sandwich, trust me, you’re in for a treat. These rissoles are easy to make, and the flavor is just… wow.
Disclosure: This post contains affiliate links.If you click and make a purchase, I may earn a small commission at no extra cost to you.


It’s the kind of dish you’ll want to make again and again, especially on those days when you need something hearty without a lot of fuss. So grab your apron, roll up your sleeves, and let’s make these rissoles together. You’ll be amazed at how something so simple can taste so good!
Why You’ll Love Chicken Rissoles
This recipe isn’t just about the ingredients—it’s about creating moments. Whether you’re cooking for a casual family dinner, hosting a get-together with friends, or simply indulging in some comforting flavors for yourself, this dish is versatile enough to fit the occasion. Here’s why it’s a favorite:
Versatile
Perfect for a weeknight dinner or even meal prepping for the week ahead. You can enjoy these rissoles on their own or served with a variety of sides like mashed potatoes, salad, or roasted veggies.
Budget-Friendly
Made with ingredients you probably already have in your kitchen, this is an affordable dish without sacrificing taste. It’s great when you want something filling but don’t want to break the bank.
Quick and Easy
You don’t need to be a seasoned chef to pull these off. With just a few simple steps, you’ll have a batch of rissoles that everyone will love.
Customizable
Feel free to adjust the seasoning to your liking. Throw in a pinch of herbs or add some grated cheese for extra flavor. You can even switch out the chicken for turkey or a mix of ground meats!
Crowd-Pleasing
The crispy exterior and tender inside make these rissoles a hit with both kids and adults. Whether you’re making them for a family dinner or as a party appetizer, they’re always a guaranteed favorite.
Ingredients in Chicken Rissoles
Here’s what you’ll need to make these tasty little bites:
Ground Chicken: The base of these rissoles, it’s lean and super versatile. It’ll soak up all the flavors you add to it.
Breadcrumbs: They give the rissoles structure and help keep them tender.
Eggs: Help bind everything together and give them that crispy texture on the outside.
Onion: Adds a little sweetness and savory depth to the mix.
Garlic: Because garlic makes everything better, right? It brings so much flavor to these rissoles.
Herbs and Seasonings: A mix of salt, pepper, and your favorite dried herbs (like parsley or thyme) will make these rissoles sing.
(Note: the full ingredients list, including measurements, is provided in the recipe card directly below.)
Instructions
Let’s dive into the steps to create these crispy, tender Chicken Rissoles:
Preheat Your Equipment
Start by heating a non-stick frying pan or skillet over medium heat with a little oil. You want it nice and hot to get that crispy exterior.
Mix the Ingredients
In a large bowl, combine the ground chicken, breadcrumbs, eggs, chopped onion, garlic, and seasoning. Mix well with your hands until everything is evenly distributed. Don’t overmix—just enough to bring everything together.
Shape the Rissoles
Take a small amount of the mixture and form it into a small patty, about the size of your palm. Press lightly to make them even. Repeat with the rest of the mixture.
Cook to Perfection
Place the rissoles in the hot pan, making sure not to crowd them. Cook for about 4-5 minutes on each side, or until golden brown and cooked through. If you’re unsure, cut one open to make sure there’s no pink left inside.
Finishing Touches
Once they’re done, remove the rissoles from the pan and place them on a paper towel-lined plate to drain any excess oil.
Serve and Enjoy
Serve these golden rissoles with your favorite sides or as a main dish. They’re perfect with a tangy dipping sauce or on a soft bun with some fresh lettuce.
How to Serve Chicken Rissoles
These rissoles are as versatile as they are delicious! Here are a few ways to serve them:
Fresh Salads
Pair them with a crisp salad for a fresh and balanced meal. A simple green salad with a light vinaigrette works beautifully.
Crusty Bread
Serve them on a toasted bun for a delicious homemade sandwich. Top with some lettuce, tomato, and a smear of your favorite sauce.
Creamy Accompaniments
Serve with a dollop of sour cream or Greek yogurt for an extra creamy bite.
Vegetable Sides
Roasted veggies or sautéed greens would complement the rissoles perfectly.
As a Standalone
Sometimes, these rissoles are great on their own. Enjoy them fresh out of the pan with a sprinkle of herbs for garnish.
Additional Tips
Prep Ahead
Mix the rissoles the night before and store them in the fridge. When you’re ready to cook, they’ll be ready to go!
Spice It Up
Want a kick of heat? Add a pinch of chili flakes or paprika to the mix. You can even add some grated cheese for extra flavor.
Dietary Adjustments
If you need to make them gluten-free, simply swap the breadcrumbs with gluten-free alternatives, like crushed rice cakes or gluten-free breadcrumbs.
Storage Tips
Store any leftovers in an airtight container for up to 3 days in the fridge. You can also freeze them for up to 2 months—just reheat in the oven to get them crispy again.
Double the Batch
These freeze beautifully, so consider making extra and storing them for later. They make a fantastic meal prep option!
FAQ Section
Q1: Can I use ground turkey instead of chicken?
A1: Absolutely! Ground turkey works great in this recipe, too. It will give a slightly different flavor, but still delicious.
Q2: Can I bake these instead of frying?
A2: Yes! Bake them at 375°F for about 20-25 minutes, flipping halfway through, until golden and cooked through.
Q3: How do I store leftovers?
A3: Store them in an airtight container in the fridge for up to 3 days. You can also freeze them for up to 2 months.
Q4: Can I make these rissoles in advance?
A4: Yes! Prepare the patties ahead of time and store them in the fridge until you’re ready to cook.
Q5: How do I reheat them?
A5: Reheat the rissoles in a hot pan for a couple of minutes on each side, or in the oven at 350°F for 10 minutes to get them crispy again.
Q6: Can I add veggies to the rissoles?
A6: Absolutely! Finely grated zucchini, carrot, or bell peppers would be a great addition.
Q7: Can I freeze the rissoles before cooking?
A7: Yes! Just freeze them in a single layer on a baking sheet, then transfer to a container. You can cook them directly from frozen.
Q8: How long should I cook these on the stovetop?
A8: About 4-5 minutes on each side should do the trick, but make sure they’re cooked through with no pink inside.
Q9: Can I serve these with a dipping sauce?
A9: Yes! They’re delicious with BBQ sauce, sweet chili sauce, or a tangy mustard dipping sauce.
Q10: Can I double the recipe?
A10: Absolutely! Just double everything and cook the rissoles in batches if necessary.
Conclusion
Chicken Rissoles are the perfect balance of crispy, juicy, and full of flavor. Whether you’re making them for a weeknight dinner or meal prepping for the week ahead, they’ll quickly become a family favorite. The beauty of this recipe is in its simplicity—easy to make, satisfying to eat, and endlessly customizable. So go ahead, make a batch, and enjoy these crispy little bites of deliciousness!
Print
Chicken Rissoles
- Prep Time: 10 minutes
- Cook Time: 10 minutes
- Total Time: 20 minutes
- Yield: 4 servings 1x
- Category: Main Course
- Method: Pan-fry
- Cuisine: Australian
- Diet: Gluten Free
Description
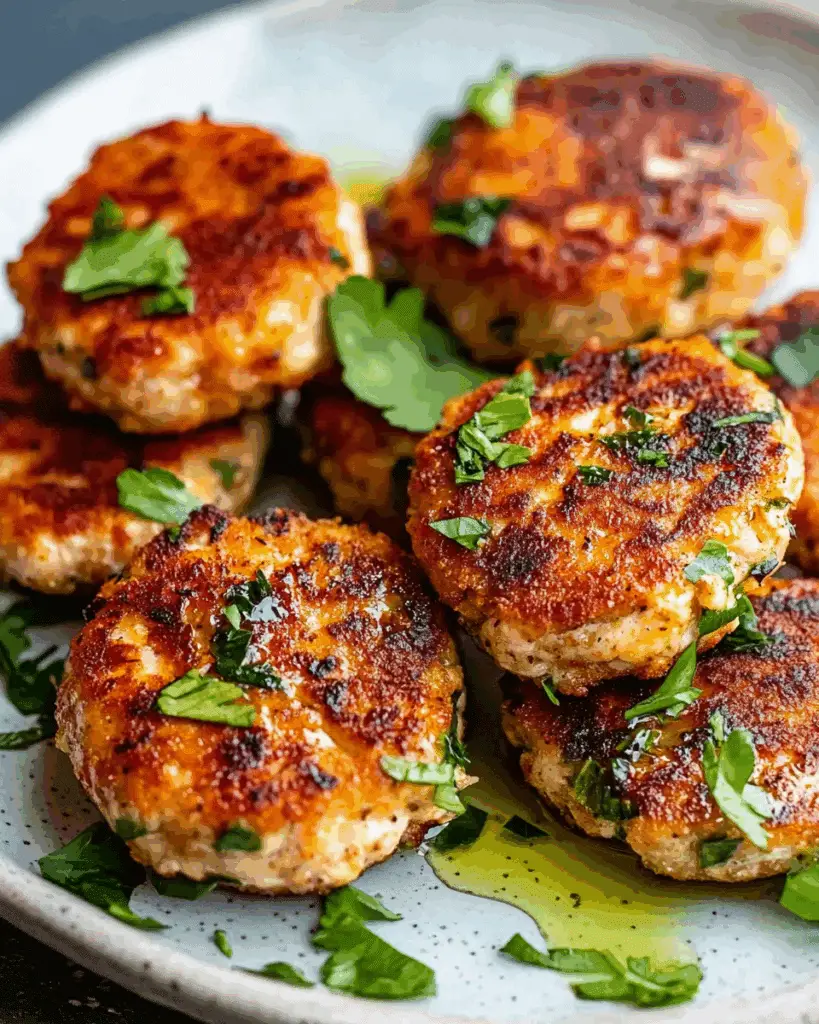
These crispy and juicy chicken rissoles (patties) are loaded with shredded vegetables and gooey cheese, making them a perfect meal or snack for the whole family. They’re golden on the outside and tender on the inside, served with a side of ketchup for extra flavor.
Ingredients
- 500g / 1 lb chicken mince (ground chicken), excess liquid drained and discarded
- 1 carrot, medium, grated on a shallow angle
- 1 zucchini, medium, grated on a shallow angle
- 1 egg
- 1 1/2 cup Colby cheese, shredded (or cheddar, tasty, Monterey Jack)
- 3/4 cup panko breadcrumbs
- 1 tbsp finely chopped parsley, optional
- 1 tsp cooking/kosher salt
- 1/2 tsp black pepper
- 2 tbsp canola oil (for cooking)
- Ketchup – for dipping
Instructions
- In a large mixing bowl, combine the ground chicken, grated carrot, grated zucchini, egg, shredded cheese, panko breadcrumbs, parsley (if using), salt, and pepper. Mix until everything is evenly incorporated.
- Form the mixture into small patties, about 2-3 inches in diameter, making sure they are compact.
- Heat the canola oil in a large skillet over medium heat. Once the oil is hot, add the patties and cook for 4-5 minutes on each side, until golden brown and cooked through.
- Once cooked, transfer the patties to a plate lined with paper towels to remove excess oil.
- Serve the chicken rissoles warm with a side of ketchup for dipping.
Notes
- If you prefer, you can use chicken breast mince instead of thigh mince for a leaner option.
- Feel free to switch up the cheese based on what you have on hand, such as cheddar or Monterey Jack.
- The rissoles can be frozen for later use. Simply cook them, let them cool, then store in an airtight container in the freezer for up to 3 months.
Nutrition
- Serving Size: 1 patty
- Calories: 250
- Sugar: 3 g
- Sodium: 400 mg
- Fat: 14 g
- Saturated Fat: 3 g
- Unsaturated Fat: 10 g
- Trans Fat: 0 g
- Carbohydrates: 12 g
- Fiber: 2 g
- Protein: 19 g
- Cholesterol: 70 mg