
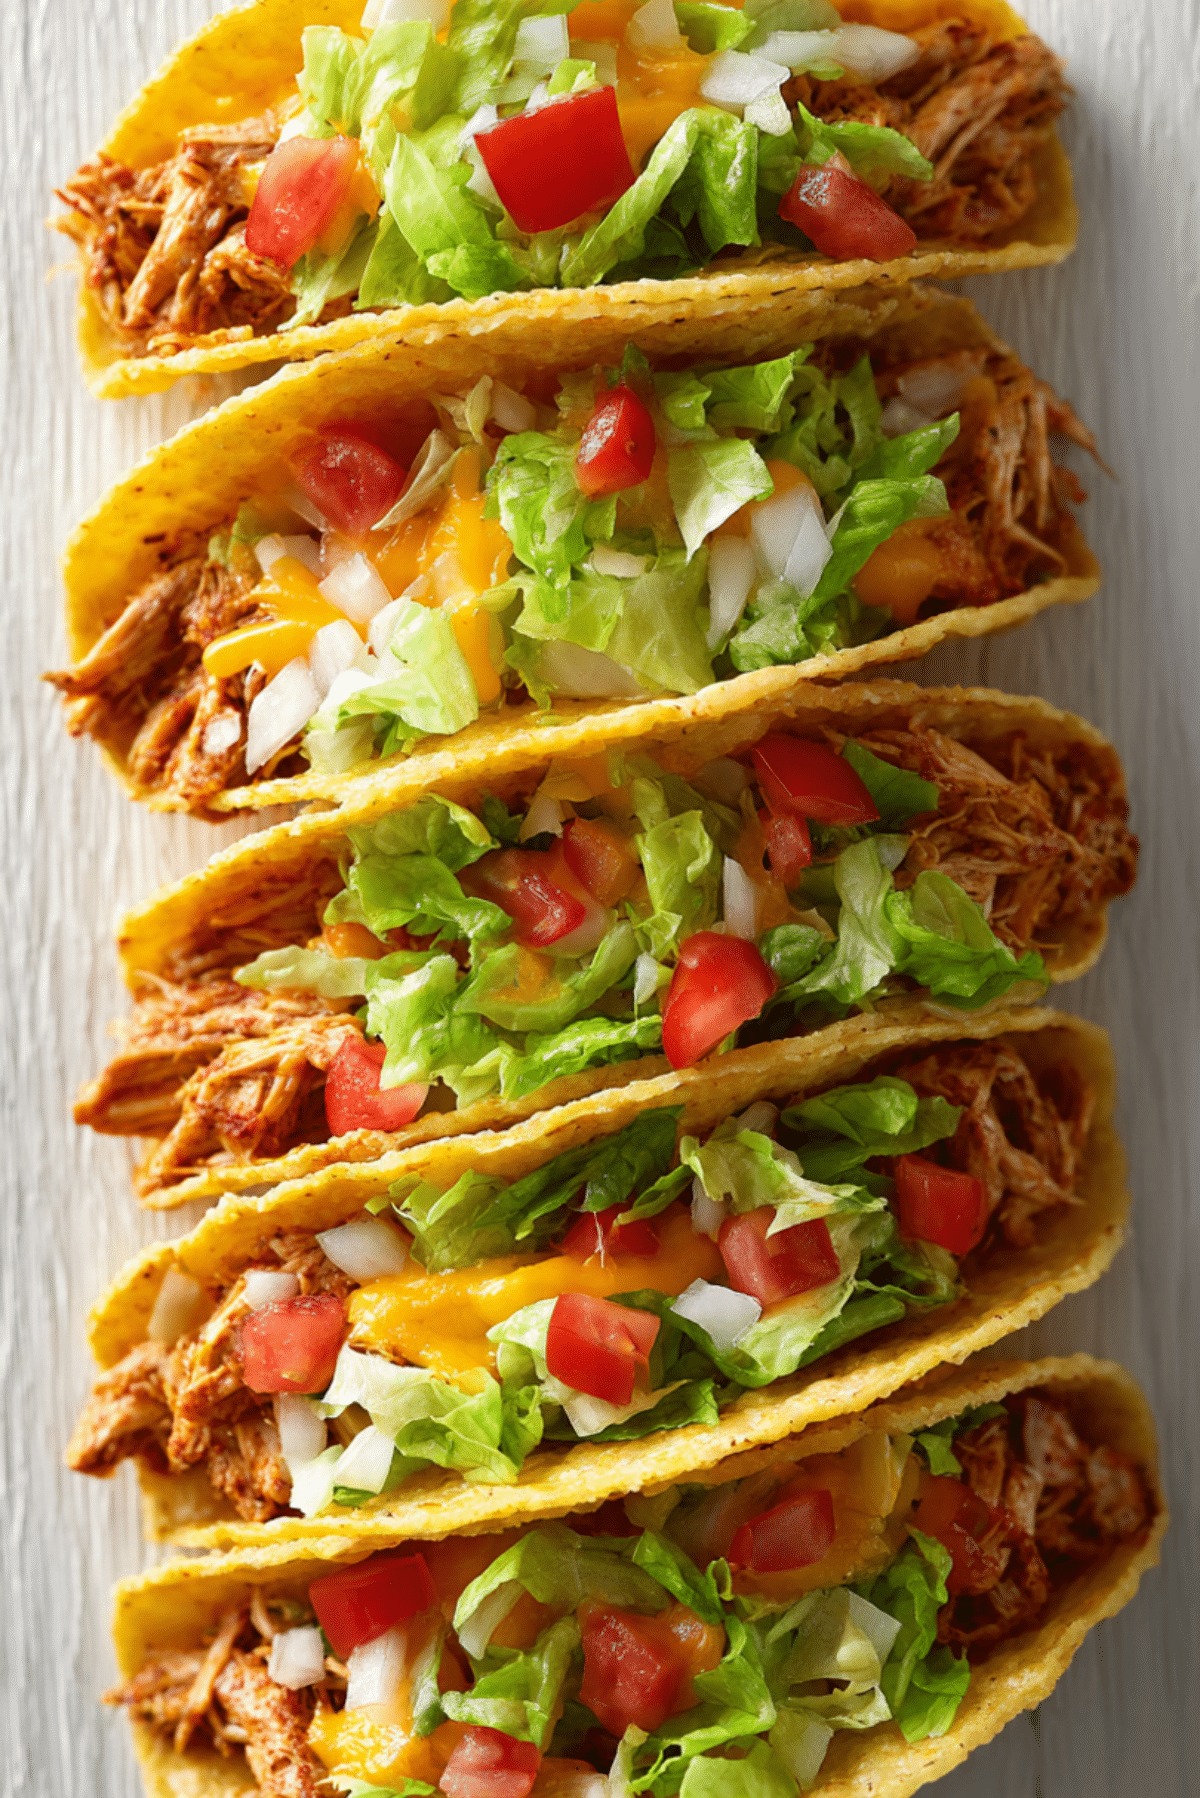
The first time I pulled a bubbling pan of cheesy chicken tacos out of the oven, I knew dinner was handled. The tortillas were lightly crisp at the edges, the chicken was juicy and full of smoky flavor, and that blanket of melted cheese made the whole thing feel extra comforting. It is the kind of meal that smells amazing before it even hits the table, and trust me, you’re going to love this.
Disclosure: This post contains affiliate links.If you click and make a purchase, I may earn a small commission at no extra cost to you.


Why These Tacos Always Hit the Spot
There is something about a warm taco filled with seasoned chicken and melted cheese that feels instantly inviting. Every bite gives you a little crunch from the tortilla, a savory and tender center, and that creamy finish from the cheese. This one’s a total game-changer for busy weeknights because it feels fun and satisfying without asking too much from you in the kitchen.
A Little Story Behind This Family Favorite
Tacos have deep roots in Mexican cuisine, where tortillas and flavorful fillings come together in countless delicious ways. This baked version leans into that spirit while adding a cozy casserole-style twist that has become especially popular in home kitchens across the United States. It is easy to see why people keep coming back to it, because it takes familiar taco flavors and turns them into something extra melty and comforting.
Reasons This Recipe Earns a Spot in Your Rotation
This dish has a way of making dinner feel easy and exciting at the same time. And now let’s dive into exactly why it works so well.
Versatile: You can keep it simple or dress it up with toppings like cilantro, diced tomatoes, or a spoonful of sour cream. It fits a casual family dinner just as easily as a game day spread.
Budget-Friendly: The ingredients are straightforward, easy to find, and friendly on the grocery bill. A little chicken, cheese, and tortillas go a long way.
Quick and Easy: Most of the work happens in one skillet and one baking dish. Once the filling is ready, assembly moves fast.
Customizable: You can adjust the spice level, swap cheeses, or add a little more freshness with chopped onion or herbs. It is easy to make it your own.
Crowd-Pleasing: Melty cheese and seasoned chicken are hard to resist. Let me tell you, it’s worth every bite.
Make-Ahead Friendly: You can prep the filling in advance and assemble everything when you are ready to bake. That makes dinner feel much less rushed.
Great for Leftovers: The flavors settle in beautifully, and reheated tacos are still delicious the next day.
Smart Kitchen Secrets for Better Results
A few small choices can take this from good to seriously memorable.
- Warm the tortillas first: A quick warm-up makes them more flexible and easier to fold without cracking.
- Do not overfill: It is tempting, but a moderate amount of filling keeps the tacos neat and helps them bake evenly.
- Use freshly shredded cheese: It melts more smoothly and gives you that irresistible cheesy finish.
- Let the chicken absorb the seasoning: Simmering the filling for a few minutes helps every bite taste richer and more balanced.
- Bake until just melted and golden: You want the cheese bubbling and the taco edges lightly crisp, not dried out.
Kitchen Tools That Make the Process Easy
Before the cooking starts, it helps to have a few basics ready so the whole process feels smooth.
Large skillet: This is where the onion, garlic, chicken, and seasonings come together into a flavorful filling.
9×13-inch baking dish: It holds the tacos snugly, which helps them stay upright while baking.
Cutting board: Perfect for prepping the onion, cilantro, and any toppings.
Chef’s knife: A sharp knife makes the vegetable prep faster and cleaner.
Mixing spoon or spatula: Useful for stirring the filling and keeping the cheese from clumping in spots.
Measuring spoons and cups: These help keep the seasoning and salsa balanced.
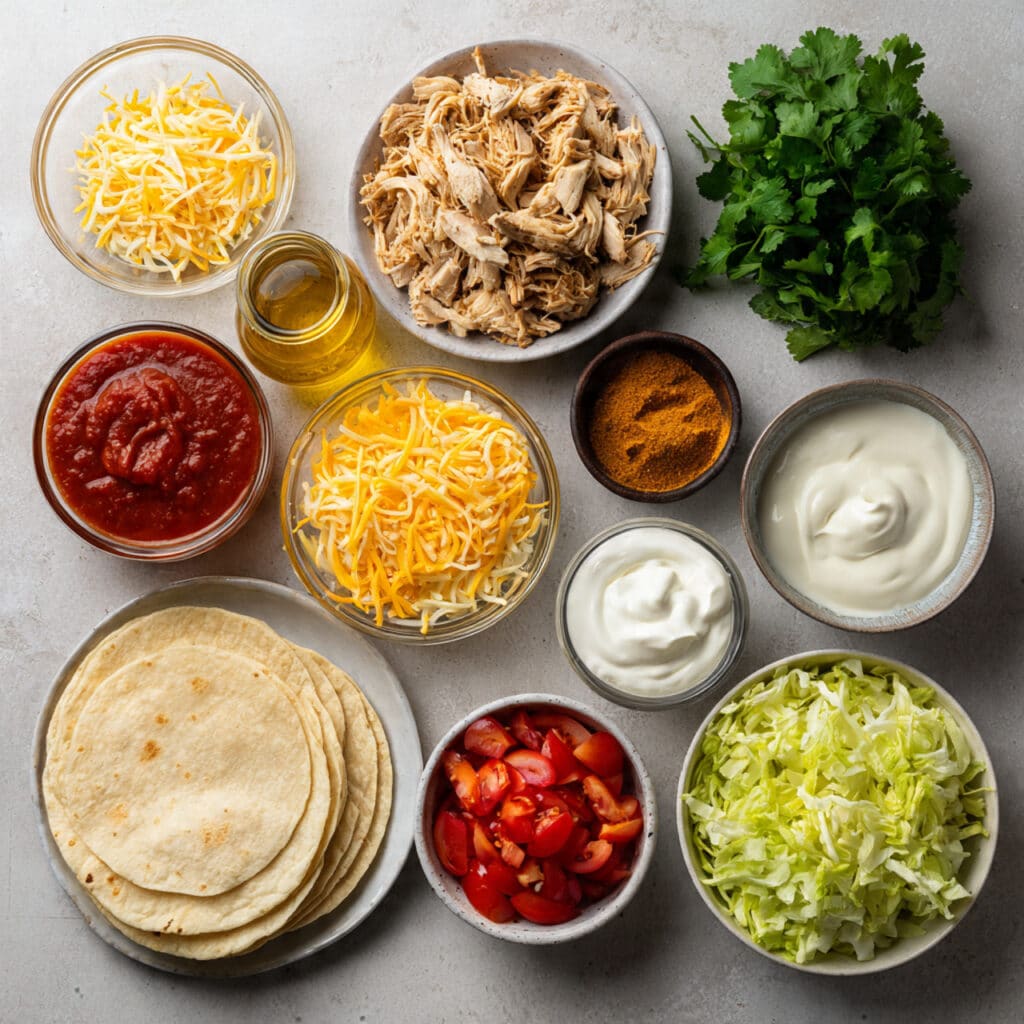
What You’ll Need to Build All That Flavor
The beauty of this dish is how everyday ingredients come together into something that tastes warm, savory, cheesy, and full of life. Each one brings something useful to the pan.
- Olive oil: 1 tablespoon, used to soften the onion and garlic while adding a little richness.
- Yellow onion: 1 small onion, finely diced, for sweetness and depth.
- Garlic: 2 cloves, minced, for a fragrant savory base.
- Cooked chicken: 3 cups, shredded, the hearty main filling that soaks up all the seasoning.
- Taco seasoning: 2 tablespoons, for smoky, savory flavor with a gentle kick.
- Tomato sauce: 1 cup, adds moisture and helps coat the chicken evenly.
- Shredded cheddar cheese: 1 cup, for sharp cheesy flavor.
- Shredded mozzarella cheese: 1 cup, for that stretchy, melty finish.
- Small flour tortillas: 10 tortillas, soft and easy to fold around the filling.
- Fresh cilantro: 2 tablespoons, chopped, for a bright finish.
- Diced tomatoes: 1 cup, for fresh juicy topping after baking.
- Shredded lettuce: 1 cup, adds a cool and crisp contrast.
- Sour cream: 1/2 cup, for creamy topping and balance.
Easy Swaps That Still Taste Amazing
One of the best things here is how flexible the recipe can be without losing its charm.
Flour tortillas: Corn tortillas, if you prefer a slightly earthier texture.
Cheddar cheese: Monterey Jack, for a milder melt.
Mozzarella cheese: Oaxaca-style cheese, for extra stretch and softness.
Tomato sauce: Salsa, for a more textured and punchy filling.
Sour cream: Plain Greek yogurt, for a tangy finish with a lighter feel.
The Ingredients That Really Make It Shine
Some ingredients quietly do the heavy lifting, and these are the stars that make the whole pan so craveable.
Shredded chicken: This is the heart of the dish, tender and savory, and it carries the seasoning beautifully in every bite.
Cheese blend: The cheddar brings bold flavor, while the mozzarella creates that gooey, melty texture everyone hopes for.
Let’s Get These Tacos Into the Oven
Now that everything is ready, this is where the kitchen starts to smell incredible. Here are the steps you’re going to follow.
- Preheat Your Equipment: Preheat the oven to 375°F and lightly grease a 9×13-inch baking dish.
- Combine Ingredients: Heat the olive oil in a large skillet over medium heat. Add the diced onion and cook for 3 to 4 minutes until softened. Stir in the garlic and cook for 30 seconds. Add the shredded chicken, taco seasoning, and tomato sauce, then stir until the mixture is evenly coated and warmed through, about 3 to 4 minutes.
- Prepare Your Cooking Vessel: Set the greased baking dish nearby and warm the tortillas for a few seconds so they are easier to fold.
- Assemble the Dish: Spoon the chicken mixture into each tortilla, add a little cheddar and mozzarella inside, fold the tortillas, and place them upright in the baking dish. Continue until the dish is filled, then sprinkle the remaining cheese evenly over the top.
- Cook to Perfection: Bake for 15 to 18 minutes, until the cheese is fully melted and the taco edges are lightly golden.
- Finishing Touches: Remove the dish from the oven and let it rest for 5 minutes. Top with chopped cilantro, diced tomatoes, and shredded lettuce.
- Serve and Enjoy: Add a dollop of sour cream and serve while everything is still warm, cheesy, and full of flavor.
What Makes Every Bite So Good
The magic here is in the contrast. The tortillas turn lightly crisp around the edges while staying tender where they hold the filling. Inside, the chicken stays juicy and savory, and the melted cheese wraps everything together in a creamy layer. Then the toppings come in with freshness and crunch, which keeps the whole dish from feeling heavy. It is cozy, balanced, and deeply satisfying.
Little Tips That Go a Long Way
As simple as this is, a few extra touches make it even better.
- Use warm tortillas: They fold more easily and are less likely to split during assembly.
- Layer the cheese inside and on top: That gives you flavor throughout the taco, not just on the surface.
- Rest before serving: A few minutes out of the oven helps everything settle and makes the tacos easier to lift.
- Add fresh toppings last: This keeps the lettuce crisp and the tomatoes juicy.
Mistakes to Skip for the Best Batch
A few common issues can get in the way, but they are easy to avoid once you know what to watch for.
- Overstuffing the tortillas: Too much filling can make the tacos burst open. Keep the filling balanced and neat.
- Using cold tortillas straight from the package: They can crack when folded, so warm them briefly first.
- Baking too long: The goal is melted cheese and lightly crisp edges, not dry chicken.
- Adding lettuce before baking: Save fresh toppings for the end so they stay bright and crisp.
A Quick Look at the Nutrition
These numbers are approximate, but they give you a helpful snapshot before serving.
Servings: 5
Calories per serving: 520
Note: These are approximate values.
Time Breakdown for Easy Planning
This is the kind of dinner that feels very manageable, even on a full day.
Prep Time: 20 minutes
Cook Time: 18 minutes
Total Time: 38 minutes
Make-Ahead and Storage Tips That Actually Help
This recipe is a lifesaver when you want to stay one step ahead. You can make the chicken filling up to 2 days in advance and keep it covered in the refrigerator. When it is time to cook, simply assemble the tacos, add the cheese, and bake.
Leftovers keep well in an airtight container in the refrigerator for up to 3 days. For longer storage, wrap the baked tacos tightly and freeze for up to 2 months. Reheat in the oven at 350°F until warmed through, which helps the tortillas stay a little crisp. The microwave works too, though the texture will be softer.
Fun Ways to Serve Them
Once the tacos are out of the oven, it is easy to turn them into a full meal. Serve them with Mexican rice, black beans, or a simple corn salad for a colorful plate. A side of guacamole or sliced avocado also works beautifully with the cheesy filling. For a casual dinner, set out the toppings and let everyone build their own perfect plate.
Leftovers That Deserve a Second Round
The next day, these tacos can become something new without much effort. Chop the leftover tacos and tuck them into a quesadilla for a crispy lunch. You can also break up the filling and spoon it over rice for a fast taco bowl. Another good option is to turn the leftovers into nachos with a little extra cheese and fresh toppings.
Extra Tips for Flavor and Ease
Sometimes the best recipes are the ones that leave room for a little kitchen confidence. Taste the chicken mixture before assembling and adjust the seasoning if needed. A squeeze of lime at the end can brighten everything up. If you want a bit more heat, add a pinch of chili powder or diced jalapeño to the filling.
How to Make Them Look as Good as They Taste
Presentation matters, especially with a dish this inviting. Bake the tacos standing upright and close together so they hold their shape nicely. Scatter the cilantro, lettuce, and tomatoes right before serving for a fresh pop of green and red. A spoonful of sour cream on top adds a creamy finish that makes the whole pan look extra tempting.
Variations to Keep Things Interesting
Once you make this once, it becomes easy to play around with it.
Spicy version: Add diced jalapeño and a pinch of chili powder to the chicken mixture for extra heat.
Veggie-loaded version: Add sautéed bell peppers and onions to the filling for more color and sweetness.
Creamier version: Stir 2 tablespoons of cream cheese into the hot chicken mixture for a richer center.
Crunchier version: Toast the tortillas lightly before filling them for more texture after baking.
Fresh herb version: Add extra cilantro and a squeeze of lime right before serving for a brighter finish.
FAQ’s
Q1: Can I use rotisserie chicken?
Yes, rotisserie chicken works beautifully here. It saves time and brings plenty of flavor.
A1:
Just shred it and stir it into the skillet with the seasoning and sauce so it absorbs all the flavor.
Q2: Can I make these ahead of time?
Absolutely. The filling can be prepared ahead, and the tacos can be assembled before baking.
A2:
Keep them covered in the refrigerator and bake when you are ready to serve.
Q3: Can I freeze them?
Yes, they freeze well after baking.
A3:
Let them cool completely, wrap tightly, and freeze for up to 2 months. Reheat in the oven for the best texture.
Q4: What cheese melts best for this recipe?
Mozzarella gives you the stretch, and cheddar gives you bold flavor.
A4:
Using both creates the best balance of taste and texture.
Q5: Can I use corn tortillas instead?
Yes, though they can be a little more delicate.
A5:
Warm them first so they are easier to fold without cracking.
Q6: How do I keep the tacos from getting soggy?
Do not overload them with sauce, and bake just until the cheese melts.
A6:
Fresh toppings should also go on after baking, not before.
Q7: Can I add beans to the filling?
Yes, black beans pair very well with the chicken and cheese.
A7:
Add about 1 cup, drained and rinsed, to stretch the filling and add heartiness.
Q8: What can I serve on the side?
Rice, beans, corn salad, avocado, or a crisp green salad all work well.
A8:
Anything fresh and bright helps balance the richness of the cheese.
Q9: Are these very spicy?
Not by default. They are flavorful and mild.
A9:
You can increase the heat with jalapeño or chili powder if you want more kick.
Q10: How do I reheat leftovers?
The oven is best for keeping a nice texture.
A10:
Reheat at 350°F until warmed through, usually about 10 to 12 minutes.
Conclusion
Cheesy chicken tacos are one of those dinners that manage to be comforting, easy, and exciting all at once. You get melty cheese, tender seasoned chicken, and fresh toppings in every bite, which makes the whole pan feel like a little celebration on a weeknight. This one is warm, reliable, and packed with flavor, and once you make it, there is a good chance it will earn a regular place at your table.
Print
Cheesy chicken tacos
- Prep Time: 20 minutes
- Cook Time: 18 minutes
- Total Time: 38 minutes
- Yield: 5 servings 1x
- Category: Dinner
- Method: Baked
- Cuisine: Mexican-Inspired
- Diet: Low Lactose
Description
These cheesy chicken tacos are baked until warm, melty, and lightly crisp at the edges, then finished with fresh lettuce, tomatoes, cilantro, and a dollop of sour cream for an easy family dinner.
Ingredients
- 1 tablespoon olive oil
- 1 small yellow onion, finely diced
- 2 cloves garlic, minced
- 3 cups cooked chicken, shredded
- 2 tablespoons taco seasoning
- 1 cup tomato sauce
- 1 cup shredded cheddar cheese
- 1 cup shredded mozzarella cheese
- 10 small flour tortillas
- 2 tablespoons fresh cilantro, chopped
- 1 cup diced tomatoes
- 1 cup shredded lettuce
- 1/2 cup sour cream
Instructions
- Preheat the oven to 375°F and lightly grease a 9×13-inch baking dish.
- Heat the olive oil in a large skillet over medium heat. Add the diced onion and cook for 3 to 4 minutes until softened. Stir in the garlic and cook for 30 seconds.
- Add the shredded chicken, taco seasoning, and tomato sauce. Stir until the mixture is evenly coated and warmed through, about 3 to 4 minutes.
- Warm the tortillas briefly so they are easier to fold.
- Spoon the chicken mixture into each tortilla, add a little cheddar and mozzarella inside, fold the tortillas, and place them upright in the prepared baking dish.
- Sprinkle the remaining cheddar and mozzarella over the top.
- Bake for 15 to 18 minutes, until the cheese is melted and the taco edges are lightly golden.
- Let rest for 5 minutes, then top with chopped cilantro, diced tomatoes, shredded lettuce, and sour cream before serving.
Notes
- Warm the tortillas first to prevent cracking.
- Freshly shredded cheese melts more smoothly than pre-shredded cheese.
- Do not overfill the tortillas or they may open while baking.
- For extra heat, add diced jalapeño or a pinch of chili powder to the chicken mixture.
Nutrition
- Serving Size: 2 tacos
- Calories: 520
- Sugar: 4g
- Sodium: 780mg
- Fat: 24g
- Saturated Fat: 11g
- Unsaturated Fat: 11g
- Trans Fat: 0g
- Carbohydrates: 35g
- Fiber: 3g
- Protein: 38g
- Cholesterol: 105mg