

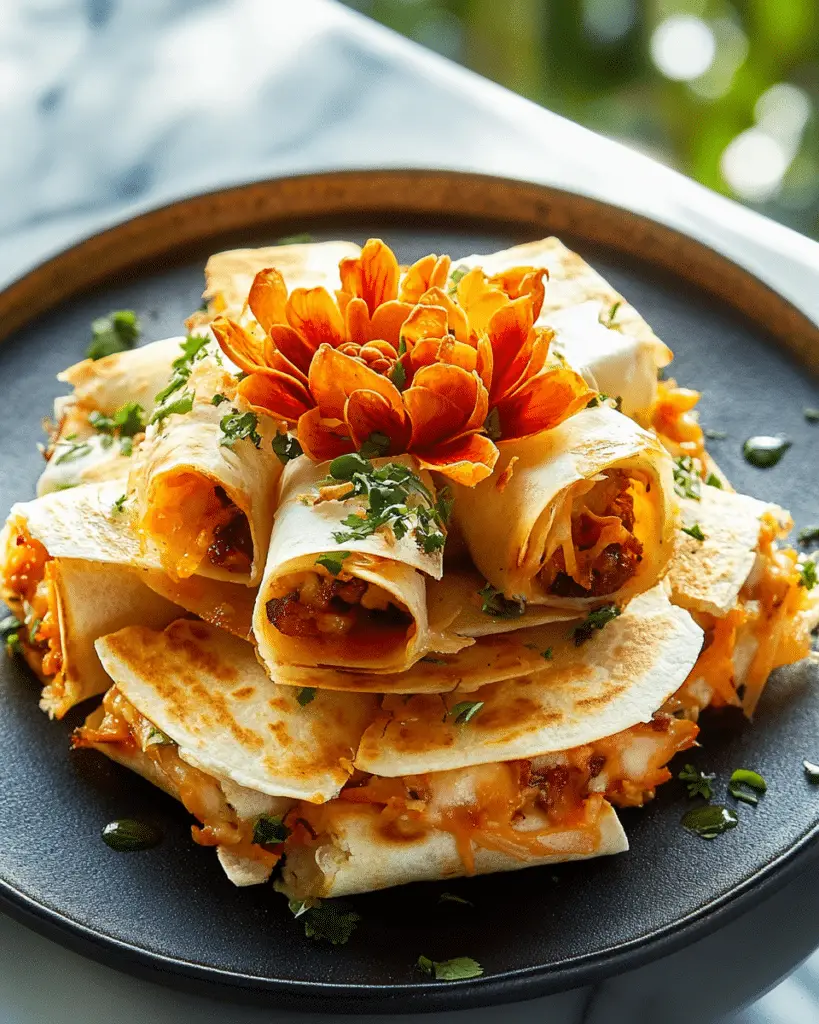
If you’ve ever wanted to serve something that looks as impressive as it tastes, the Blooming Quesadilla Ring is your answer. Picture this: a golden, cheesy quesadilla with a spicy kick, served in a ring formation that makes everyone go “wow!” It’s fun, interactive, and totally Instagram-worthy. Whether you’re hosting a game night, throwing a party, or just craving a fun twist on your usual dinner routine, this recipe has you covered. Trust me, you’re going to love the way this one turns out!
Disclosure: This post contains affiliate links.If you click and make a purchase, I may earn a small commission at no extra cost to you.


It’s a showstopper that doesn’t require a ton of effort—just a few simple ingredients, a little bit of assembly, and a quick bake. The result? A warm, cheesy ring that everyone can pull apart, dip into their favorite salsa or guacamole, and enjoy. Ready to impress? Let’s get started.
Why You’ll Love Blooming Quesadilla Ring
Versatile
Perfect for any occasion. Whether it’s a cozy family dinner, a festive get-together, or even a quick snack, this dish fits the bill. It’s casual but impressive, so don’t be surprised if you get lots of compliments!
Easy to Make
The best part? It’s so simple! You don’t have to be a master chef to pull this off. If you can layer ingredients and bake, you’ve got this!
Customizable
You can change up the fillings to suit your taste. Prefer chicken? Go for it. Want it spicy? Add some jalapeños. Vegetarian? Skip the meat and load it up with extra veggies.
Fun to Eat
The whole family (or your guests) will love pulling apart the layers of cheesy, flavorful quesadilla goodness. It’s like a quesadilla meets a pull-apart bread—what could be better?
Crowd-Pleasing
Everyone loves a good quesadilla, and this one is no exception. It’s cheesy, savory, and just the right amount of crispy. It’s the kind of dish that gets devoured in minutes!
Ingredients in Blooming Quesadilla Ring
This quesadilla ring is all about simple, flavorful ingredients that come together beautifully. Here’s what you’ll need to make it:
Flour Tortillas
These create the layers of your blooming ring. Soft, warm, and perfect for wrapping around all the cheesy fillings.
Shredded Cheese
A classic blend of cheddar and mozzarella brings the perfect balance of sharpness and meltiness. You can even swap in some Monterey Jack for a smooth, creamy touch.
Cooked Chicken (optional)
Add cooked chicken for extra protein and heartiness. You can use leftover chicken, rotisserie chicken, or even ground chicken.
Sautéed Bell Peppers and Onions
These bring sweetness and flavor to balance out the richness of the cheese. Plus, they add a pop of color to your ring.
Taco Seasoning
For that perfect blend of spices that gives this dish its quesadilla flavor. You can make your own or use a pre-made packet.
Sour Cream or Guacamole (for dipping)
You’ll want a creamy dip to go with your blooming quesadilla ring. Sour cream or guacamole are both perfect for adding that refreshing contrast to the warm, cheesy layers.
(Note: the full ingredients list, including measurements, is provided in the recipe card directly below.)
Instructions
Ready to create this delicious masterpiece? Let’s walk through the steps:
Preheat Your Oven
Start by preheating your oven to 375°F. This ensures everything bakes evenly and crisps up just right.
Prepare the Filling
In a pan over medium heat, sauté the bell peppers and onions until they’re soft and lightly caramelized, about 5–7 minutes. Add the cooked chicken and taco seasoning to the pan, stirring until everything is well-coated and heated through.
Assemble the Ring
Lay one tortilla flat on a baking sheet. Spoon a portion of the filling mixture onto the center of the tortilla and top with shredded cheese. Place another tortilla on top and repeat the process until you have stacked 4–5 layers of tortillas, fillings, and cheese.
Form the Ring
Once you’ve stacked all your layers, carefully arrange them into a circular ring shape on the baking sheet, leaving a small gap in the center. Tuck the edges of the tortillas to form the ring, making sure everything stays together.
Bake to Golden Perfection
Place the baking sheet in the preheated oven and bake for about 15–20 minutes, or until the top is golden brown and the cheese is melted. Keep an eye on it to avoid overbaking.
Serve and Enjoy
Remove the quesadilla ring from the oven and let it cool for a couple of minutes before cutting. Serve with sour cream, guacamole, or your favorite salsa for dipping.
Nutrition Facts
Servings: 6
Calories per serving: 280
Preparation Time
Prep Time: 10 minutes
Cook Time: 20 minutes
Total Time: 30 minutes
How to Serve Blooming Quesadilla Ring
This quesadilla ring is delicious on its own, but if you want to elevate your meal, try these tasty sides:
Fresh Salad
Pair it with a light, crisp salad for a refreshing contrast to the cheesy richness of the quesadilla. A tangy vinaigrette would balance the flavors perfectly.
Mexican Rice
A side of fluffy Mexican rice would be a great addition, adding a comforting element to the dish.
Corn on the Cob
Serve with grilled or roasted corn on the cob for a fun, festive touch.
Dips
Along with sour cream and guacamole, you could add some spicy salsa or even queso dip for extra indulgence.
As a Snack or Appetizer
If you’re serving this as an appetizer, make it smaller by cutting the ring into bite-sized wedges.
Additional Tips
Make It Ahead
Assemble the quesadilla ring ahead of time, wrap it tightly in plastic wrap, and refrigerate until you’re ready to bake. Just pop it in the oven when it’s time to serve!
Add Heat
For a spicier version, throw in some diced jalapeños or a drizzle of hot sauce in the filling.
Keep It Vegetarian
Skip the chicken and load up on extra vegetables like zucchini, mushrooms, or spinach. You can even add black beans for extra protein.
Storage Tips
Store leftovers in an airtight container in the fridge for up to 2 days. Reheat in the oven for a few minutes to get that crispy texture back.
Double the Recipe
This recipe is perfect for doubling if you have a crowd. Simply increase the number of tortillas and filling, and bake two rings!
FAQ Section
Q1: Can I use corn tortillas instead of flour?
A1: Sure! Just note that corn tortillas might be a little more fragile, so handle with care when assembling.
Q2: Can I freeze this dish?
A2: Yes, you can! Assemble the quesadilla ring, wrap it tightly, and freeze for up to 3 months. Bake from frozen, adding a few extra minutes to the cook time.
Q3: How do I store leftovers?
A3: Store any leftovers in an airtight container in the fridge for up to 2 days. Reheat in the oven to maintain that crispy texture.
Q4: Can I make this vegetarian?
A4: Absolutely! Just skip the chicken and fill the ring with more veggies like peppers, mushrooms, or beans.
Q5: How do I make this spicier?
A5: Add jalapeños to the filling or drizzle your favorite hot sauce over the top before baking. You can also add some chili powder to the taco seasoning.
Q6: Can I use different cheese?
A6: Yes! Feel free to swap in mozzarella, pepper jack, or a sharp cheddar for a different flavor.
Q7: Can I make smaller portions?
A7: Absolutely! You can make mini quesadilla rings or cut the large ring into bite-sized wedges for easy appetizers.
Q8: Can I add beans to the filling?
A8: Yes, black beans or refried beans are great additions to the filling, adding extra flavor and heartiness.
Q9: How do I keep it from getting soggy?
A9: Make sure your filling isn’t too wet. If you’re using something like salsa, make sure it’s drained well before adding to the filling.
Q10: Can I add guacamole inside the ring?
A10: You can, but I recommend serving guacamole as a dip on the side to keep the texture intact and fresh.
Final Thoughts
The Blooming Quesadilla Ring is everything you love about a quesadilla, but elevated and served in a fun, shareable way. It’s cheesy, savory, and full of flavor—perfect for any occasion. Whether you’re sharing it with family, friends, or just enjoying it all to yourself, this recipe is sure to impress. Ready to give it a try? You won’t regret it!
Print
Blooming Quesadilla Ring
- Prep Time: 20 minutes
- Cook Time: 25 minutes
- Total Time: 45 minutes
- Yield: 4 servings
- Category: Dinner
- Method: Roasting
- Cuisine: Middle Eastern
Description
This Chicken Shawarma Sheet-Pan Dinner is a flavorful, easy-to-make meal that brings the bold tastes of shawarma into your kitchen. Marinated chicken thighs are roasted with onions, then topped with a creamy tahini yogurt sauce and a refreshing cucumber-tomato salad. Perfectly paired with toasted pita for a complete meal.
Ingredients
For the Marinade:
-
Zest and juice of 1 lemon
-
1 Tbsp. tomato paste
-
1 tsp. ground coriander
-
1 tsp. ground cumin
-
1 tsp. smoked paprika
-
1/2 tsp. freshly ground black pepper
-
1/2 tsp. ground turmeric
-
1/4 tsp. cayenne pepper
-
1/4 tsp. ground cinnamon
-
2 Tbsp. plus 1/2 cup full-fat Greek yogurt, divided
-
5 Tbsp. extra-virgin olive oil, divided
-
Kosher salt
For the Salad:
-
3 mini cucumbers, finely chopped
-
1 pint cherry tomatoes, quartered or halved
-
2 small red onions, sliced into 1/4″ to 1/2″ wedges
-
2 Tbsp. plus 1/4 cup chopped fresh parsley, divided
For the Tahini Yogurt Sauce:
-
2 garlic cloves, grated or finely chopped
-
2 Tbsp. tahini
-
2 Tbsp. lemon juice
-
2 Tbsp. olive oil
-
Remaining 1/2 cup yogurt
-
2 Tbsp. parsley (for mixing into sauce)
For Serving:
-
Toasted pita
Instructions
Marinate the Chicken
-
In a large bowl, combine lemon zest, tomato paste, coriander, cumin, paprika, black pepper, turmeric, cayenne, cinnamon, 2 Tbsp. yogurt, 2 Tbsp. olive oil, and 2 tsp. salt. Add chicken and toss to coat. Let marinate for 30 minutes.
Make the Tahini Yogurt Sauce
-
In a small bowl, whisk together garlic, tahini, lemon juice, 2 Tbsp. olive oil, and the remaining 1/2 cup yogurt. (For fluffier sauce, you can use a food processor.) Stir in 2 Tbsp. parsley and refrigerate until ready to serve.
Prepare the Cucumber Salad
-
In a medium bowl, toss together cucumbers, tomatoes, a pinch of salt, and the remaining 1/4 cup parsley. Refrigerate until ready to serve.
Roast the Chicken
-
Arrange a rack in the lower third of the oven and preheat to 425°F. In a small bowl, toss onions with 1/2 tsp. salt and the remaining 1 Tbsp. olive oil until onions are coated. Transfer the onion mixture to a large baking sheet. Arrange marinated chicken around the onions in a single layer.
-
Roast the chicken until fully cooked through and lightly charred, about 25 minutes, or until an instant-read thermometer registers 165°F.
Serve
-
Top the roasted chicken with tahini yogurt sauce and cucumber salad. Serve with toasted pita on the side.
Notes
-
For extra flavor, you can add a squeeze of lemon juice over the roasted chicken just before serving.
-
If you prefer, you can marinate the chicken overnight for even more intense flavor.
Nutrition
- Serving Size: 1/4 of the dish
- Calories: 370 kcal
- Sugar: 7g
- Sodium: 570mg
- Fat: 22g
- Saturated Fat: 4g
- Unsaturated Fat: 18g
- Trans Fat: 0g
- Carbohydrates: 13g
- Fiber: 3g
- Protein: 31g
- Cholesterol: 95mg