
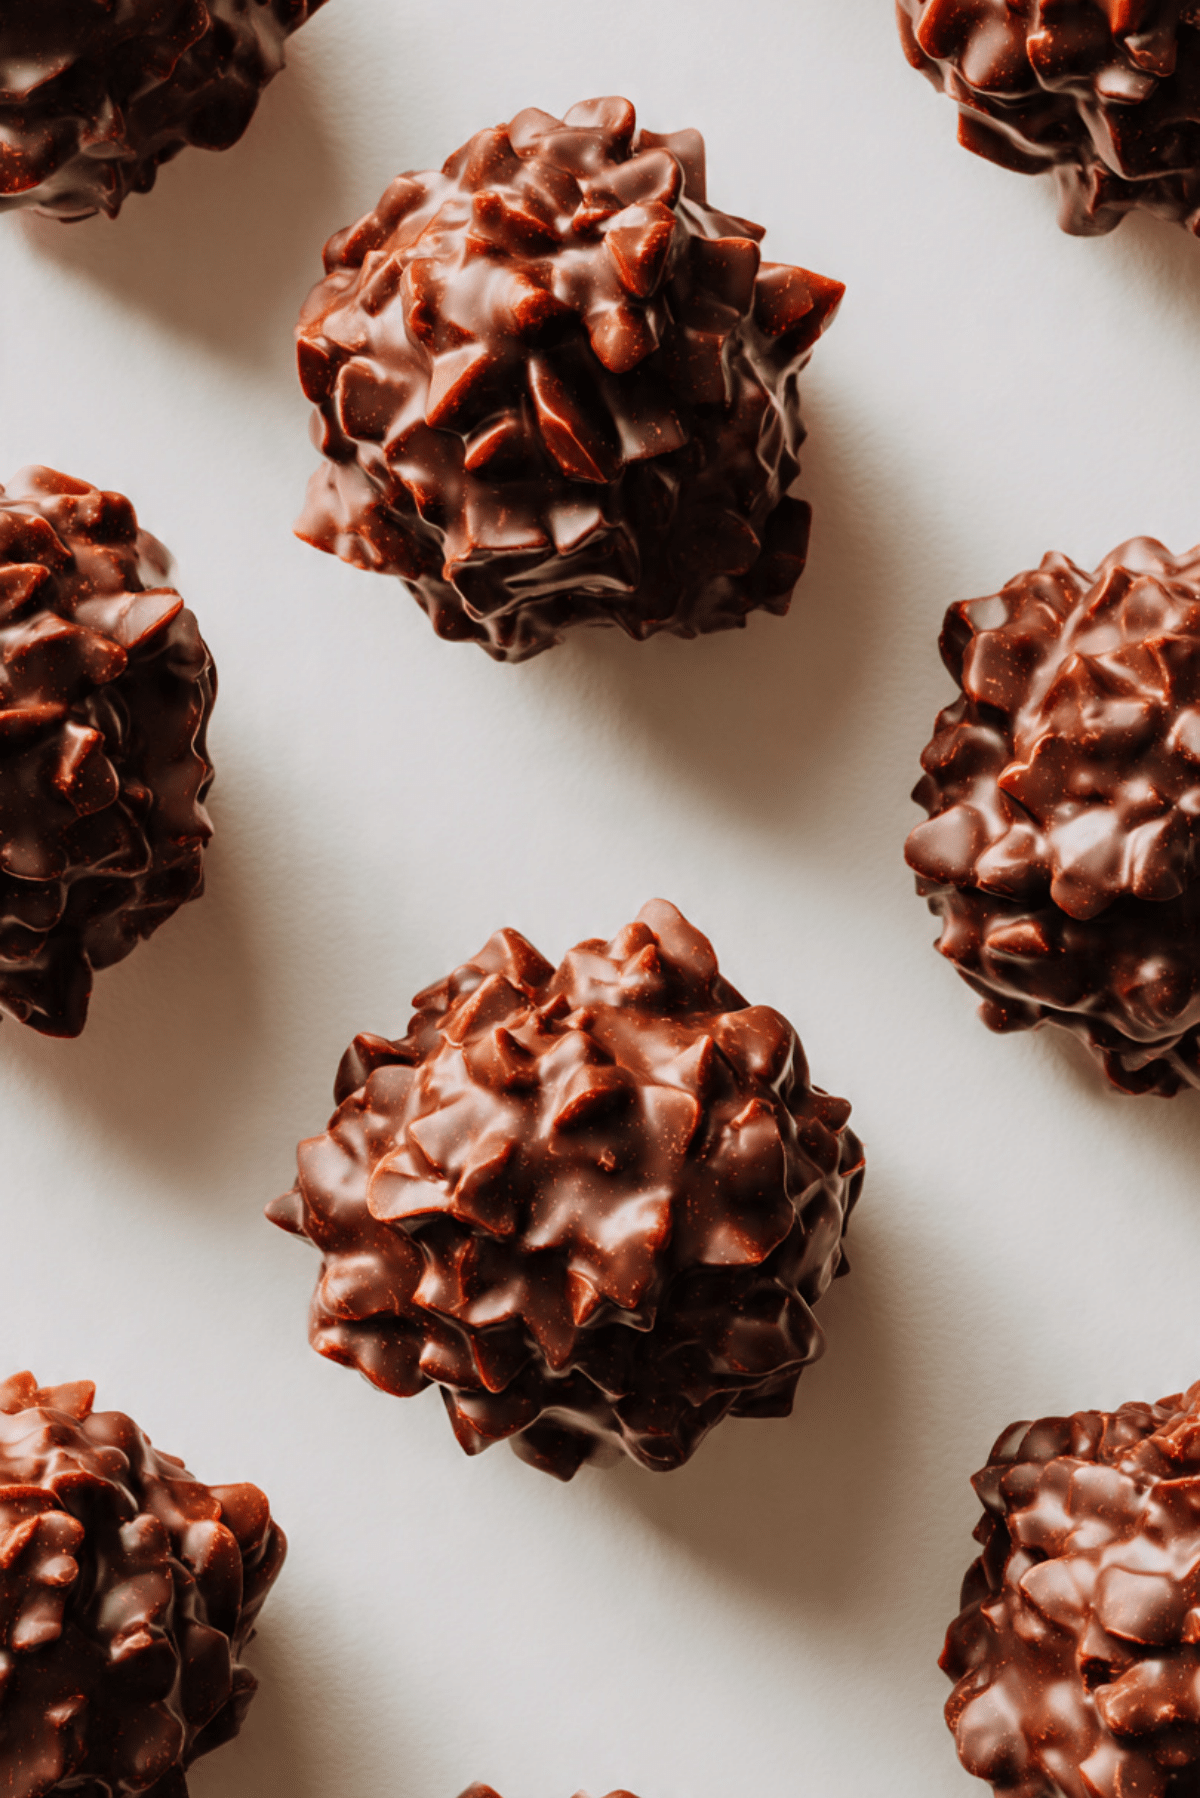
There is something so fun about a dessert that looks a little fancy, tastes wildly indulgent, and still comes together with almost no effort. These chocolate strawberry cluster pops are exactly that kind of treat. They are sweet, fruity, creamy, and chilled just enough to give you that dreamy snap of chocolate against juicy strawberries. Trust me, you’re going to love this.
Disclosure: This post contains affiliate links.If you click and make a purchase, I may earn a small commission at no extra cost to you.


And now let’s dive into what makes this simple dessert such a keeper, because once you make one batch, it is very hard not to start planning the next one.
Why These Little Pops Deserve a Spot in Your Dessert Rotation
Some desserts ask for a mixer, a thermometer, and a whole afternoon. This one keeps things refreshingly simple. You get bright strawberries, silky melted chocolate, and that playful pop-style presentation that makes everything feel a bit more special.
What makes them even better is the contrast in every bite. The strawberries stay fresh and juicy, the chocolate turns firm and glossy after chilling, and the little bit of coconut oil helps everything set with a smoother finish. It is the kind of dessert that feels cheerful, easy, and just a little bit irresistible.
The Sweet Story Behind Chocolate and Strawberries
Chocolate and strawberries have been a beloved pairing for years, and honestly, it is easy to see why. The rich, mellow depth of chocolate balances the natural brightness of strawberries in a way that feels timeless and elegant. You will see this combo everywhere from special occasion desserts to quick homemade treats, and it never really goes out of style.
Cluster-style sweets also have a homemade charm that feels cozy and unfussy. They are less formal than dipped strawberries and a lot more playful to serve. Put them on sticks, and suddenly they become a dessert that feels party-ready, freezer-friendly, and extra fun to eat.
Reasons This Recipe Works Every Single Time
This dessert is charming on its own, but it also has the kind of practical magic that makes it reliable when you actually need something easy.
Versatile: You can serve these straight from the fridge, keep them in the freezer for a colder bite, or dress them up with a tiny sprinkle of crushed freeze-dried strawberries if you want a prettier finish.
Budget-Friendly: With only five ingredients, this dessert keeps your shopping list short and manageable while still tasting like something from a boutique dessert case.
Quick and Easy: The process is simple, the prep is minimal, and the hardest part is waiting for the chocolate to set.
Customizable: You can use dark chocolate, semi-sweet chocolate, or milk chocolate depending on how rich or sweet you want the final flavor to be.
Crowd-Pleasing: These are fruity enough for people who want something fresh and chocolatey enough for serious dessert lovers.
Make-Ahead Friendly: They chill beautifully, which means you can make them ahead and pull them out when you need them.
Great for Leftovers: If you happen to have any left, they store well and make a perfect little grab-and-go sweet bite later.
Smart Tips That Make These Pops Even Better
Before you head to the kitchen, here are a few little tricks that make the whole process smoother.
- Dry the strawberries well: Any extra moisture can make the chocolate seize or slide off, so pat them very dry after washing.
- Chop evenly: Keeping the strawberry pieces close in size helps the clusters hold together better.
- Cool the chocolate slightly: Let the melted chocolate sit for a minute before mixing so it coats the fruit without becoming too runny.
- Use parchment paper: This makes lifting the pops easy and keeps the bottoms neat.
- Insert the sticks after shaping: Pressing the sticks in once the clusters are formed helps everything stay centered and tidy.
Kitchen Tools That Make the Job Easy
You do not need much here, and that is part of the beauty of it.
Microwave-safe bowl: For melting the chocolate gently and evenly.
Rubber spatula or spoon: For folding the strawberries into the chocolate without crushing them too much.
Knife and cutting board: To hull and chop the strawberries into bite-sized pieces.
Baking tray or plate: This gives the pops a flat surface to chill on.
Parchment paper: It prevents sticking and makes cleanup easy.
Wooden popsicle sticks: These give the clusters their playful pop shape and make serving easier.
What You’ll Need to Bring These Pops to Life
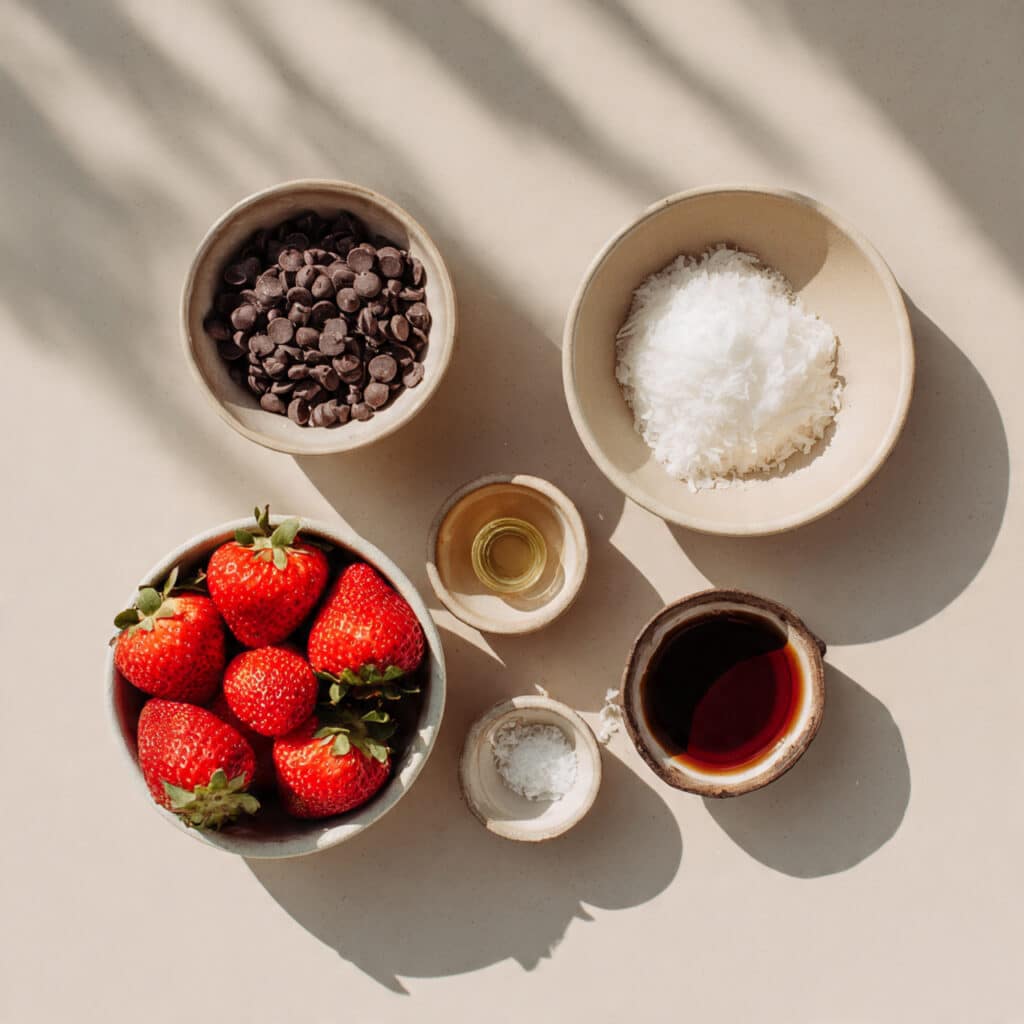
The ingredient list is short, but each one matters. Together they create that perfect balance of juicy fruit, creamy chocolate, and a chilled finish that feels like a total game-changer.
- Fresh Strawberries: 2 cups, hulled and chopped, these bring the bright, juicy sweetness that keeps the dessert fresh and vibrant.
- Semi-Sweet Chocolate Chips: 1 1/2 cups, these melt into a rich coating that firms up beautifully around the fruit.
- Coconut Oil: 1 tablespoon, this helps the chocolate melt more smoothly and set with a lovely glossy finish.
- Vanilla Extract: 1 teaspoon, this rounds out the flavor and adds a soft bakery-style warmth.
- Sea Salt: 1/8 teaspoon, this tiny amount sharpens the chocolate flavor and makes the strawberries taste even sweeter.
Easy Swaps If You Want to Change Things Up
And now that the base recipe is set, here are a few simple substitutions that still keep the spirit of the dessert intact.
Semi-Sweet Chocolate Chips: Dark chocolate chips or milk chocolate chips.
Coconut Oil: Neutral vegetable oil or a small amount of unsalted butter.
Vanilla Extract: Almond extract, use just a few drops for a slightly different flavor.
Fresh Strawberries: Fresh raspberries, though the clusters may be softer and more delicate.
Sea Salt: Fine kosher salt, use a very small pinch.
Ingredients That Really Make the Magic Happen
A few ingredients do more than just show up, they shape the whole experience.
Fresh Strawberries: These are the heart of the dessert. Their juicy texture and natural tang keep the chocolate from feeling too heavy, and that bright red color makes every pop look cheerful and inviting.
Semi-Sweet Chocolate Chips: This is where the richness comes in. Semi-sweet chocolate gives you enough sweetness to feel indulgent, but it still leaves room for the fruit to shine.
How to Make 5-ingredient Chocolate Strawberry Cluster Pops
This is the part where everything starts coming together, and honestly, it is so satisfying. Here are the steps you’re going to follow.
- Preheat Your Equipment: There is no oven needed here, but line a tray or large plate with parchment paper and make room in your refrigerator or freezer so the pops can set undisturbed.
- Combine Ingredients: Add the semi-sweet chocolate chips and coconut oil to a microwave-safe bowl. Microwave in 20-second intervals, stirring each time, until smooth. Stir in the vanilla extract and sea salt.
- Prepare Your Cooking Vessel: Wash, hull, and chop the strawberries into small bite-sized pieces, then pat them completely dry with paper towels so the chocolate adheres properly.
- Assemble the Dish: Fold the chopped strawberries into the melted chocolate until evenly coated. Scoop about 2 tablespoons of the mixture at a time onto the parchment-lined tray, shaping each into a rough cluster. Gently insert a wooden popsicle stick into each cluster.
- Cook to Perfection: Transfer the tray to the refrigerator for 30 minutes, or to the freezer for 15 minutes, until the chocolate is firm and the pops hold their shape.
- Finishing Touches: Once set, check that the sticks are secure and smooth any rough edges with the back of a spoon if needed before serving.
- Serve and Enjoy: Serve chilled for the best texture, with the chocolate crisp and the strawberries cool and juicy. Let me tell you, it’s worth every bite.
The Texture and Flavor Payoff
The first thing you notice is the snap. That chilled chocolate shell firms up just enough to give each bite a satisfying crackle, then the strawberries come in with their juicy, tender texture. It is a beautiful contrast, rich but refreshing at the same time.
Flavor-wise, these pops stay balanced. The chocolate feels deep and smooth, the vanilla softens the edges, and the tiny bit of salt quietly boosts everything. The strawberries keep the whole dessert from becoming too heavy, so each bite feels bright and lively instead of overly dense.
Helpful Tips for a Smoother Batch
A few simple habits can make these even easier to pull off.
- Use firm, ripe strawberries: They hold their shape better and keep the clusters from getting watery.
- Do not overmix: Fold gently so the strawberry pieces stay visible and the mixture does not turn mushy.
- Chill on a flat surface: This helps the clusters set evenly and keeps the sticks from tilting.
What to Avoid for the Best Results
Even simple desserts have a few little traps, but they are easy to avoid.
- Do not use wet strawberries: Water and melted chocolate are not friends, and the coating can turn grainy or slip off.
- Do not overheat the chocolate: Microwave gently and stir often so it stays smooth and glossy.
- Do not make the clusters too large: Smaller clusters set better and are easier to eat on a stick.
- Do not skip the chill time: The texture depends on that final set, so let them firm up fully before serving.
Nutrition Facts That Keep Things Simple
Servings: 8 pops
Calories per serving: 165
Note: These are approximate values.
Time Breakdown Before You Start
This is one of those desserts that gives a great reward for very little hands-on effort.
Prep Time: 15 minutes
Cook Time: 0 minutes
Total Time: 45 minutes
Make-Ahead and Storage Tips That Actually Help
One of the nicest things about these pops is how well they fit into a busy schedule. You can make them earlier in the day, chill them until firm, and keep them ready for dessert, snacks, or a sweet little treat straight from the fridge.
Store the pops in an airtight container in the refrigerator for up to 2 days, placing parchment between layers if needed. For longer storage, freeze them for up to 2 weeks. When you want to enjoy them, let them sit at room temperature for 3 to 5 minutes so the strawberries soften just slightly and the chocolate is easier to bite.
Fun Ways to Serve Them
These chilled pops already feel special, but a thoughtful presentation makes them even more inviting. Arrange them on a white platter or a small dessert board so the red berries and glossy chocolate really stand out.
They also pair beautifully with a glass of cold milk, a strawberry smoothie, or a simple cup of coffee if you want a richer contrast. For parties, you can stand them upright in a jar or serving glass filled with dry rice or beans underneath parchment for support.
Creative Leftover Transformations
If you have extras, there are a few fun ways to reinvent them instead of just eating them straight from the fridge, though that is still a very good option.
Chop a pop into smaller pieces and scatter it over plain yogurt for a quick parfait-style snack. You can also tuck pieces into a bowl of vanilla frozen yogurt for a simple dessert that feels a little more dressed up. Another good move is to roughly chop them and spoon them over oatmeal for a sweet breakfast twist.
Extra Little Tips for Even Better Flavor
Sometimes the smallest details are what make a recipe feel polished. Let the melted chocolate cool slightly before mixing so it clings better to the fruit. Use parchment instead of wax paper for a cleaner release. And keep the pops cold until serving so the chocolate texture stays crisp and satisfying.
A tiny sprinkle of extra sea salt on top can also make the flavor pop, especially if you are using darker chocolate. It is a small touch, but this one’s a total game-changer.
How to Make Them Look Party-Ready
Presentation matters, especially with a dessert this naturally pretty. Try shaping the clusters into neat rounds so they look a little more polished once chilled. Leave a bit of strawberry peeking through the chocolate for contrast and color.
For a cleaner finish, wipe the edges of the tray before chilling and keep the sticks aligned in the same direction. It is simple, but it makes the final batch look intentional and extra inviting.
Variations to Try Next Time
Once you make the classic version, it is easy to start imagining a few fun twists.
Dark Chocolate Version
Use dark chocolate chips for a deeper, more intense flavor that pairs beautifully with very sweet strawberries.
Milk Chocolate Version
Swap in milk chocolate for a softer, sweeter flavor that feels extra kid-friendly.
Mini Cluster Bites
Skip the sticks and make smaller mounds for a poppable party dessert.
Vanilla Bean Twist
Use vanilla bean paste instead of vanilla extract for a slightly richer, more dessert-forward flavor.
Berry Blend Style
Replace part of the strawberries with raspberries for a more tart, mixed-berry bite.
FAQ’s
Q1: Can I use frozen strawberries?
Frozen strawberries are not the best choice here because they release too much moisture as they thaw, which can affect the chocolate texture.
Q2: How do I keep the chocolate smooth?
Melt it slowly in short intervals and stir between each one. The coconut oil also helps keep it silky.
Q3: Can I make these without popsicle sticks?
Yes, absolutely. You can make them as simple clusters and chill them the same way.
Q4: How long do they last in the fridge?
They are best within 2 days, while the strawberries still taste fresh and the texture stays pleasant.
Q5: Can I use chocolate bars instead of chocolate chips?
Yes, chopped semi-sweet chocolate bars work well as long as you melt them gently.
Q6: Why is my chocolate not sticking to the fruit?
The strawberries were likely damp. Drying them very well is key to getting the coating to cling.
Q7: Can I use white chocolate?
You can, but it will be noticeably sweeter and a bit softer when set.
Q8: Are these good for parties?
Yes, they are excellent for parties because they are easy to portion, easy to grab, and look lovely on a platter.
Q9: Can I freeze them?
Yes, freeze them in a single layer first, then transfer to a container for up to 2 weeks.
Q10: What is the best way to serve them?
Serve them chilled, just a few minutes out of the fridge or freezer, for the best contrast between juicy fruit and firm chocolate.
Conclusion
These 5-ingredient Chocolate Strawberry Cluster Pops are proof that a simple dessert can still feel exciting, pretty, and totally satisfying. They come together with barely any fuss, yet every bite delivers that wonderful mix of juicy fruit and snappy chocolate. So the next time you need something easy but impressive, give these a try. Trust me, they disappear fast.
Print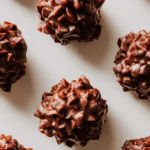
5-ingredient Chocolate Strawberry Cluster Pops
- Prep Time: 15 minutes
- Cook Time: 0 minutes
- Total Time: 45 minutes
- Yield: 8 pops 1x
- Category: Dessert
- Method: No-Bake
- Cuisine: American
- Diet: Vegetarian
Description
These chocolate strawberry cluster pops are a quick no-bake dessert made with juicy fresh strawberries and smooth semi-sweet chocolate. They are chilled until firm, easy to serve, and perfect for a simple party treat or sweet snack.
Ingredients
- 2 cups fresh strawberries, hulled and chopped
- 1 1/2 cups semi-sweet chocolate chips
- 1 tablespoon coconut oil
- 1 teaspoon vanilla extract
- 1/8 teaspoon sea salt
Instructions
- Line a tray or large plate with parchment paper and clear space in the refrigerator or freezer.
- Add the semi-sweet chocolate chips and coconut oil to a microwave-safe bowl. Microwave in 20-second intervals, stirring each time, until smooth.
- Stir the vanilla extract and sea salt into the melted chocolate.
- Wash, hull, and chop the strawberries into small bite-sized pieces, then pat them completely dry.
- Fold the chopped strawberries into the melted chocolate until evenly coated.
- Scoop about 2 tablespoons of the mixture at a time onto the parchment-lined tray, shaping each into a rough cluster.
- Gently insert a wooden popsicle stick into each cluster.
- Refrigerate for 30 minutes, or freeze for 15 minutes, until the chocolate is firm and the pops hold their shape.
- Serve chilled.
Notes
- Dry the strawberries very well so the chocolate adheres smoothly.
- Use firm, ripe strawberries for the best texture.
- Store in an airtight container in the refrigerator for up to 2 days or freeze for up to 2 weeks.
- Let frozen pops sit for 3 to 5 minutes before serving for the best bite.
Nutrition
- Serving Size: 1 pop
- Calories: 165
- Sugar: 14g
- Sodium: 18mg
- Fat: 10g
- Saturated Fat: 6g
- Unsaturated Fat: 3g
- Trans Fat: 0g
- Carbohydrates: 19g
- Fiber: 2g
- Protein: 2g
- Cholesterol: 0mg